Changelog
Follow up on the latest improvements and updates.
RSS
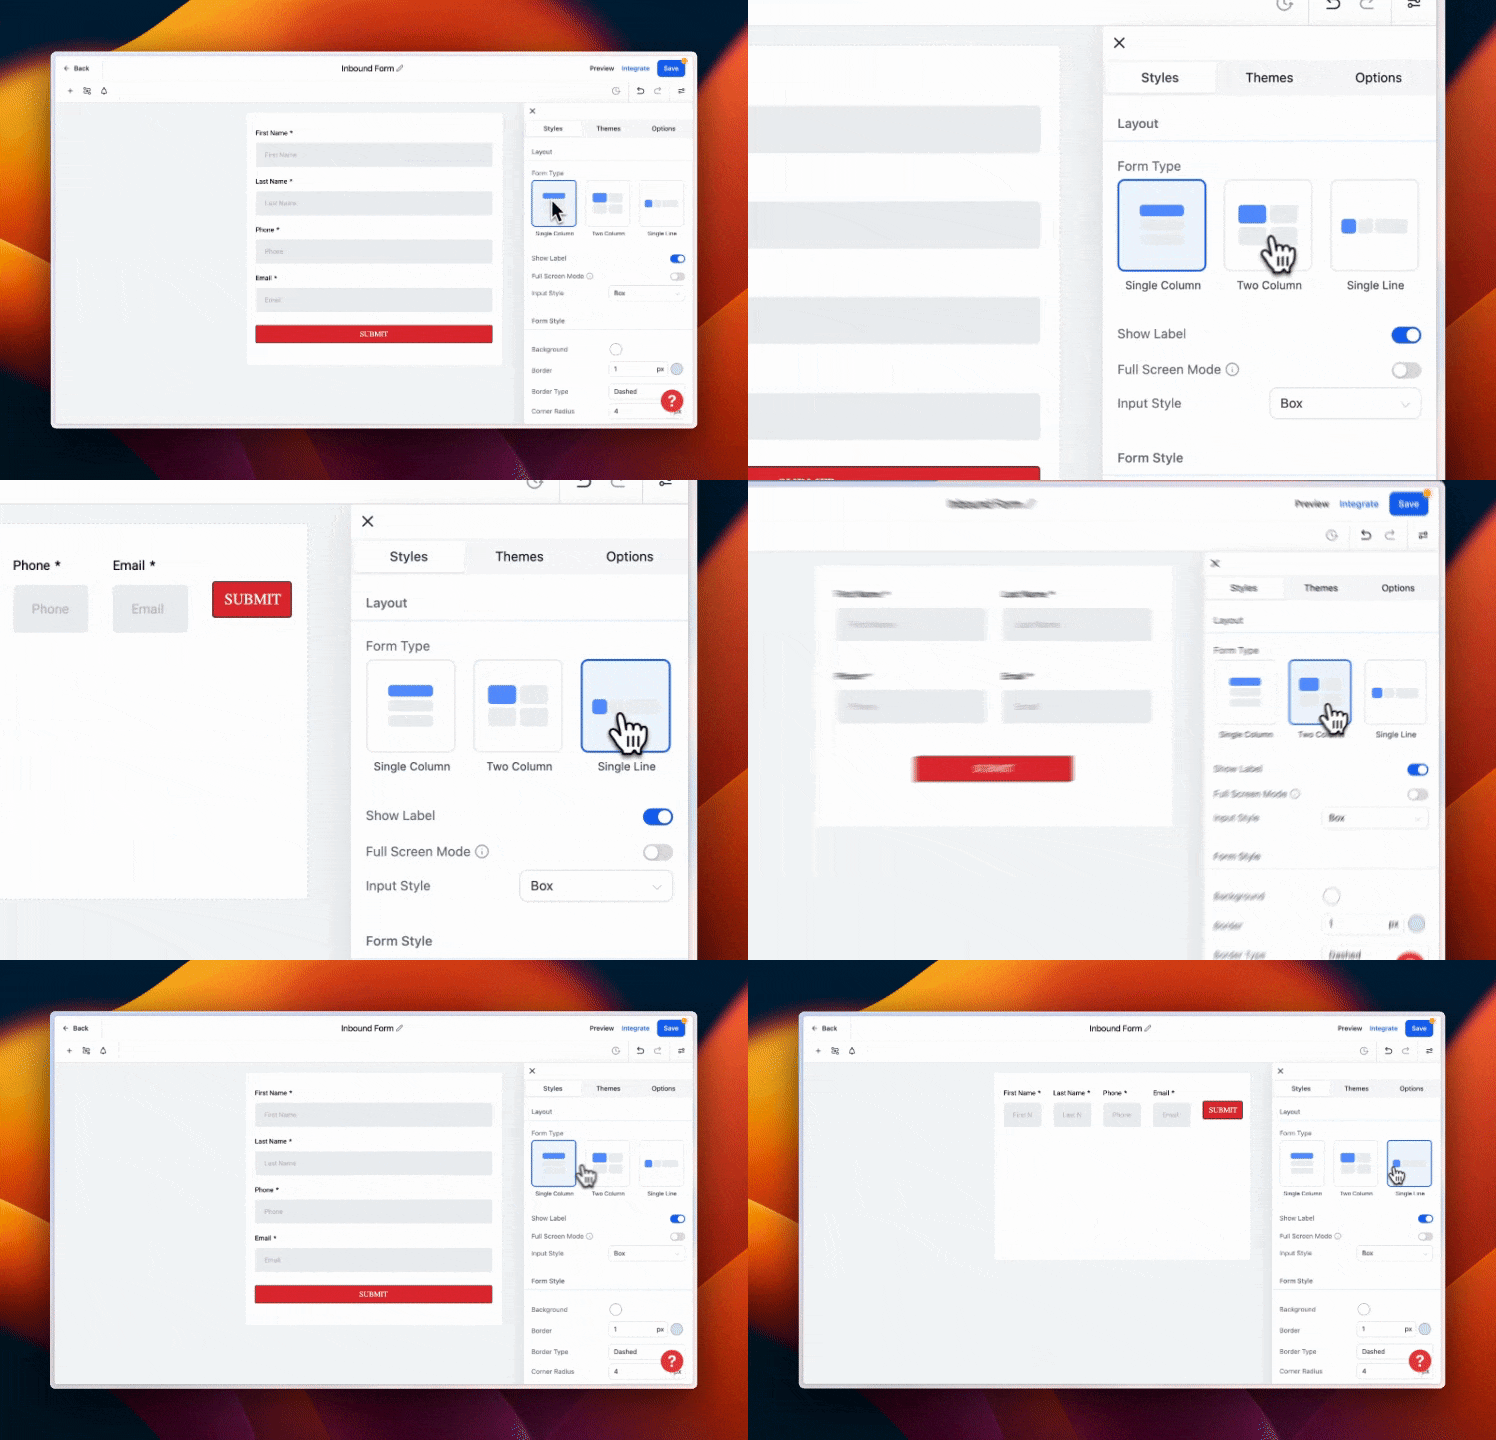
Customize your forms to fit your needs.
new
Email Builder
Click tracking now in Email Campaigns!
We're excited to introduce our latest feature: Click Performance Metrics. This new addition empowers you with detailed insights into how subscribers engage with your content through click tracking.
👀 What We Did:
When click tracking is enabled for an email campaign, EGL adds tracking information to each click-through URL.
Each time a contact clicks a link in the campaign, the click is tracked through redirection.
This ensures that you receive accurate data on link engagement within your campaign reports.
⭐ How This is Beneficial:
- Analyze Link Placements: Understand which links are performing well and optimize their placement to improve engagement.
- Understand Subscriber Interaction: Gain deeper insights into how your subscribers interact with your content, helping you tailor your campaigns to better meet their interests and needs.
- With Click Performance Metrics, you can refine your email marketing strategies based on real user interaction data, enhancing the effectiveness of your campaigns.
-
👷 How to use it?
- Navigate to the Email Marketing section.
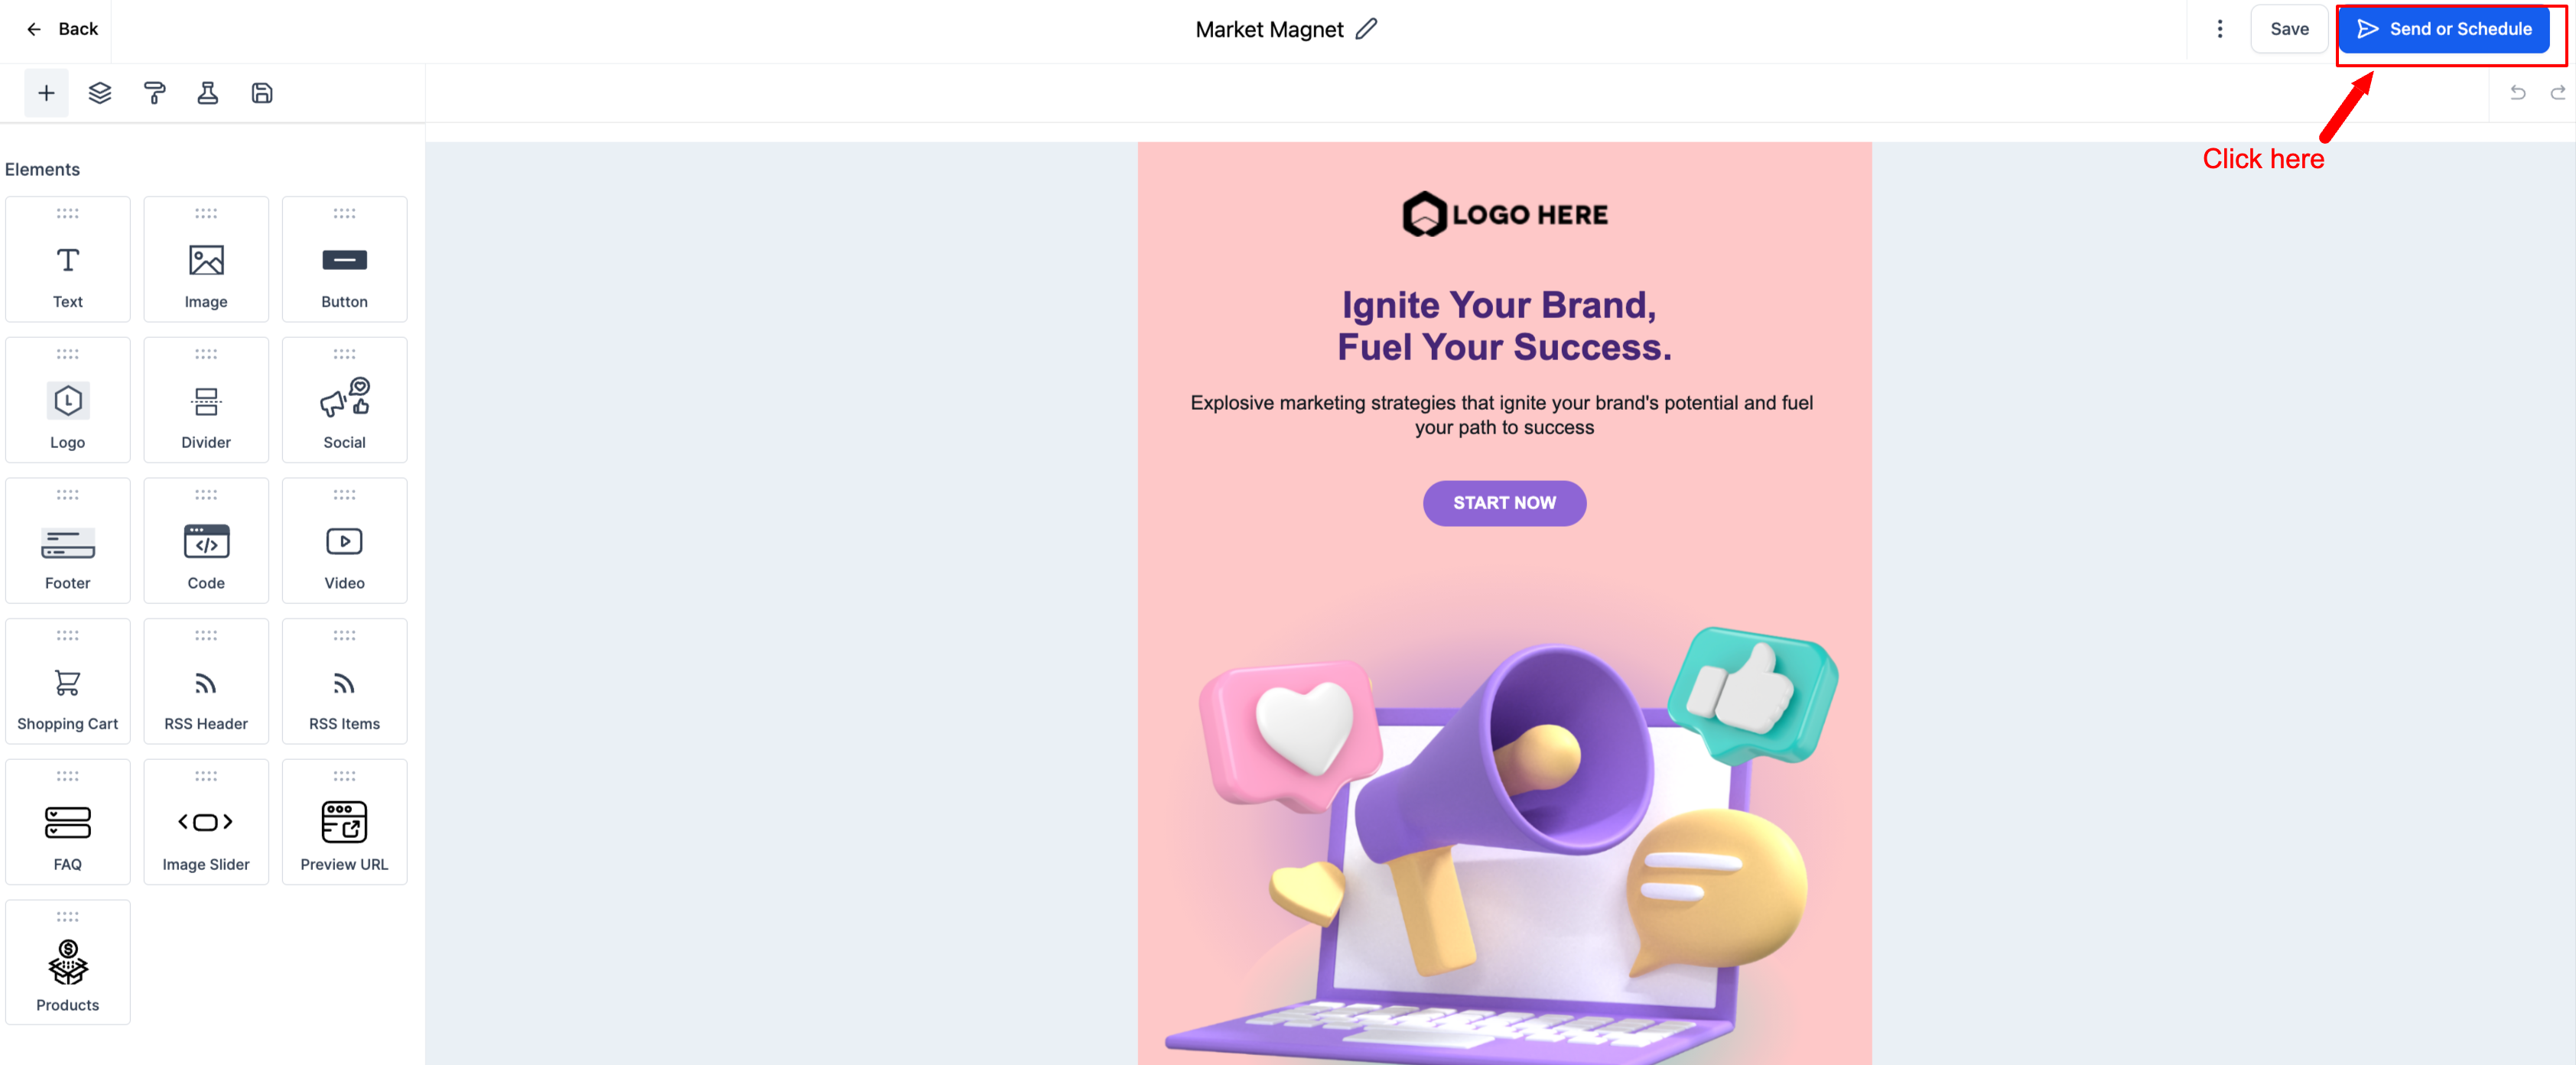
- Create a new campaign and click on send or schedule.
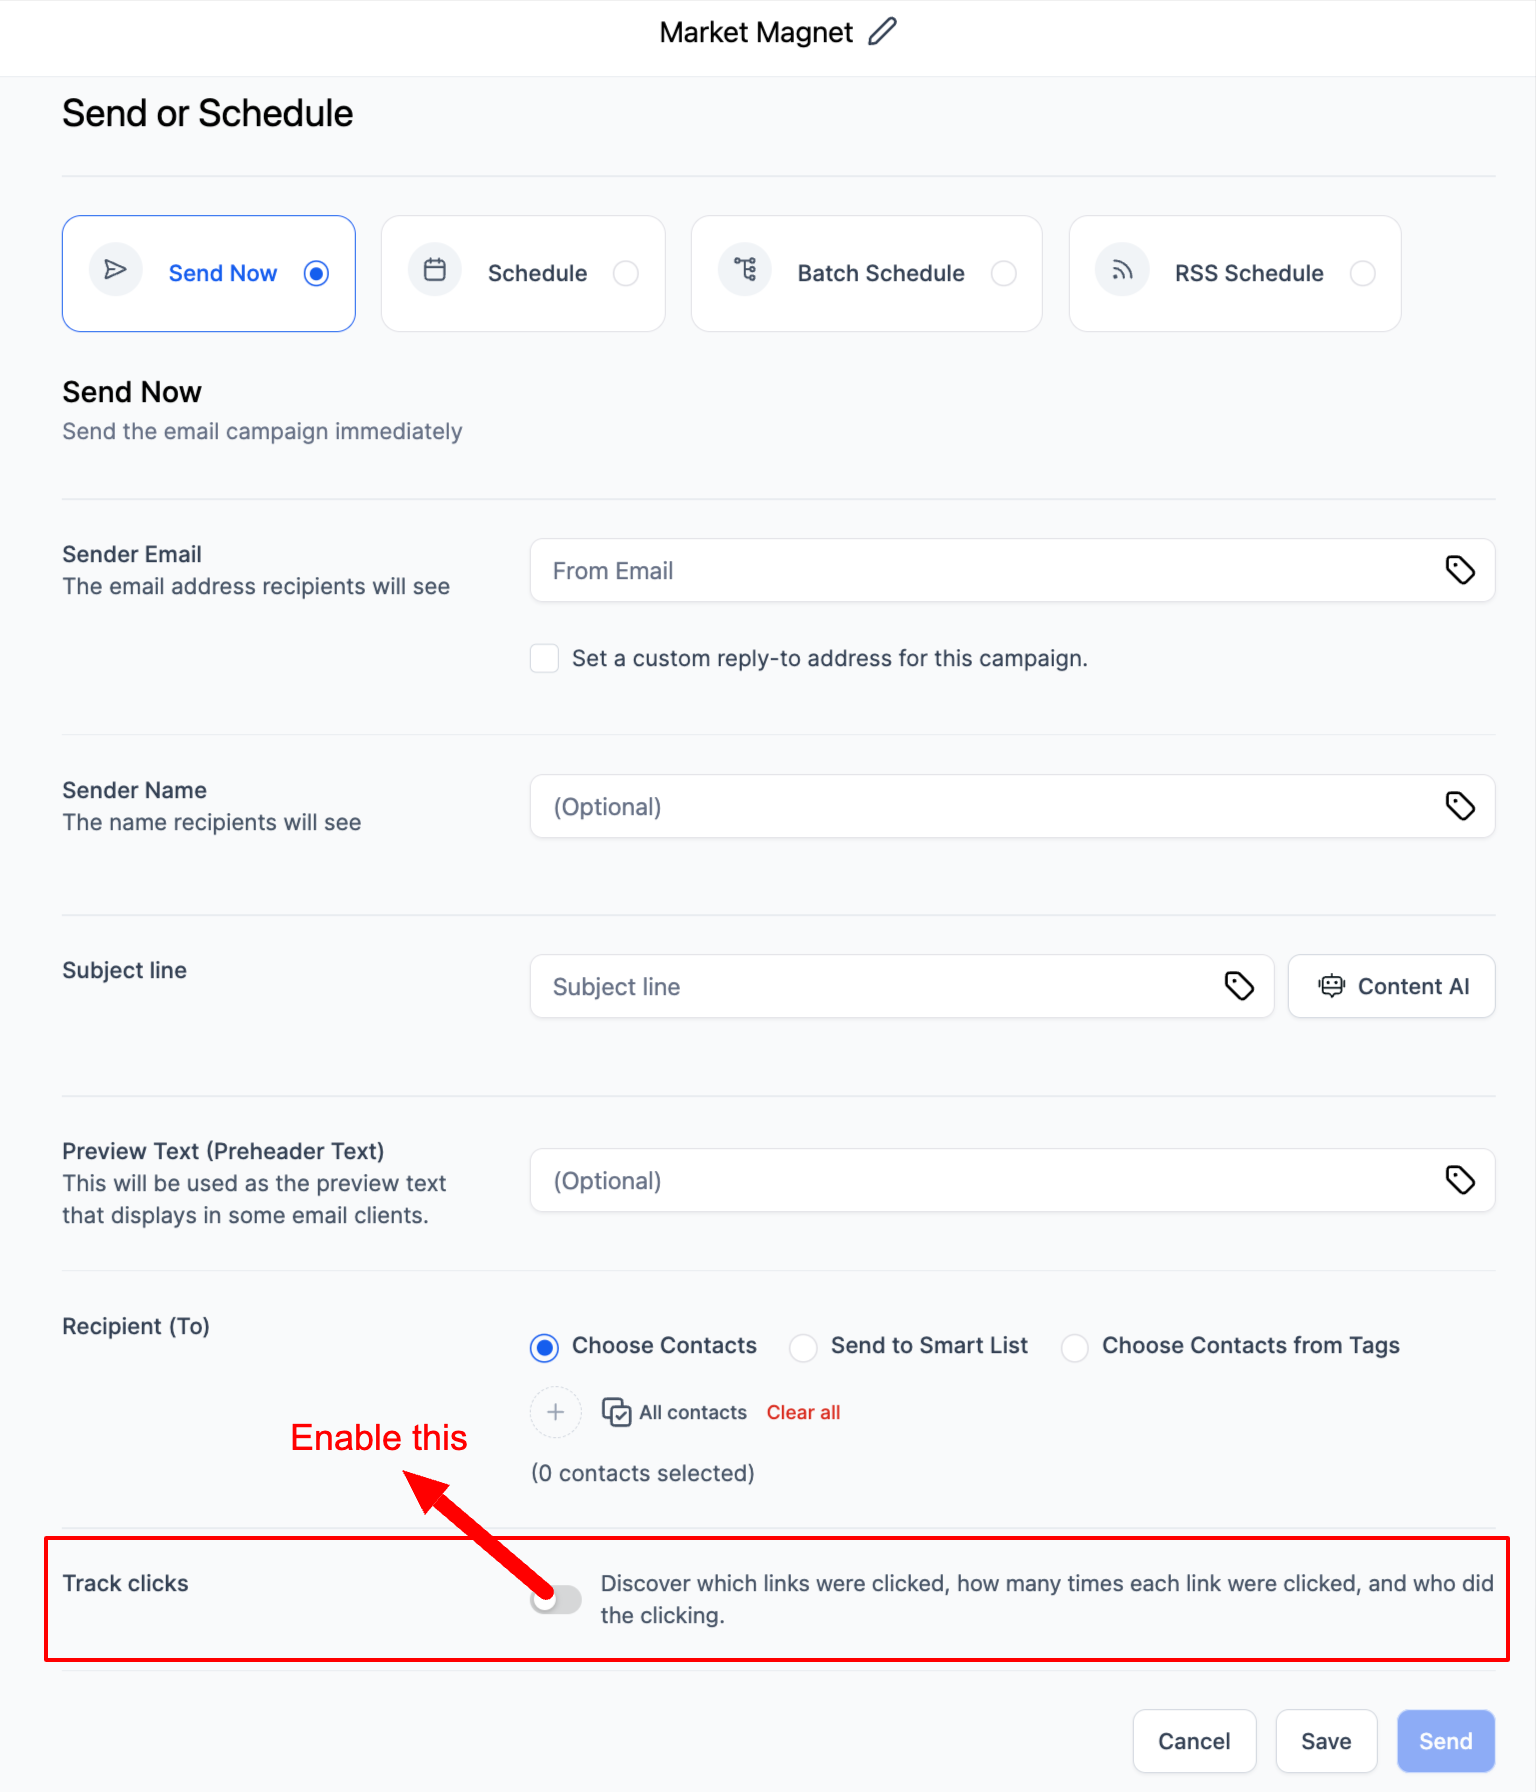
- Enable click tracking before sending.
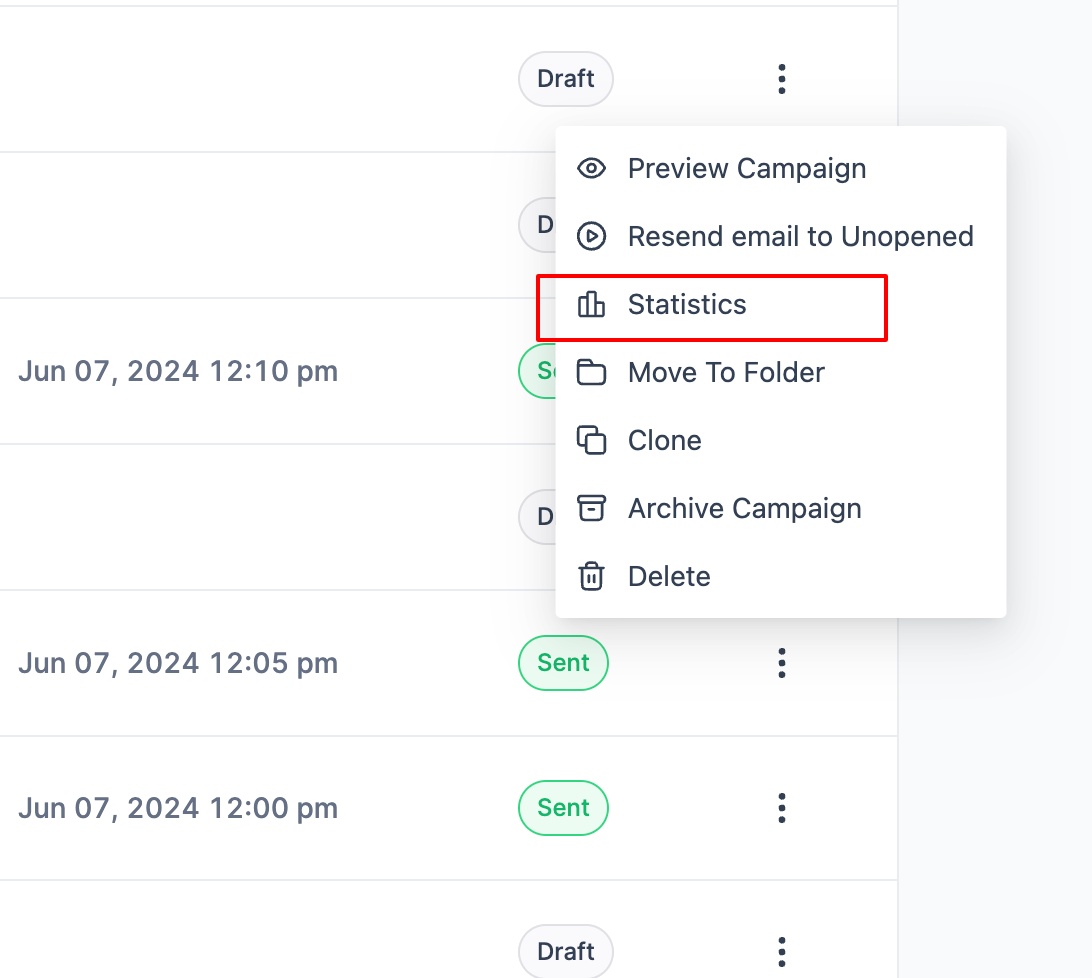
- After sending, access Campaign Statistics by clicking the three dots next to your campaign.
- Click on Click Performance to analyze link performance.
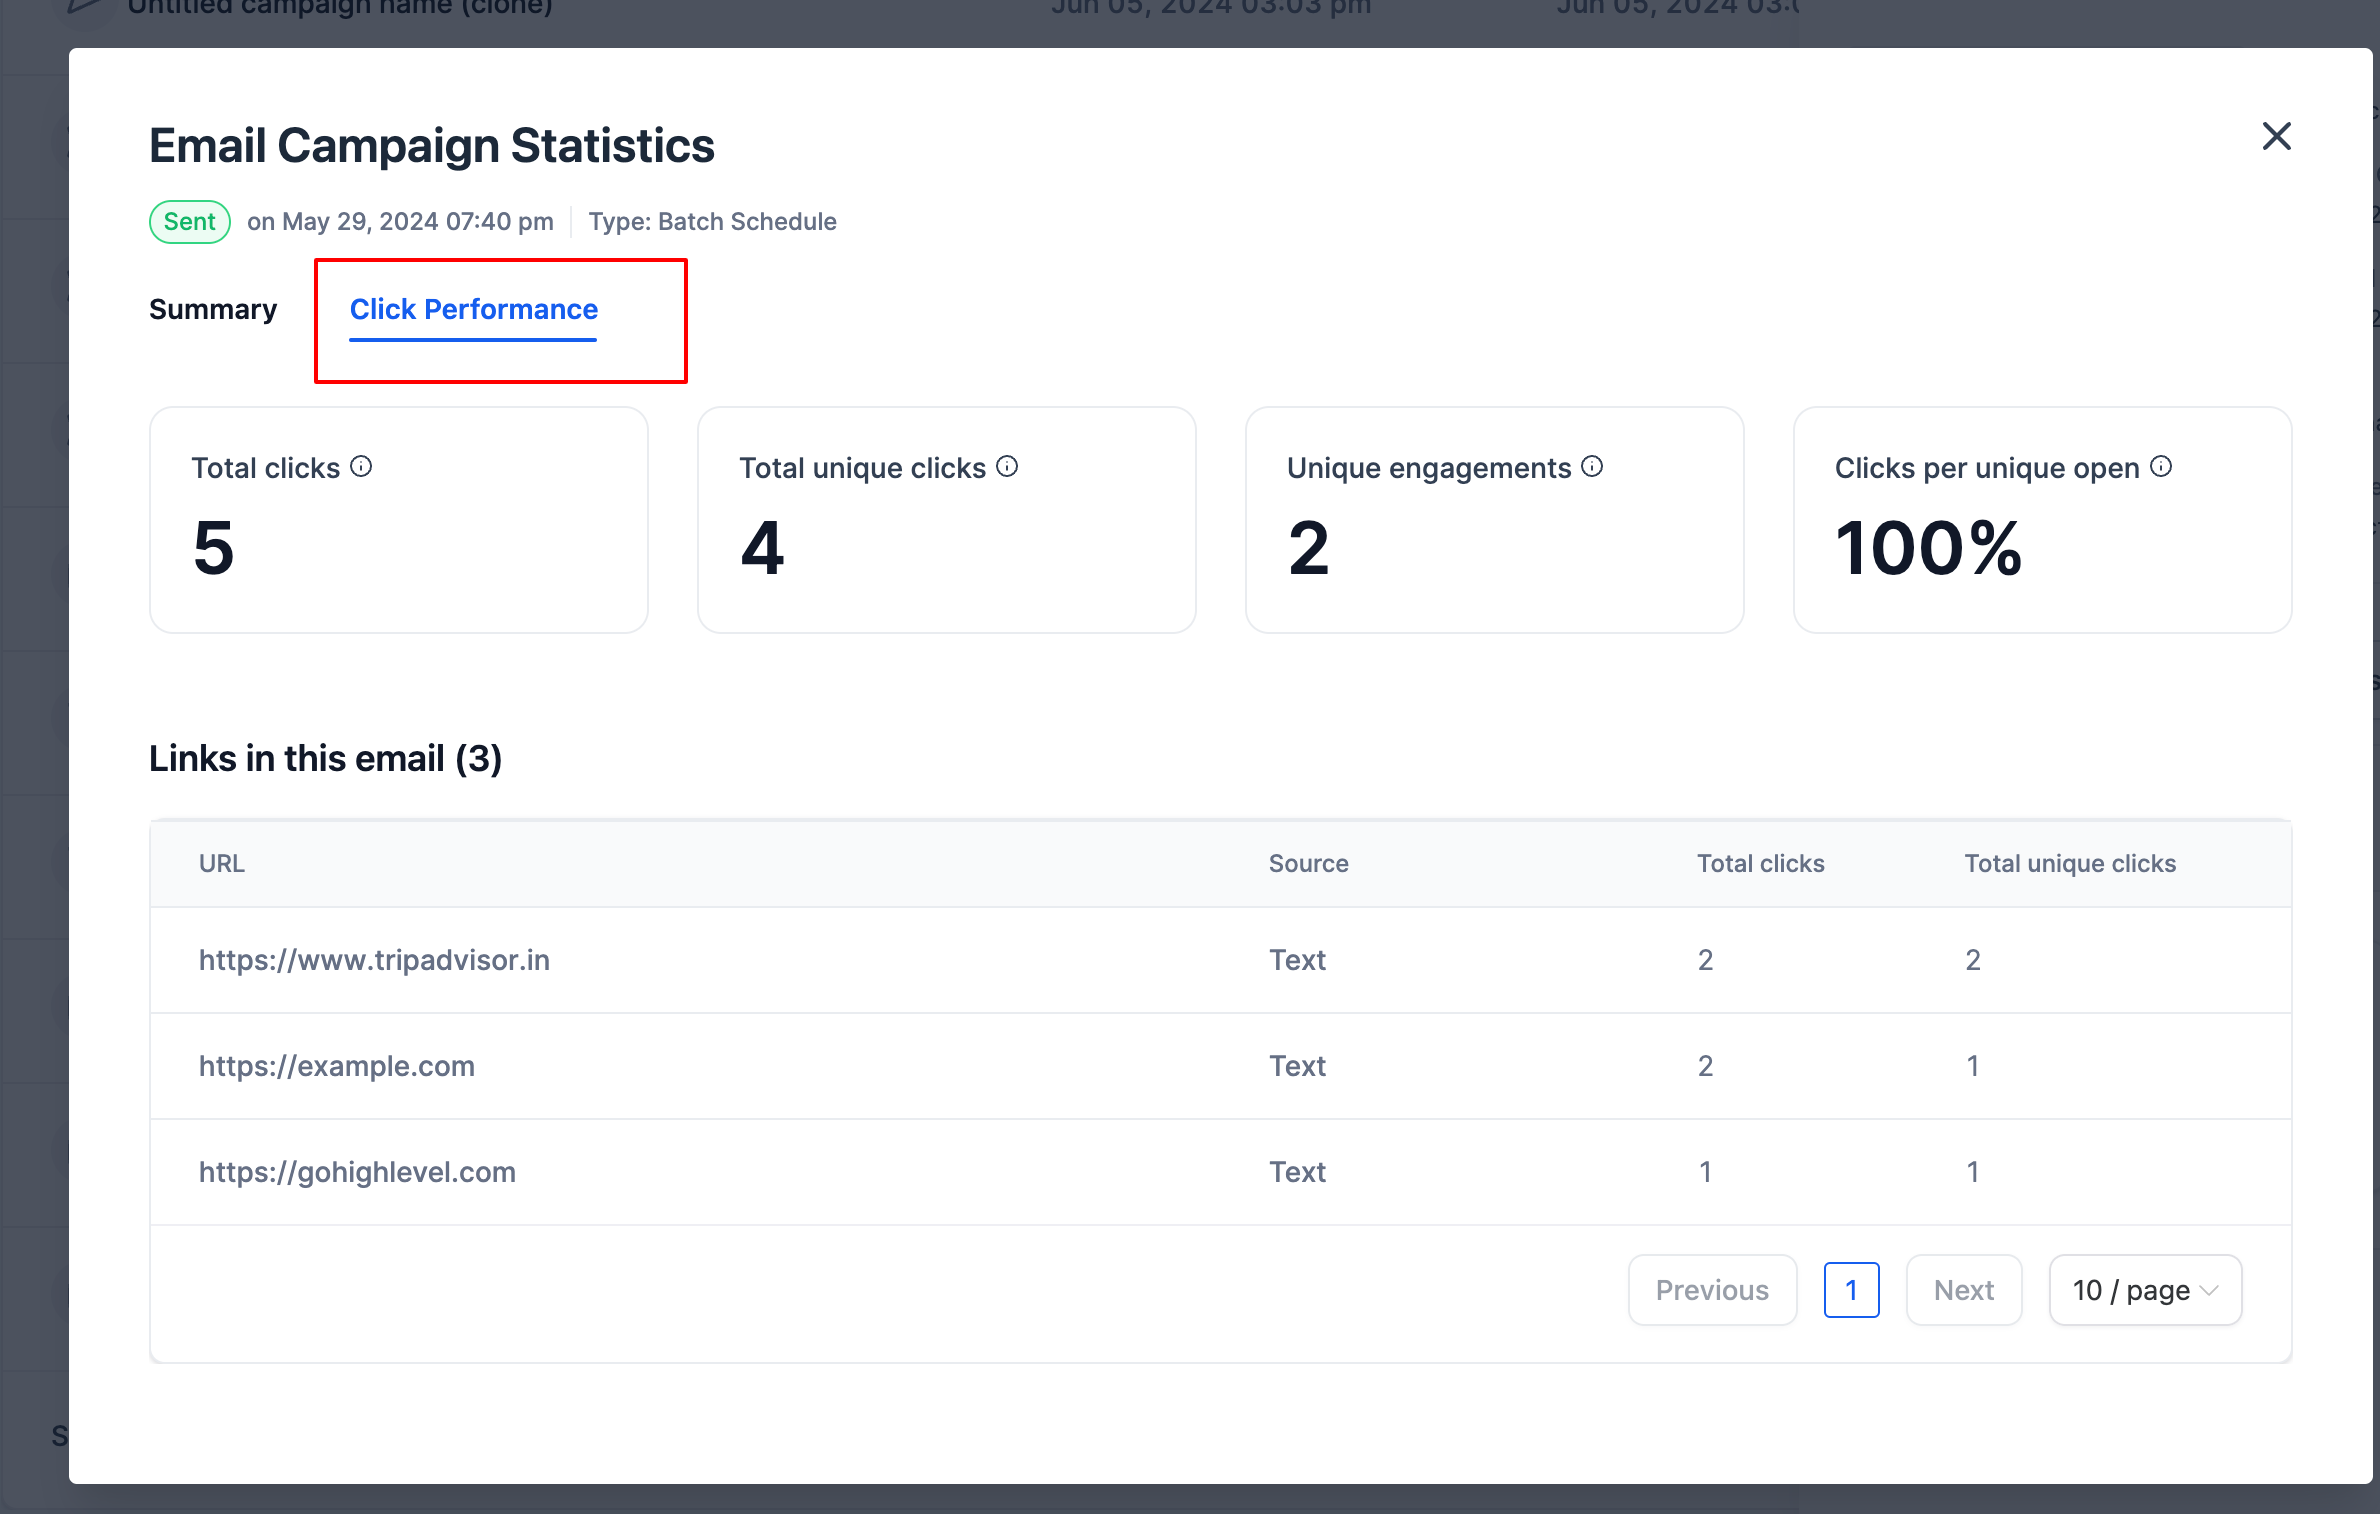
- The click performance report would have all individual links and overview details.
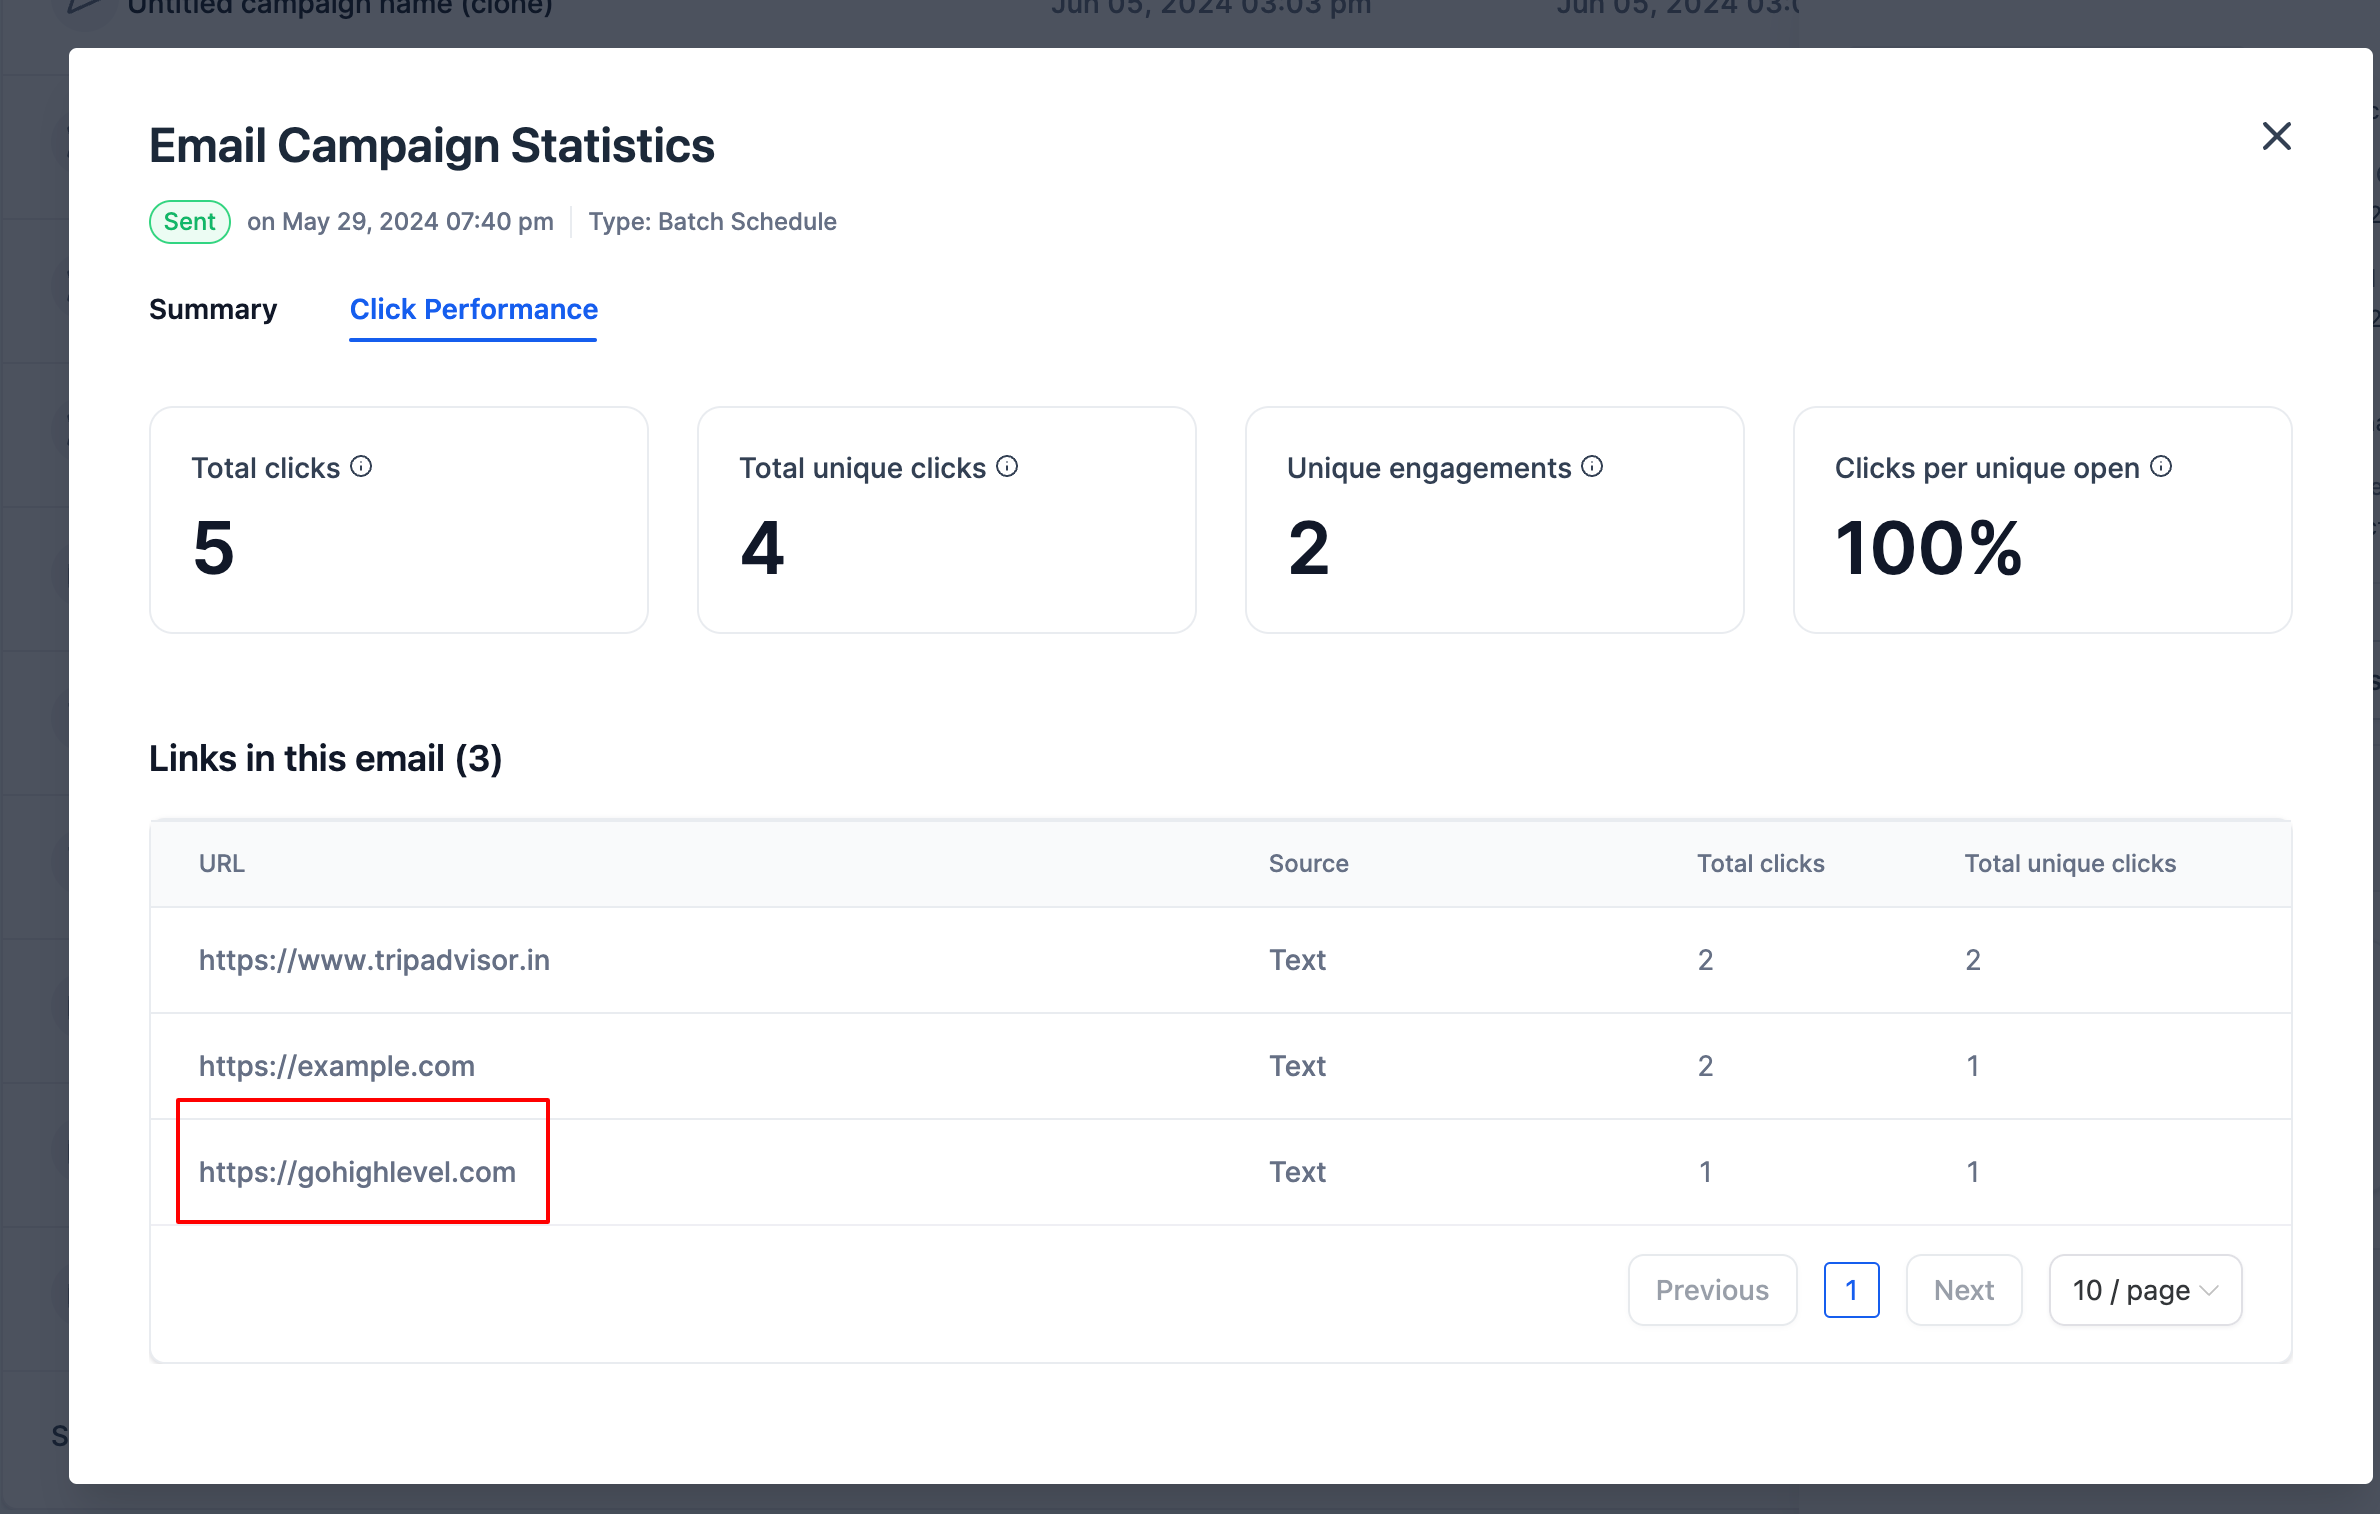
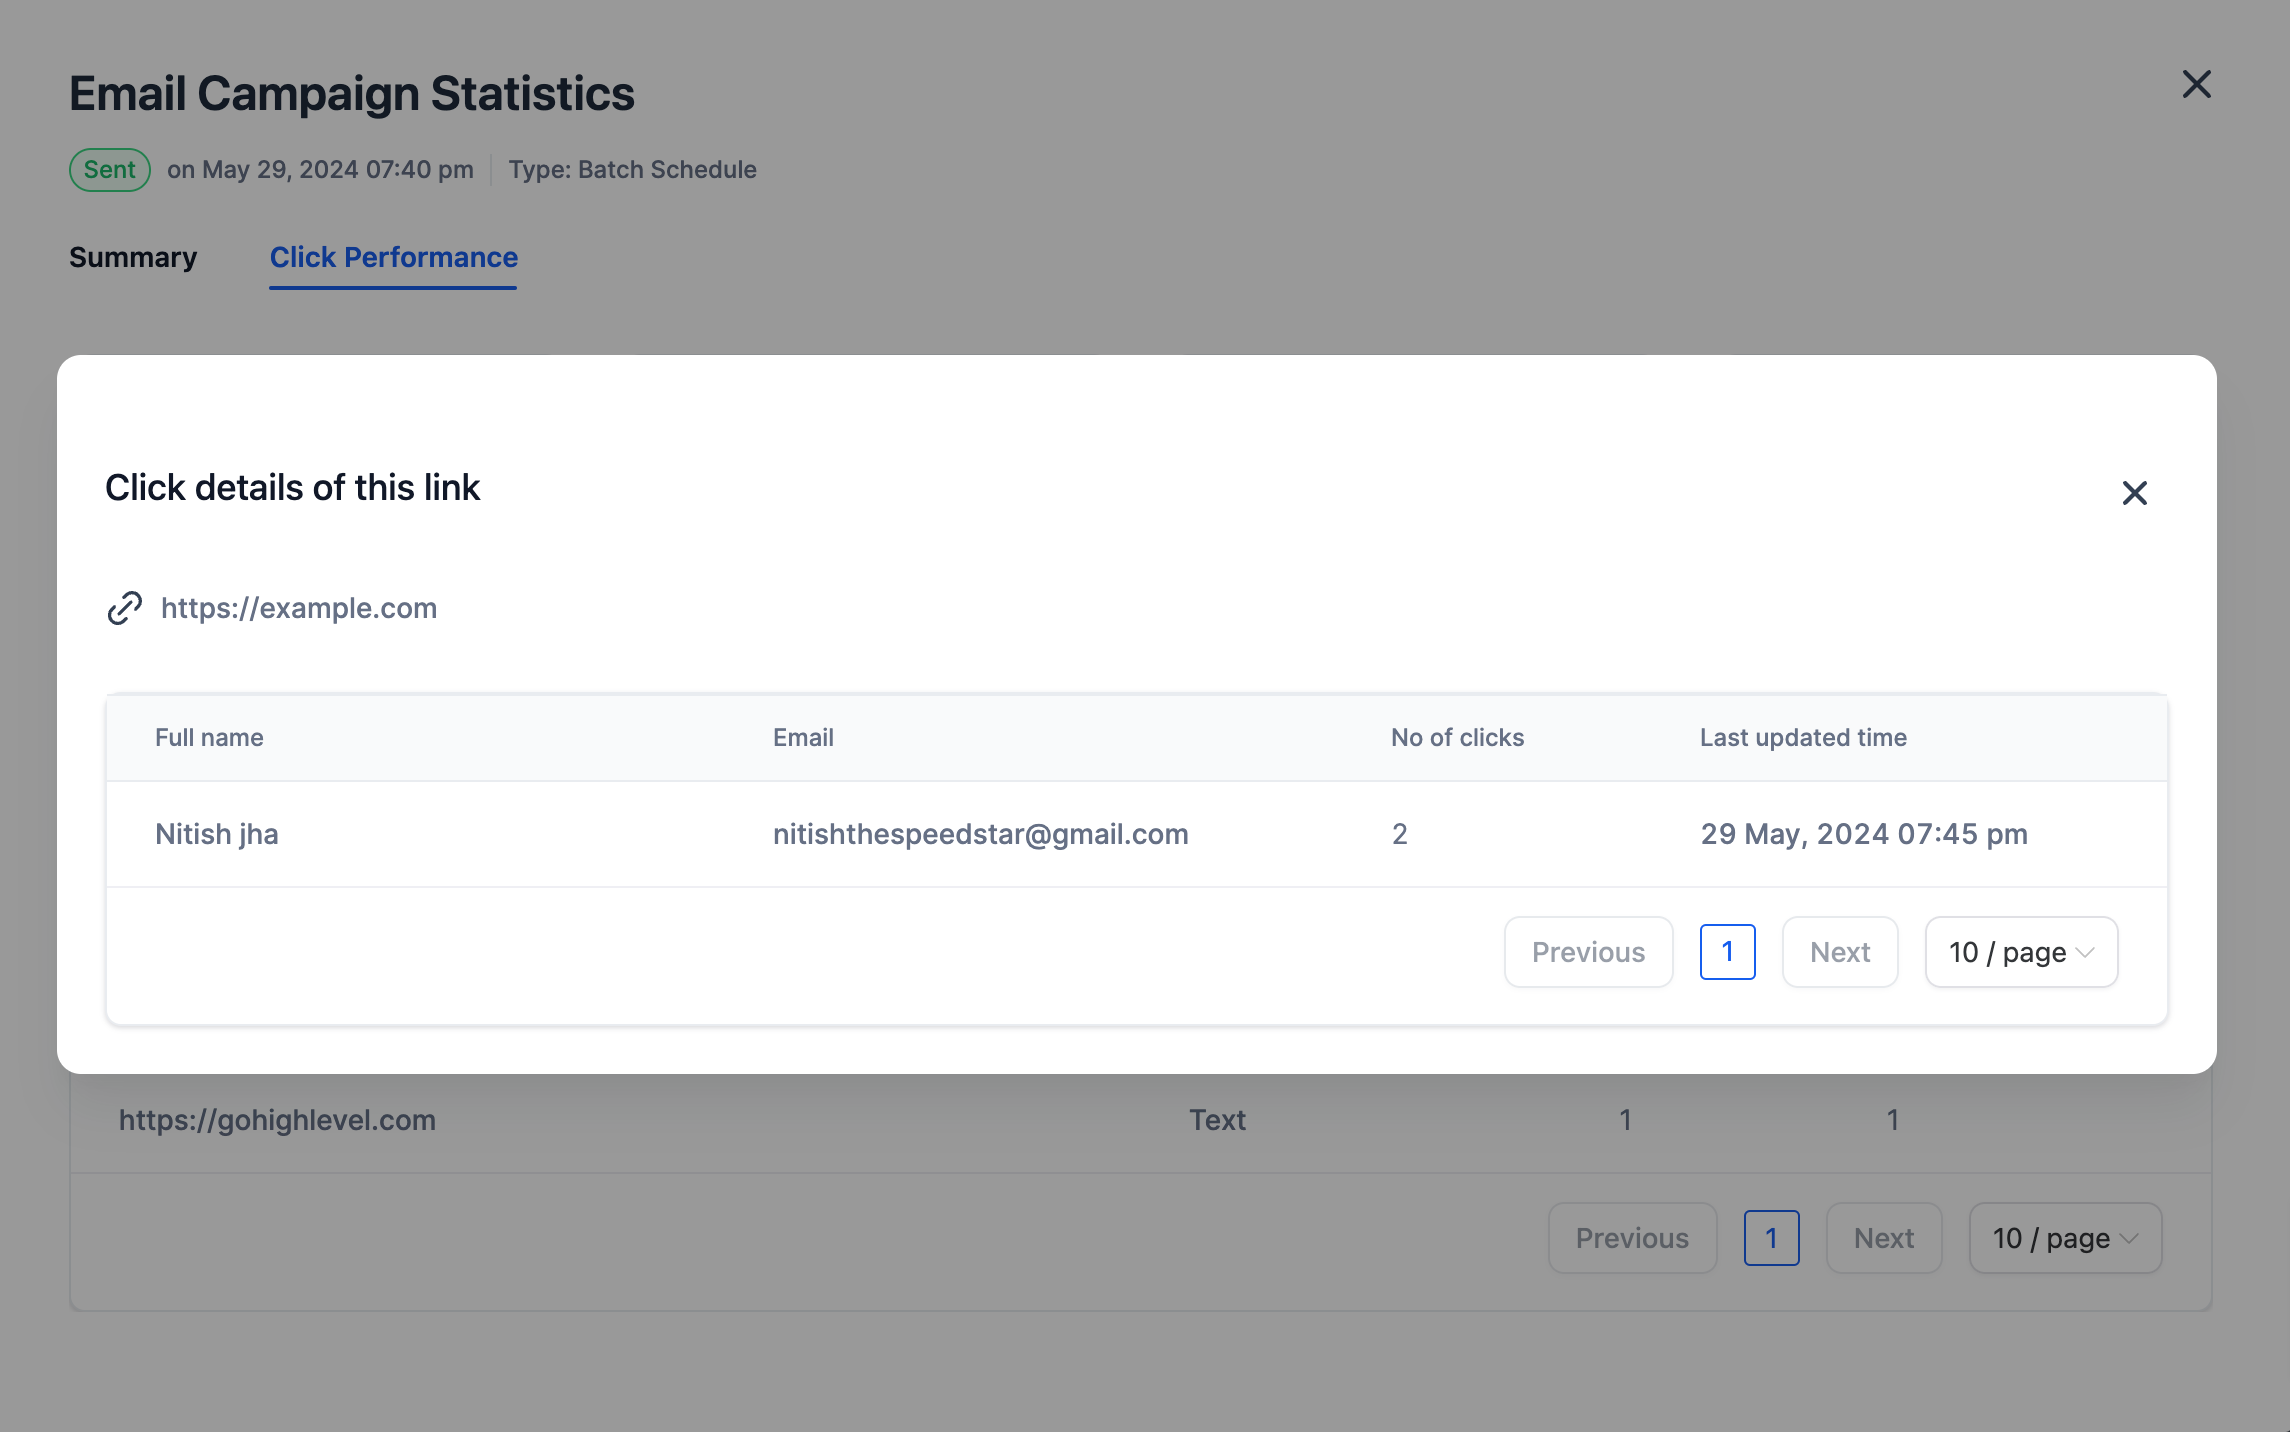
- Click on individual links to view contact-specific click details.
📌 Note:
- The current implementation does not support A/B test and RSS campaigns
- The current implementation if for campaigns sent under email marketing and not workflows.
- The current implementation supports custom values but not trigger links
🚀 Coming soon
- We will support it for A/B testing and RSS campaigns
- Click Map Preview to refer the placement of the links in the campaign
Overview
Relied on workflows to remind your customers? Now, increase your payment conversions on invoices by setting payment reminders for your customers directly from settings.
What's New?
- Set up multiple reminders by Adding New reminders and simply enabling/disabling it using a toggle
- Delete a reminder if needed
- Set number of reminders, custom emails and change when to send it based on Invoice due date or sent date
How to use?
- Go to Settings within Invoices
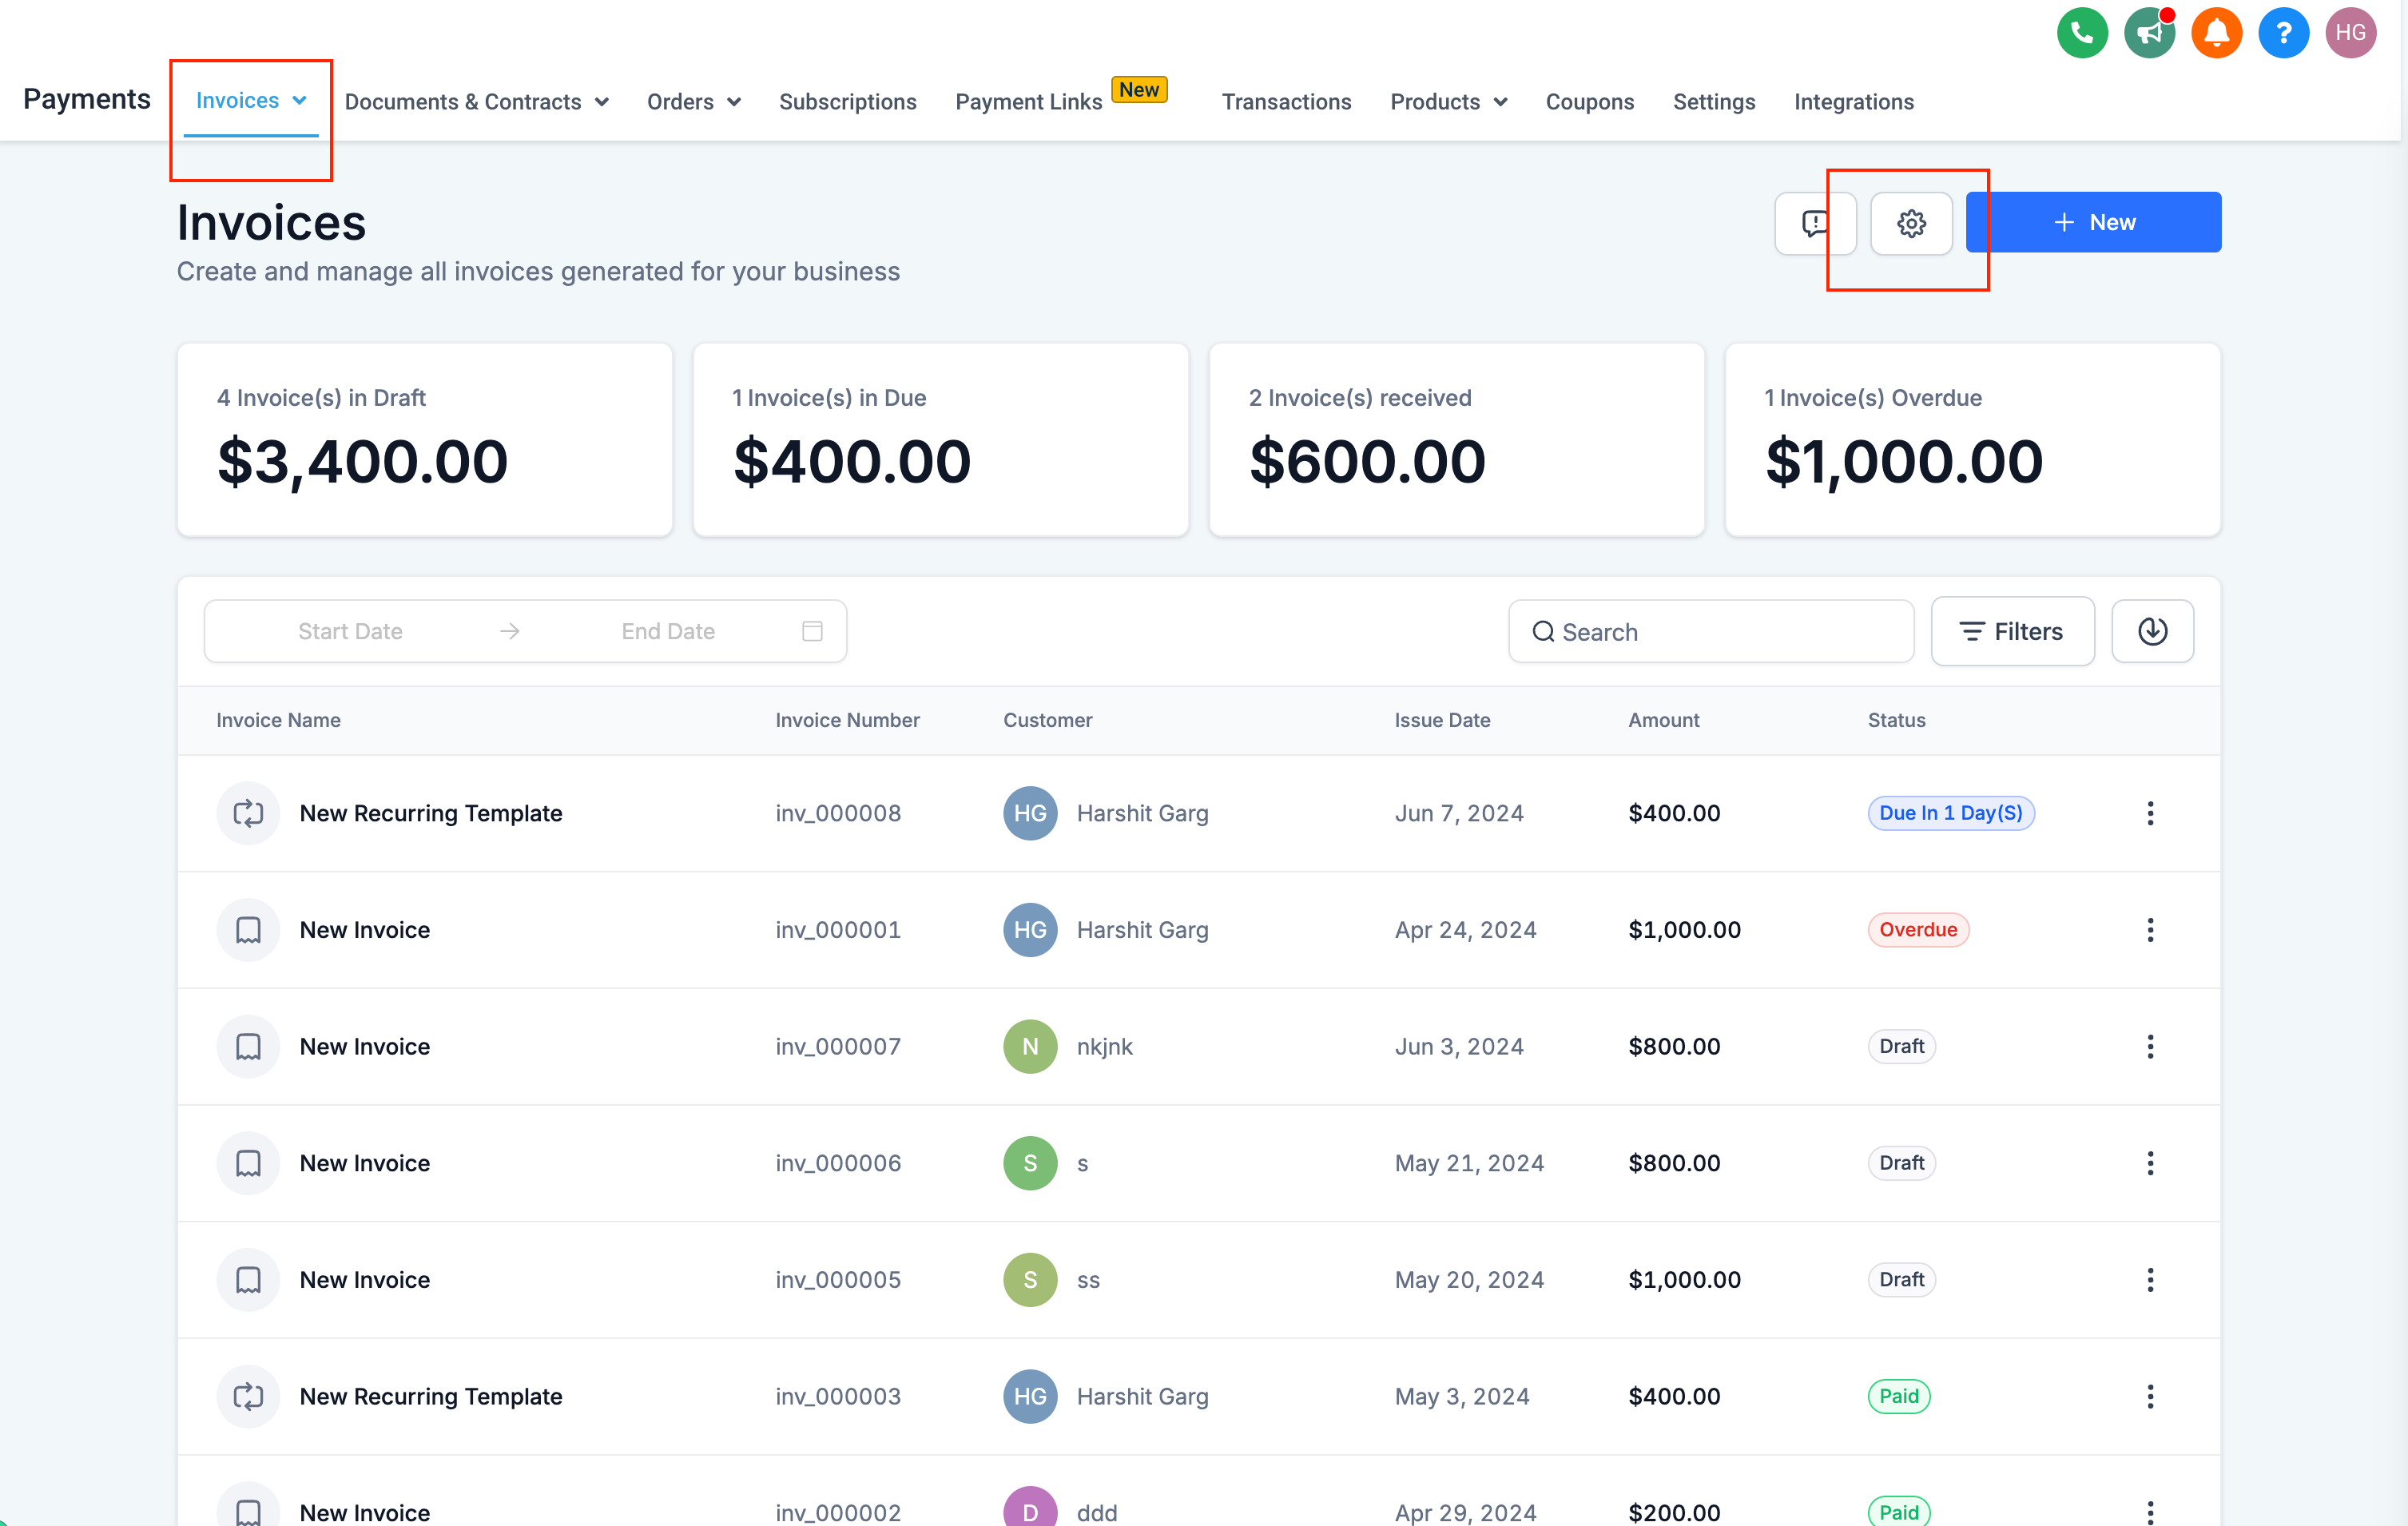
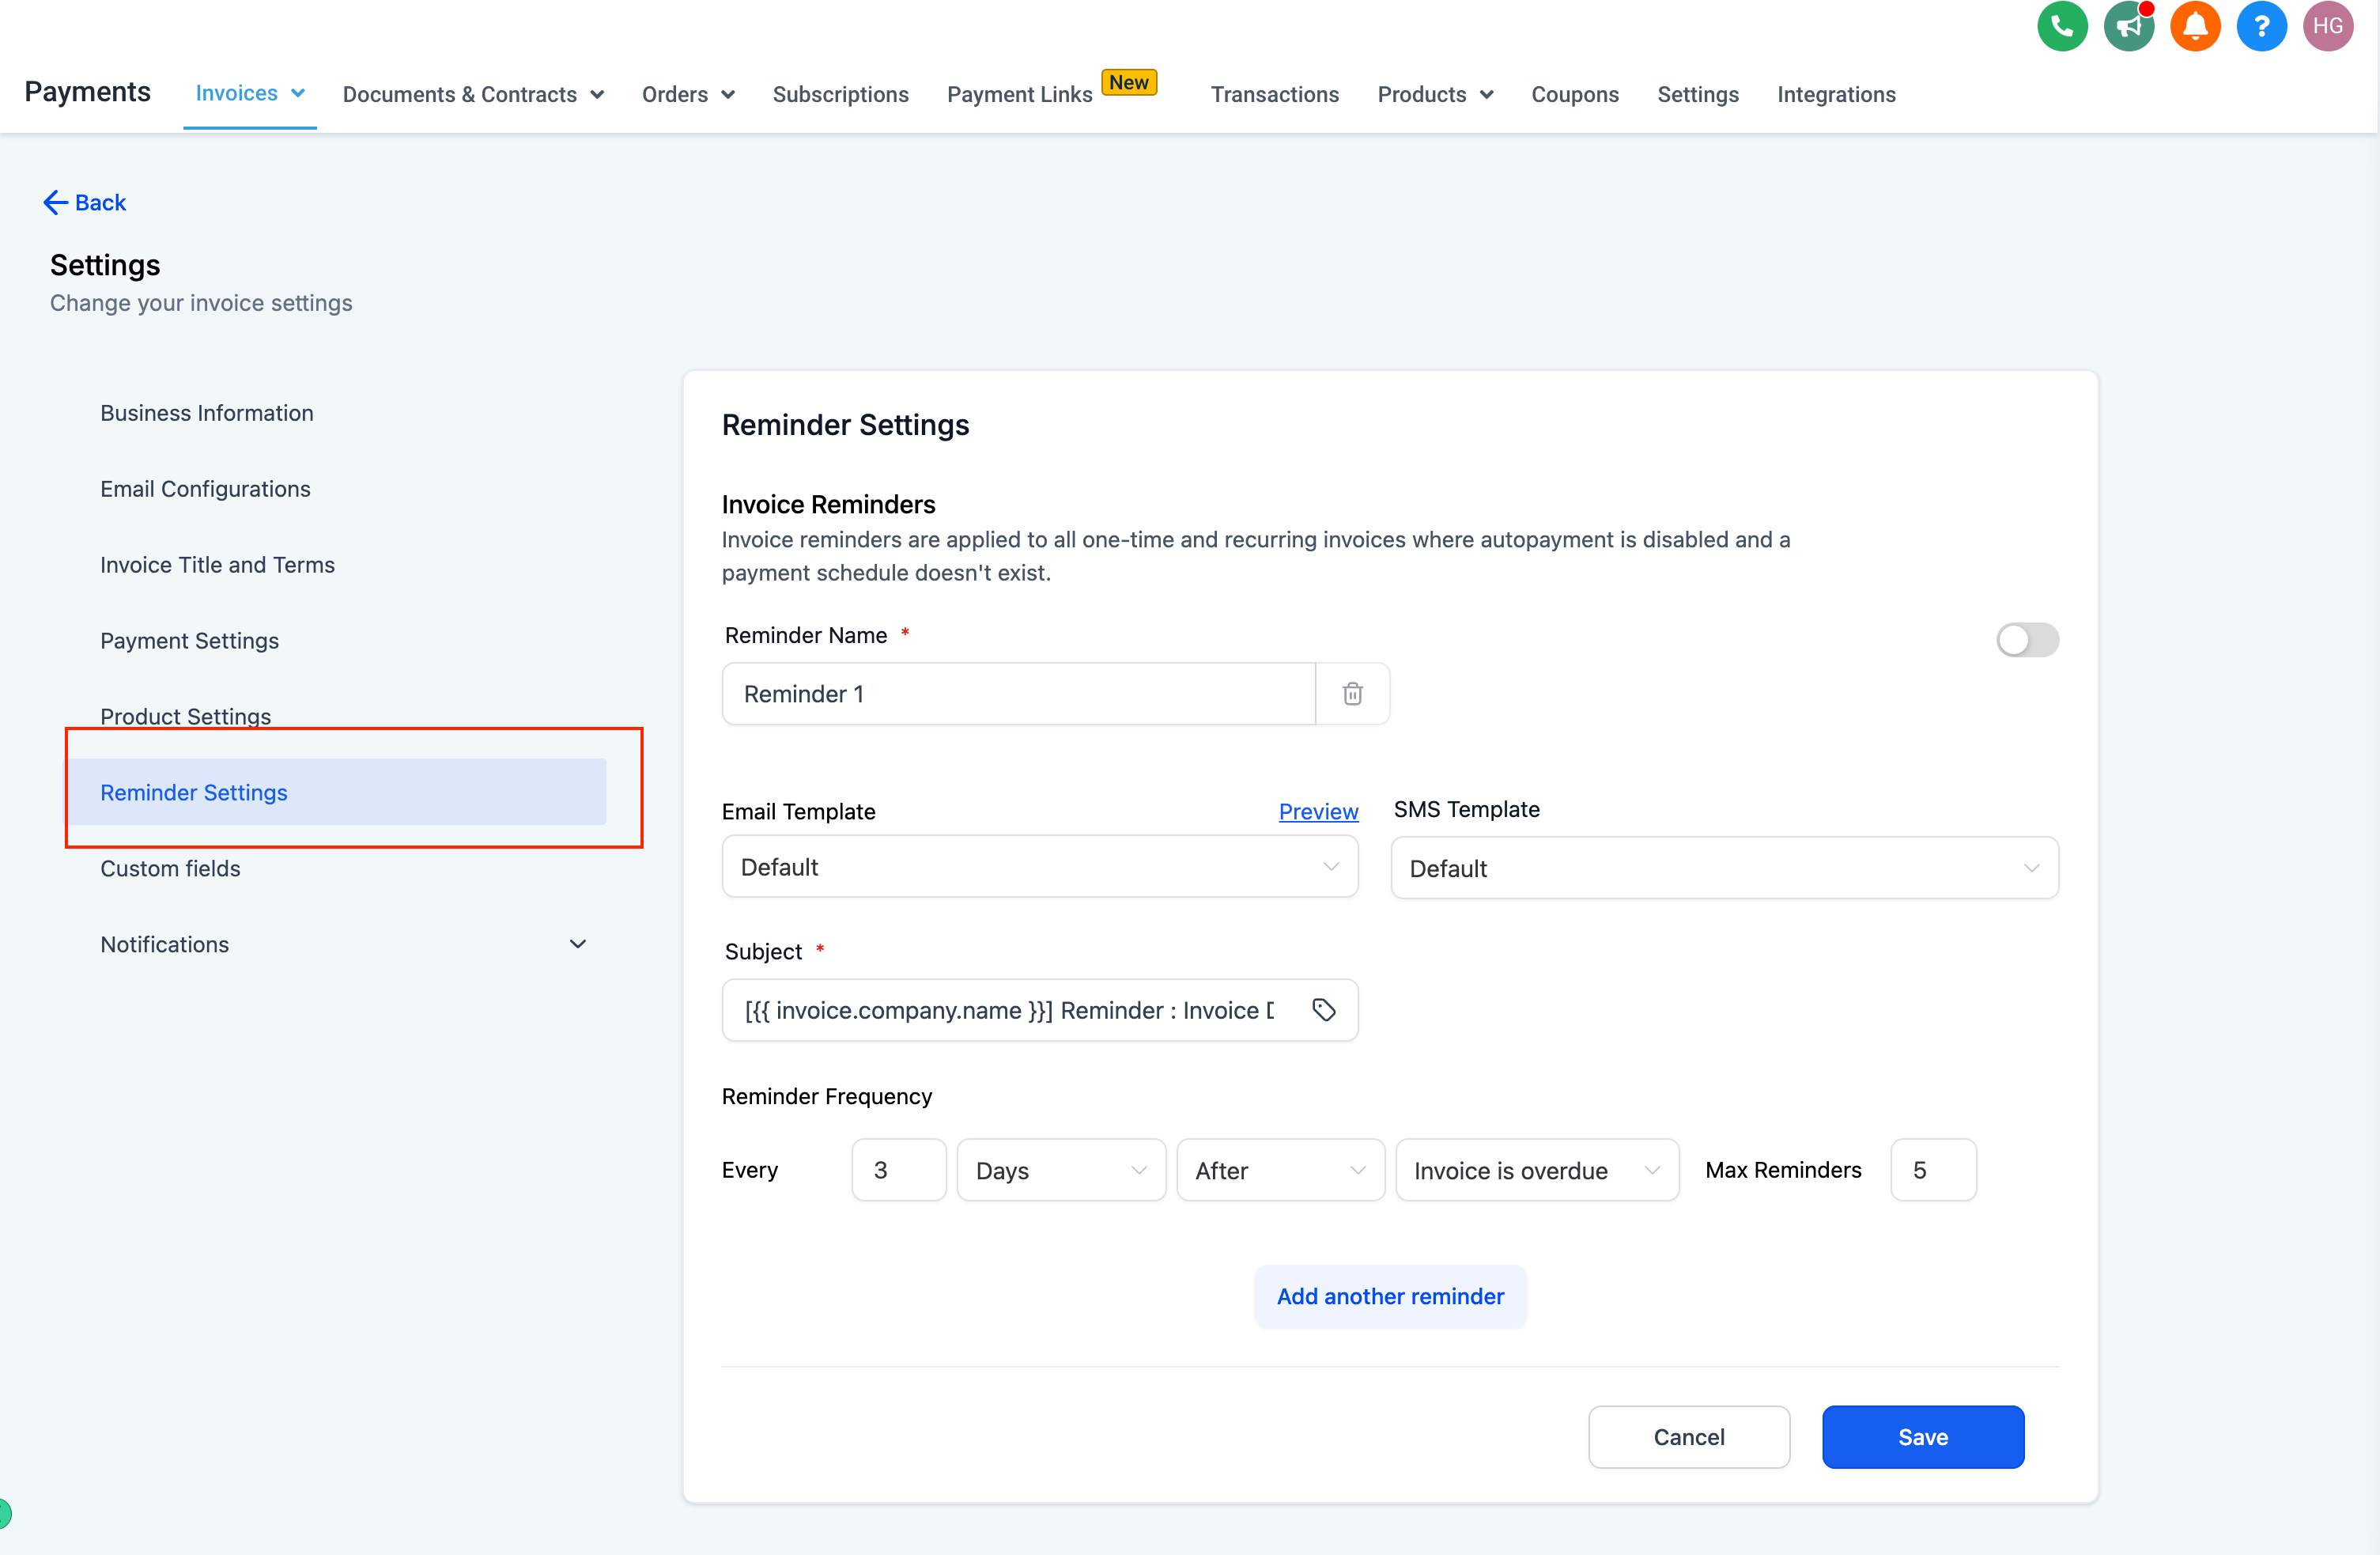
Configure below details for every reminder:
- Reminder Name
- Reminder Template for Email and SMS - Use existing or edit an existing template and create a new one on the go!
- Edit the Subject of your email
- Set reminder frequency: Every [X] [Days/Months/Hours..] [After/Before] [Invoice Due date/Invoice sent date]
- Set Maximum reminders to limit when the reminder will stop to go
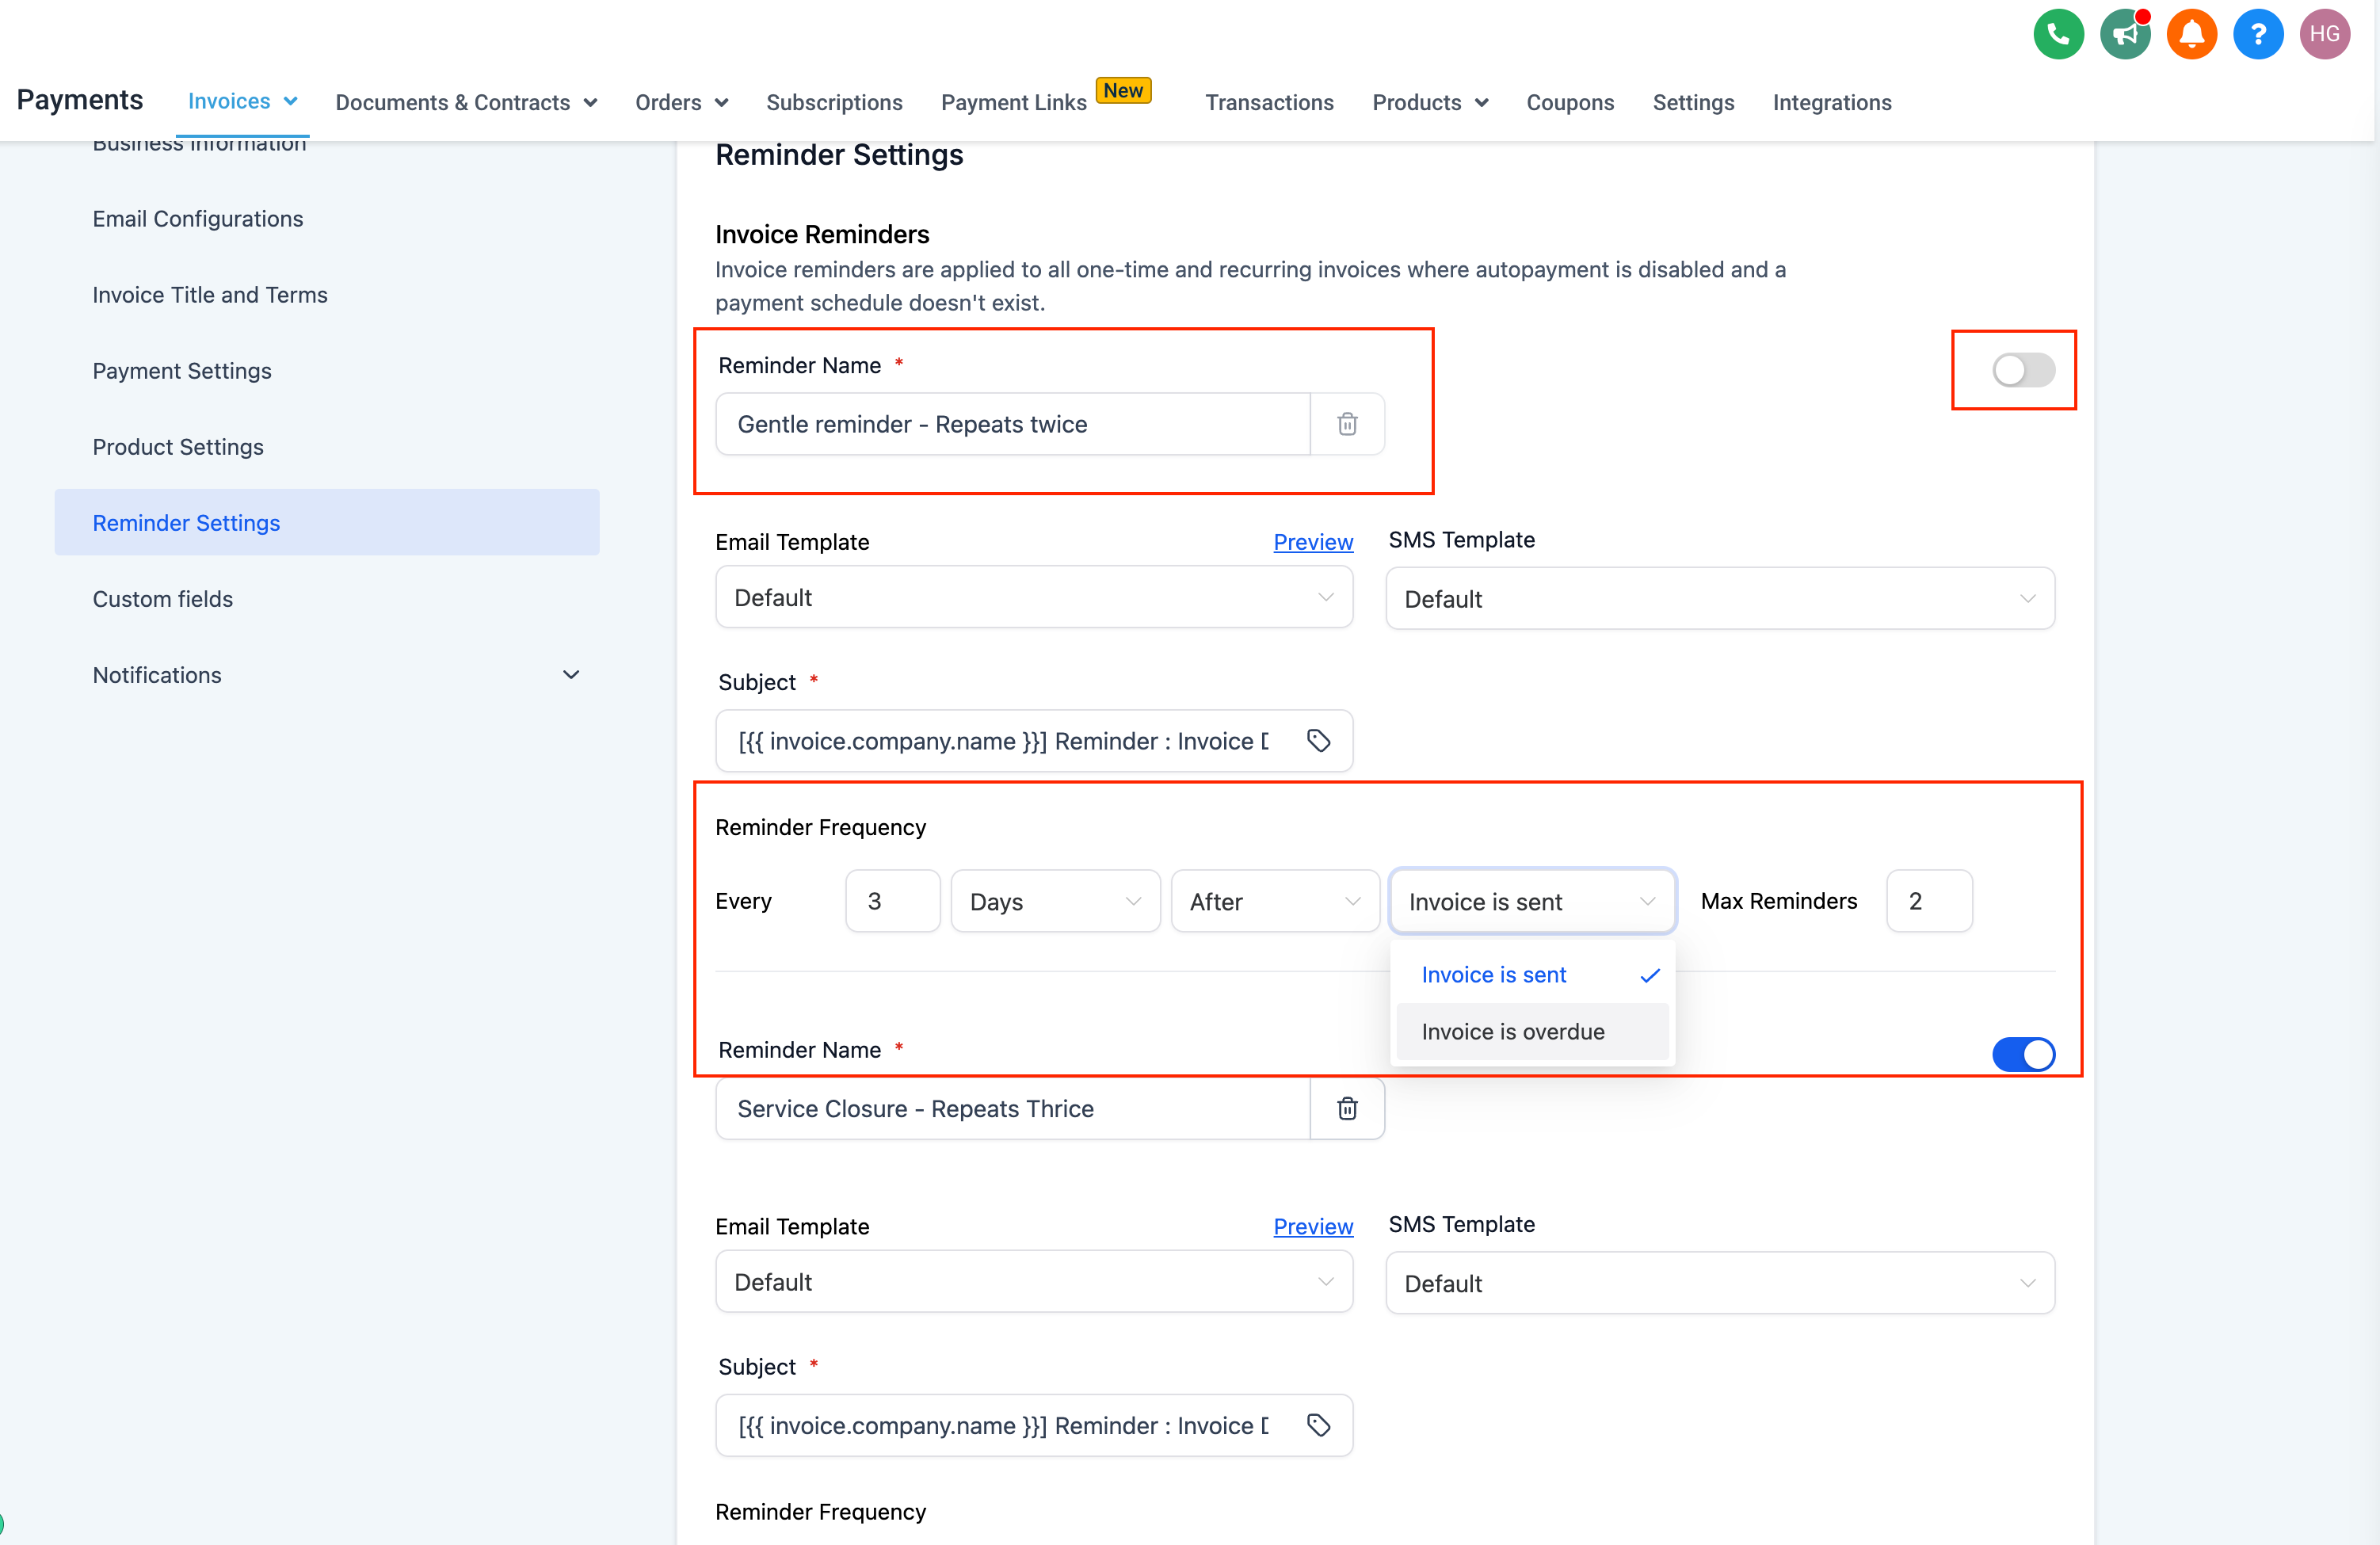
- Click on Add New Reminder to add another reminder
- Delete a reminder if needed or just turn it off using a toggle
-
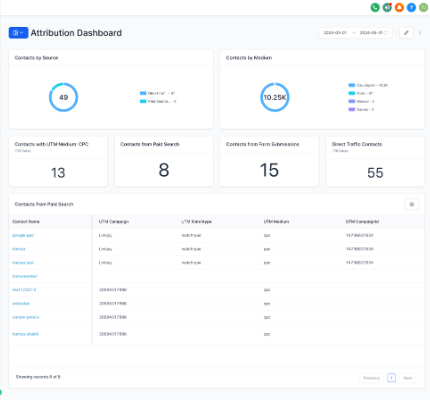
We're thrilled to announce a major update to our Contact widgets: Attribution and UTM parameters are here!
👀 What’s New?
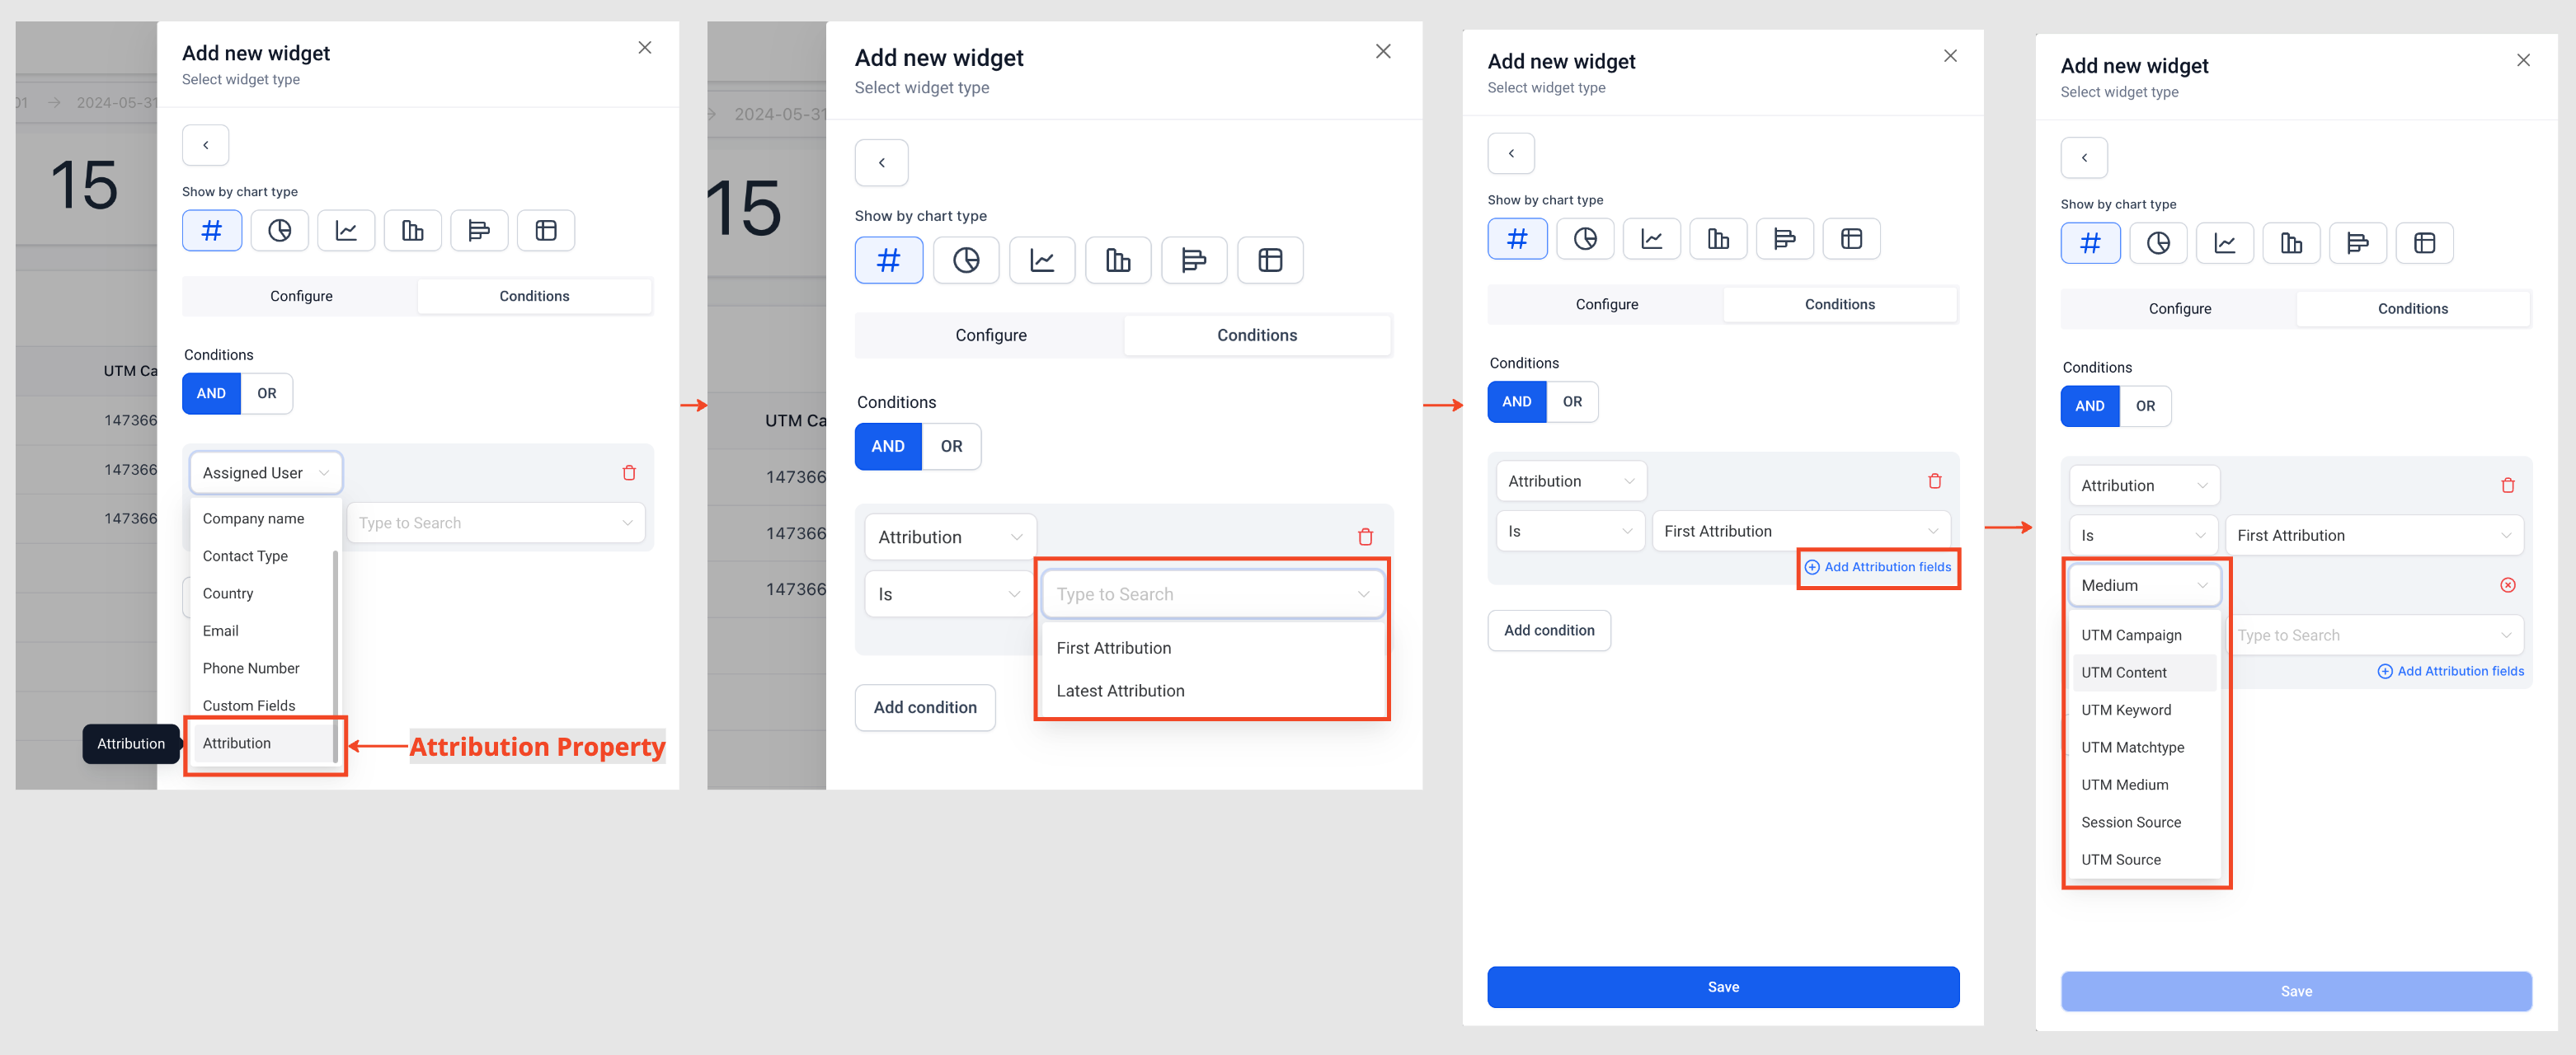
- Attribution Property:Filter contacts based on First or Last attribution with our new Attribution property in contact widget conditions.
- UTM Parameters:Gain deeper insights with the addition of key UTM parameters to contact widget conditions. Create more detailed widgets using; UTM Campaign, UTM Content, UTM Keyword, UTM Matchtype, UTM Medium, UTM AdId, UTM AdGroupId, UTM Source and other Attribution properties like Medium and Session Source.
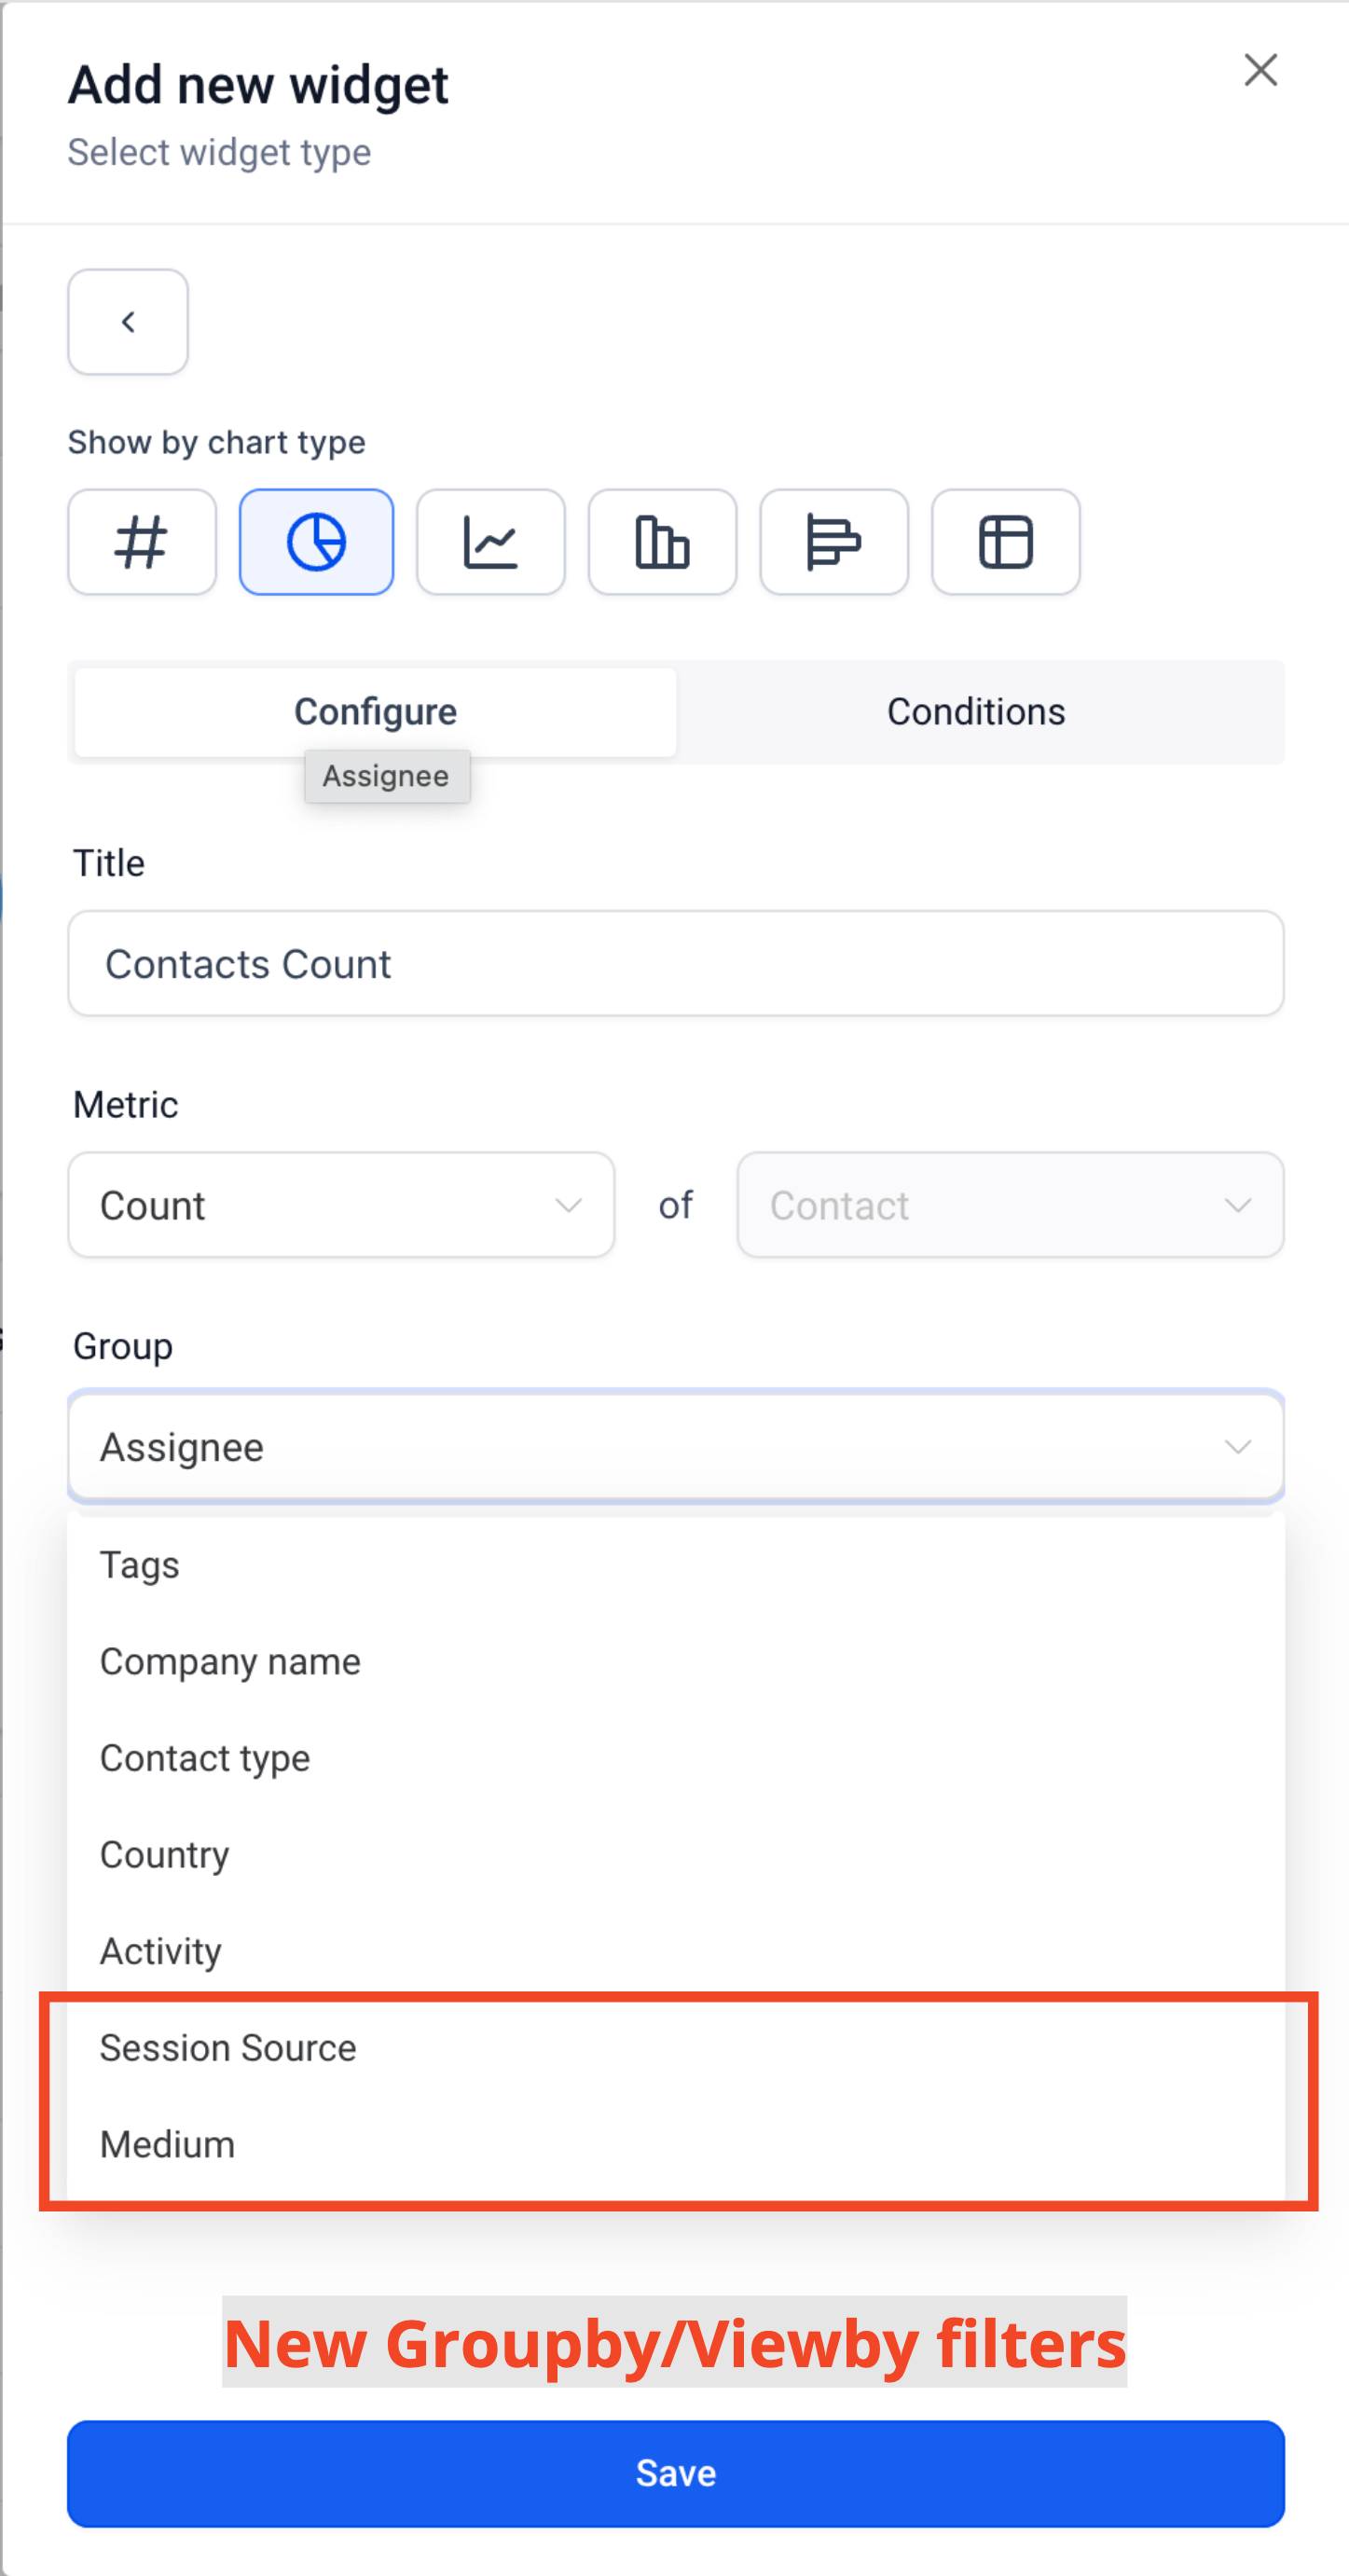
- Group by/View By:Now you can create donut and line graphs using these new properties; Session Source and Medium
- Updated Columns in Granular Insights:All the new properties are now available in the granular insights table view and can be exported to CSV.
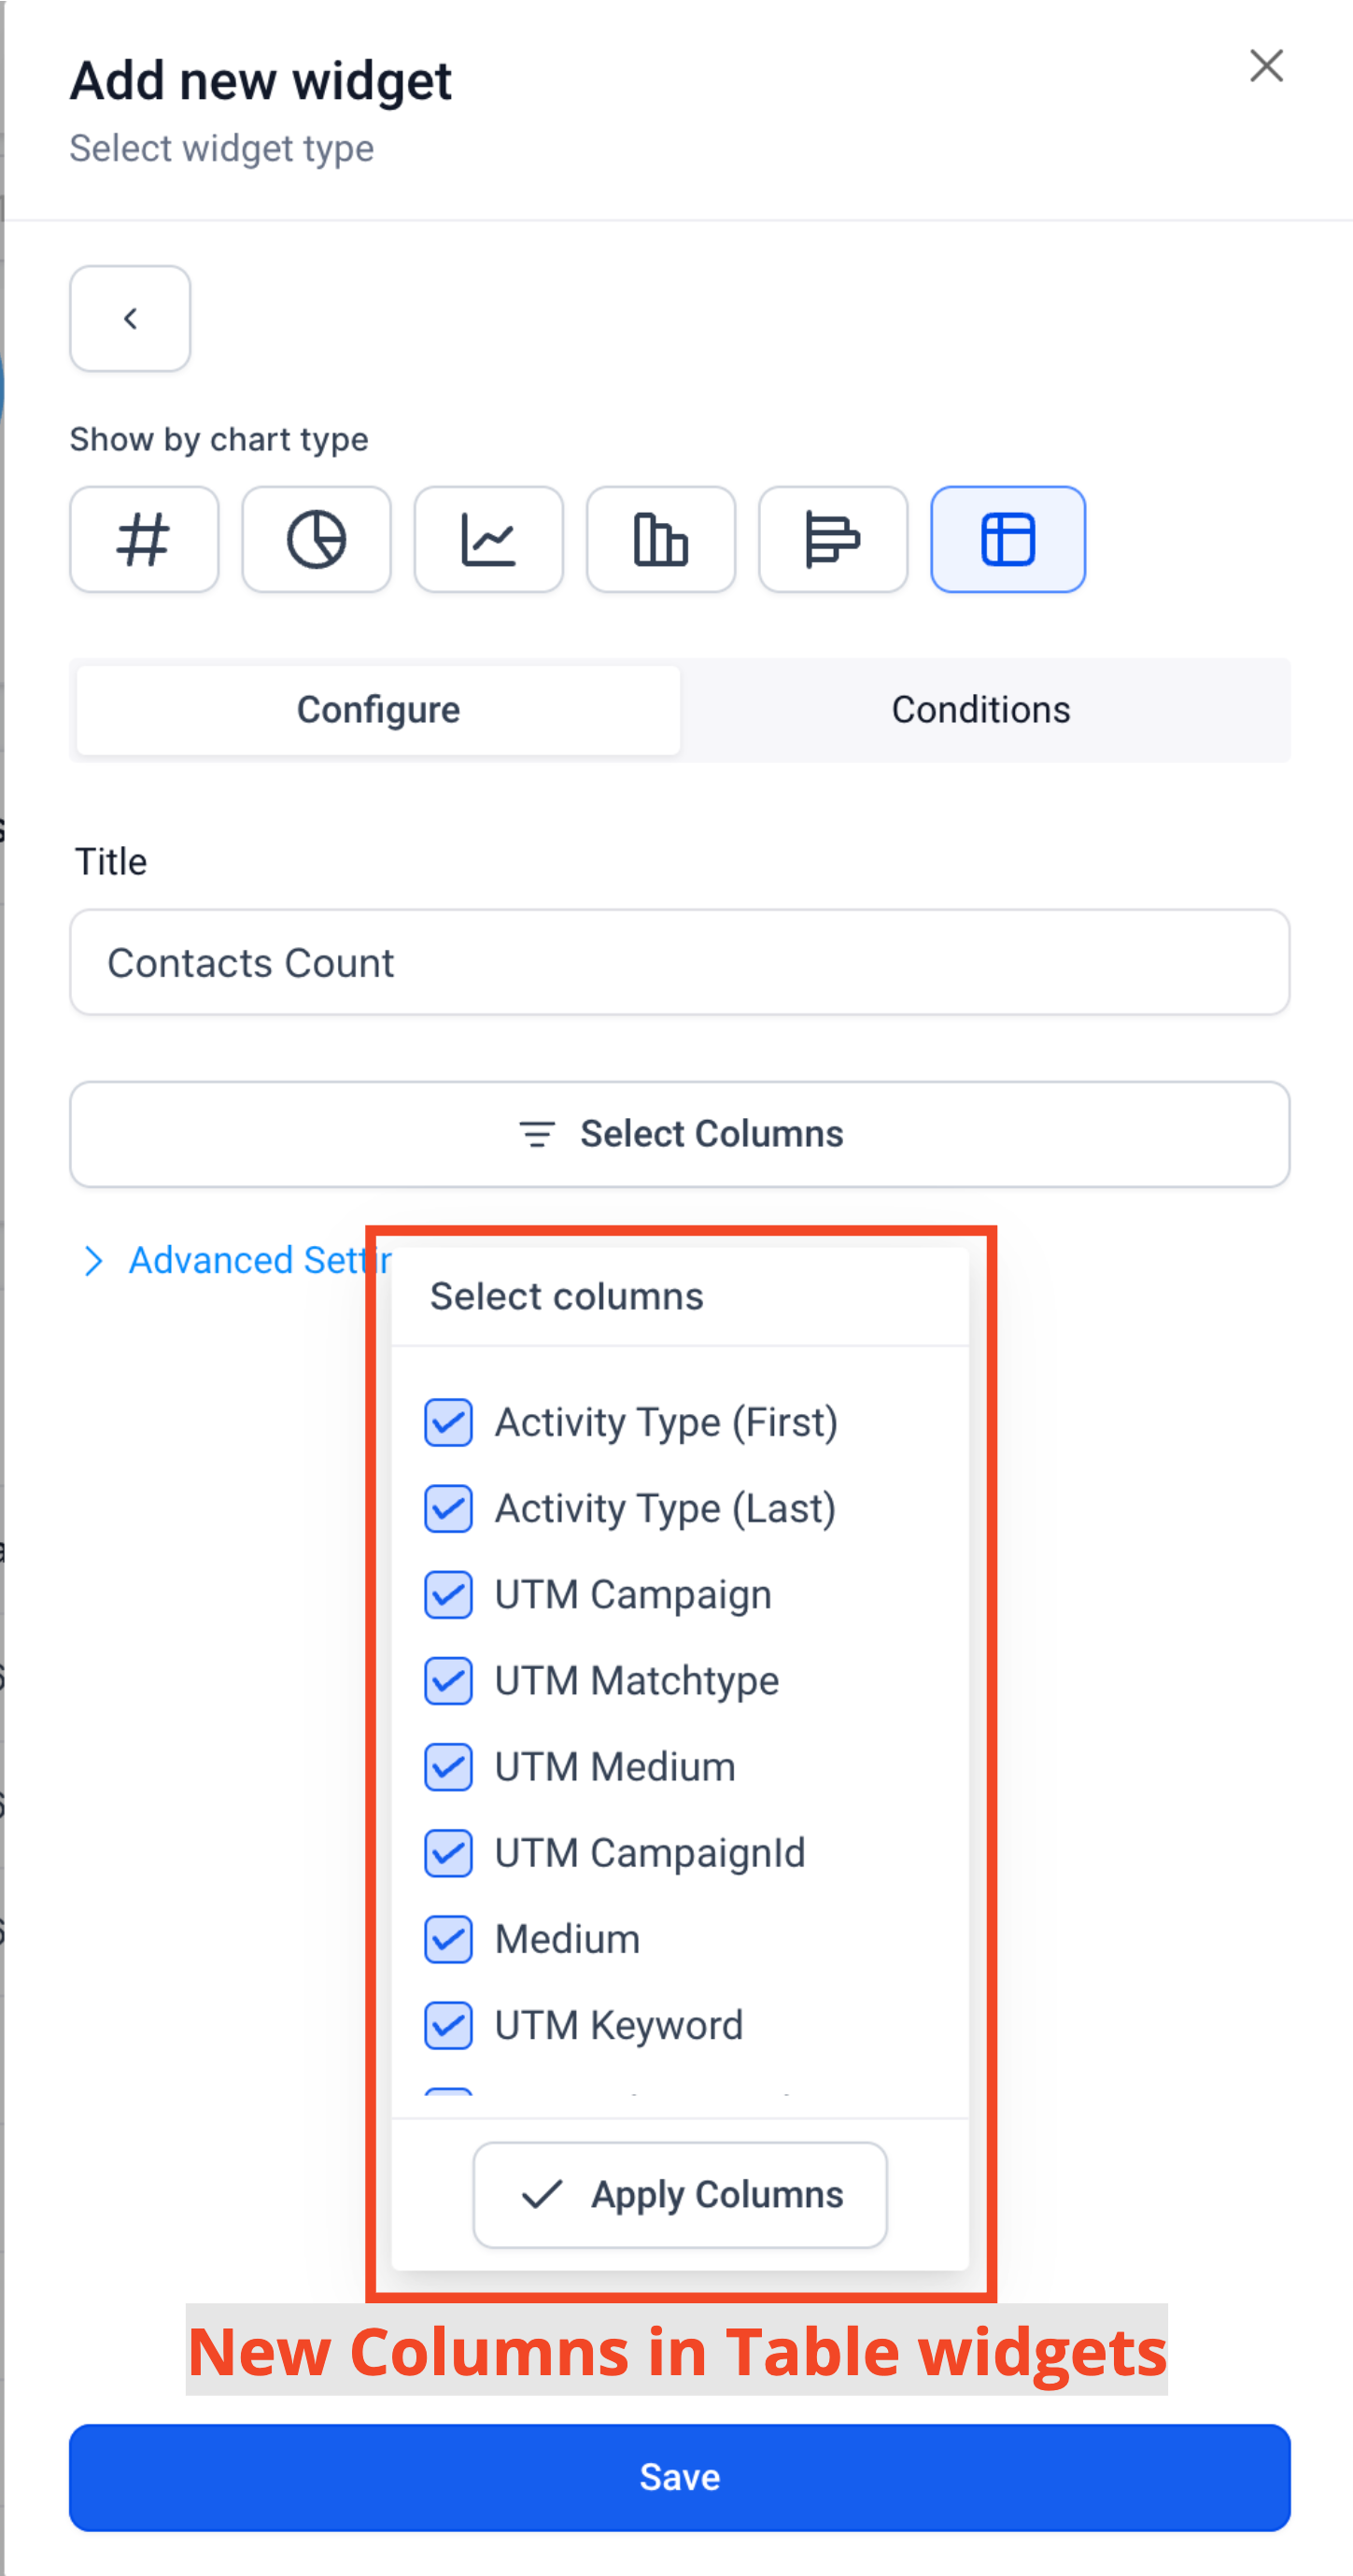
- New Columns for Table Widget:These properties are also now selectable in the Table widget's column selector.
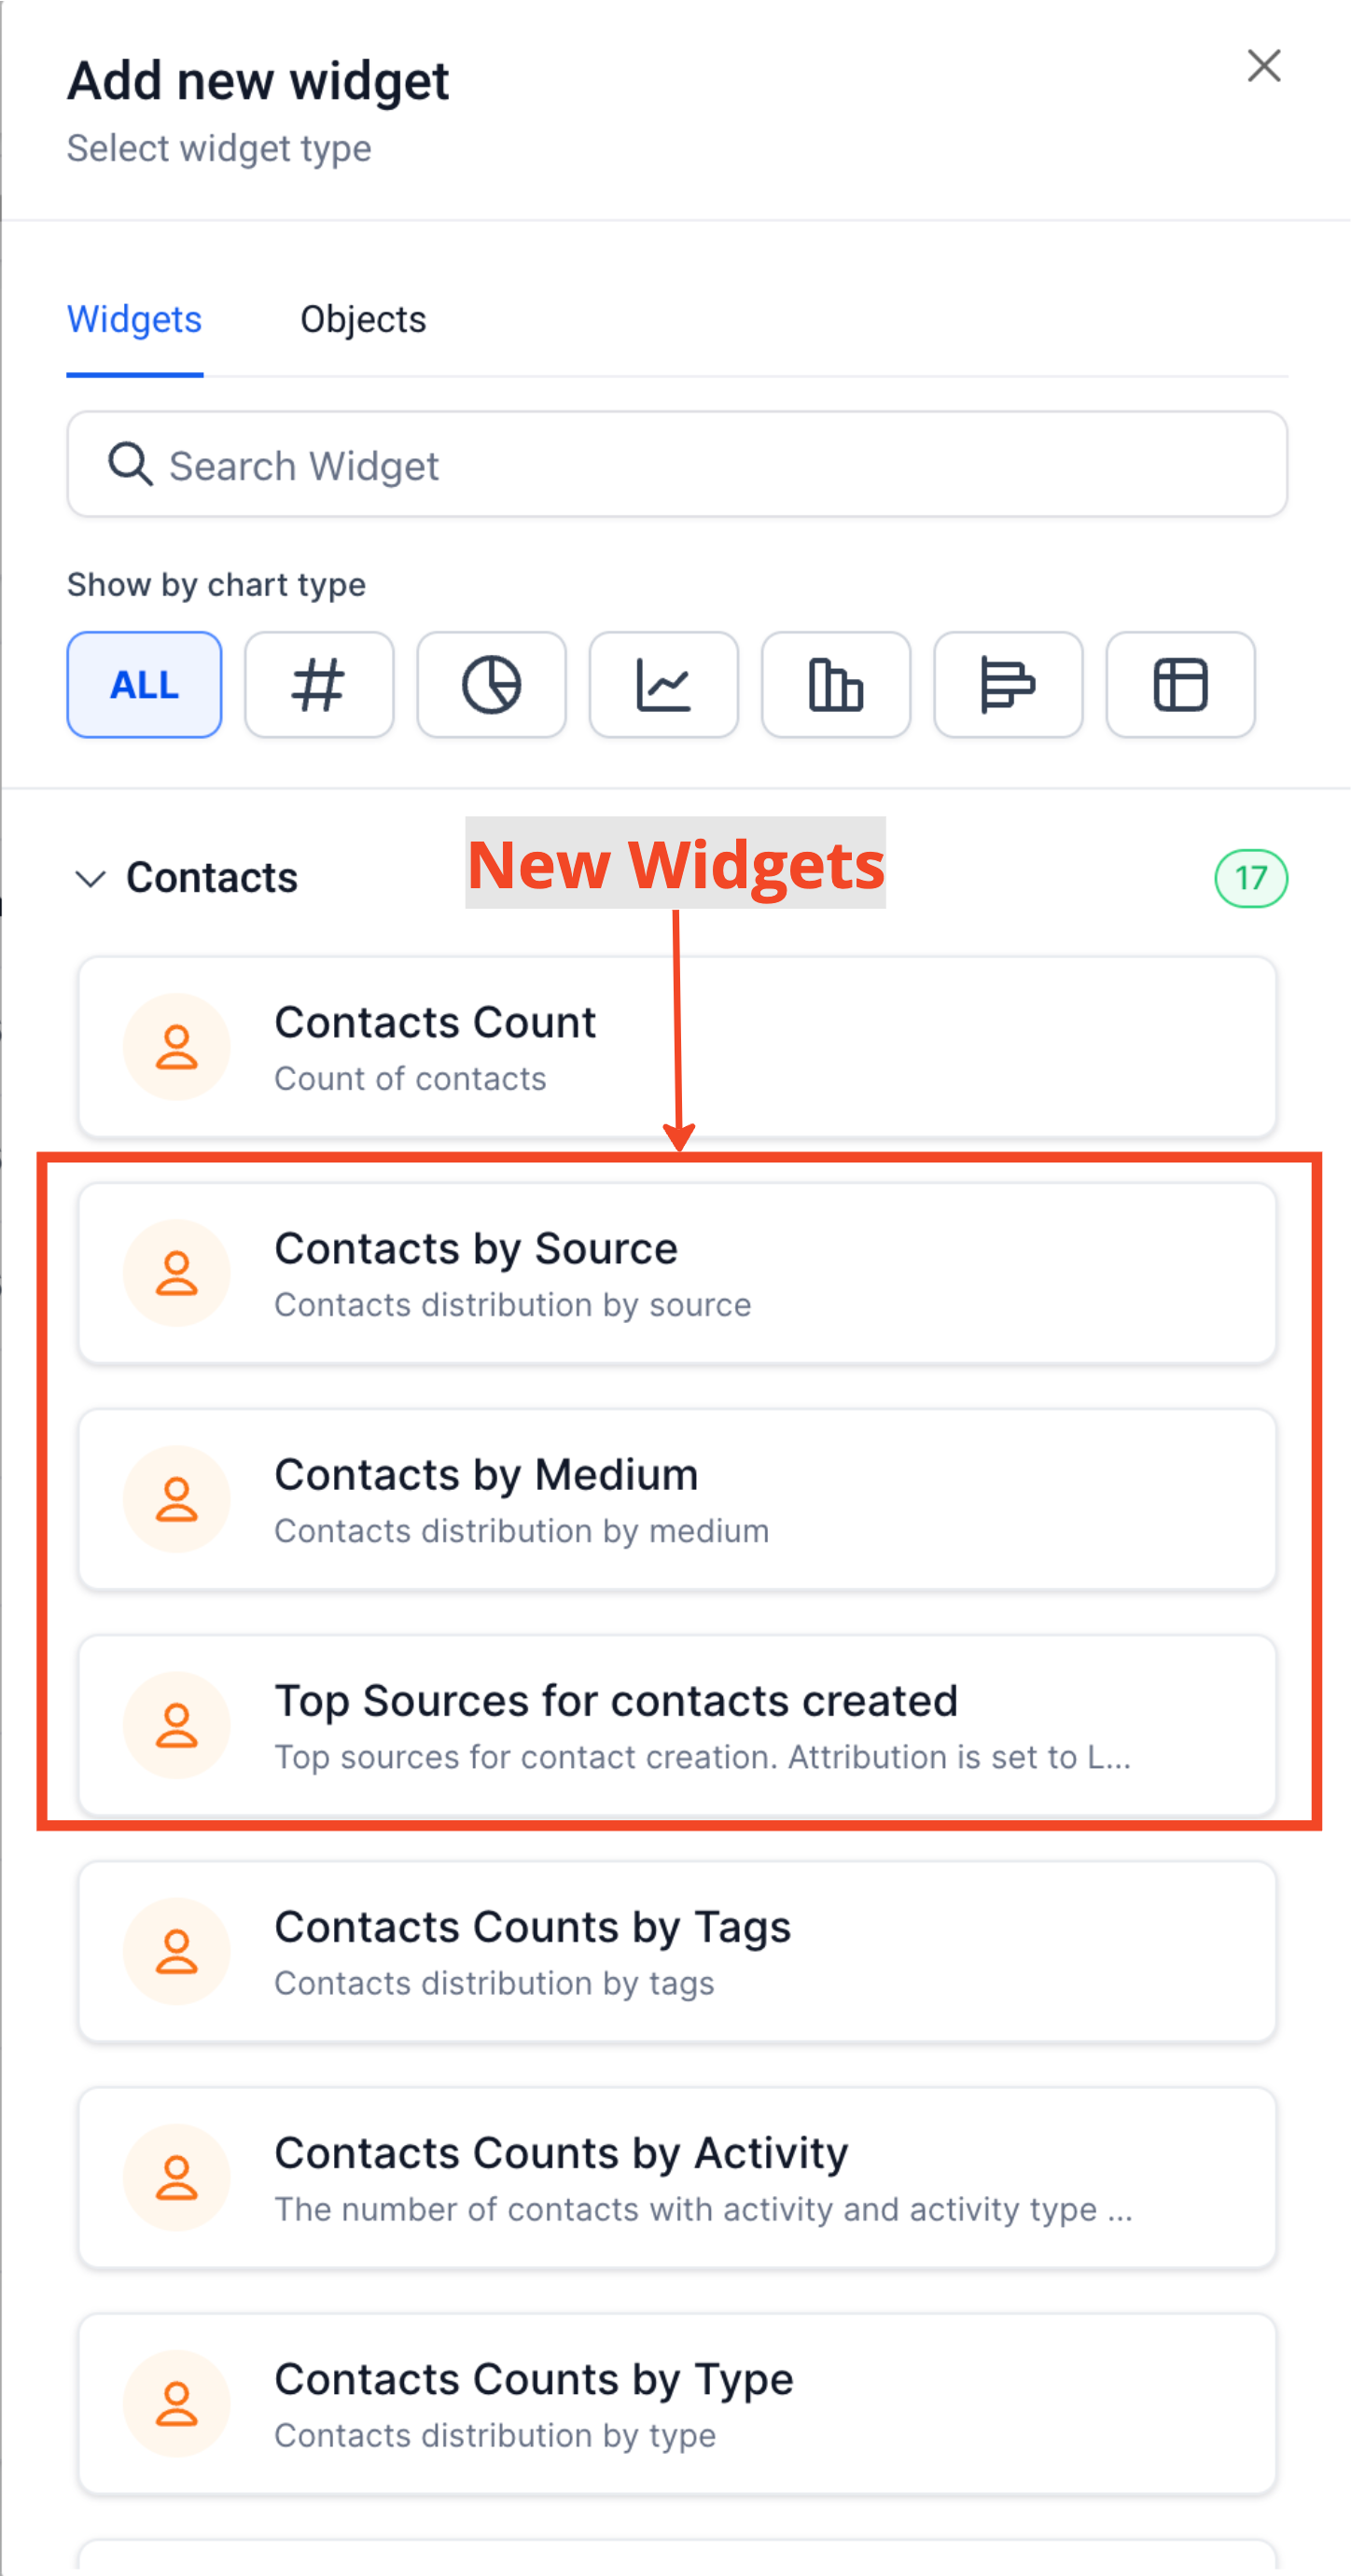
- New Widgets:Introducing "Contacts by Source" , "Contacts by Medium" and "Top Sources for contacts created" widgets.
👷 How It Works:
- Enter Edit mode on your Dashboard.
- Click on Add widget.
- Under Contact Category, choose any widget.
- Switch to the condition tab.
- Choose Attribution and select the attribution type.
- Click on Add attribution field.
- Choose and configure attribution parameter filters as per your requirements.
- You can add more by clicking on Add attribution field again
- Save your changes.
⭐ Why it Matters:
- Enhanced Understanding: Identify where your contacts are coming from and create detailed, specific widgets for various attribution and UTM properties.
- Lead Source Insights: Build your own interactive lead source widgets on the dashboard and export data for different sources using the CSV export functionality.
- Greater Flexibility: Gain more control over what you see on your widgets, tailoring them to your exact need
📌 Important Notes:
- UTM parameters and fields will only be visible on Table and Granular insights view if Attribution type (First or Latest) is added in widget conditions
- Group/View by properties - Session Source and Medium can only be selected if Attribution type (First or Latest) is added in widget conditions
improved
Documents & Contracts
Documents and Contracts: Support for Today's date & Signer Name toggle
What's new?
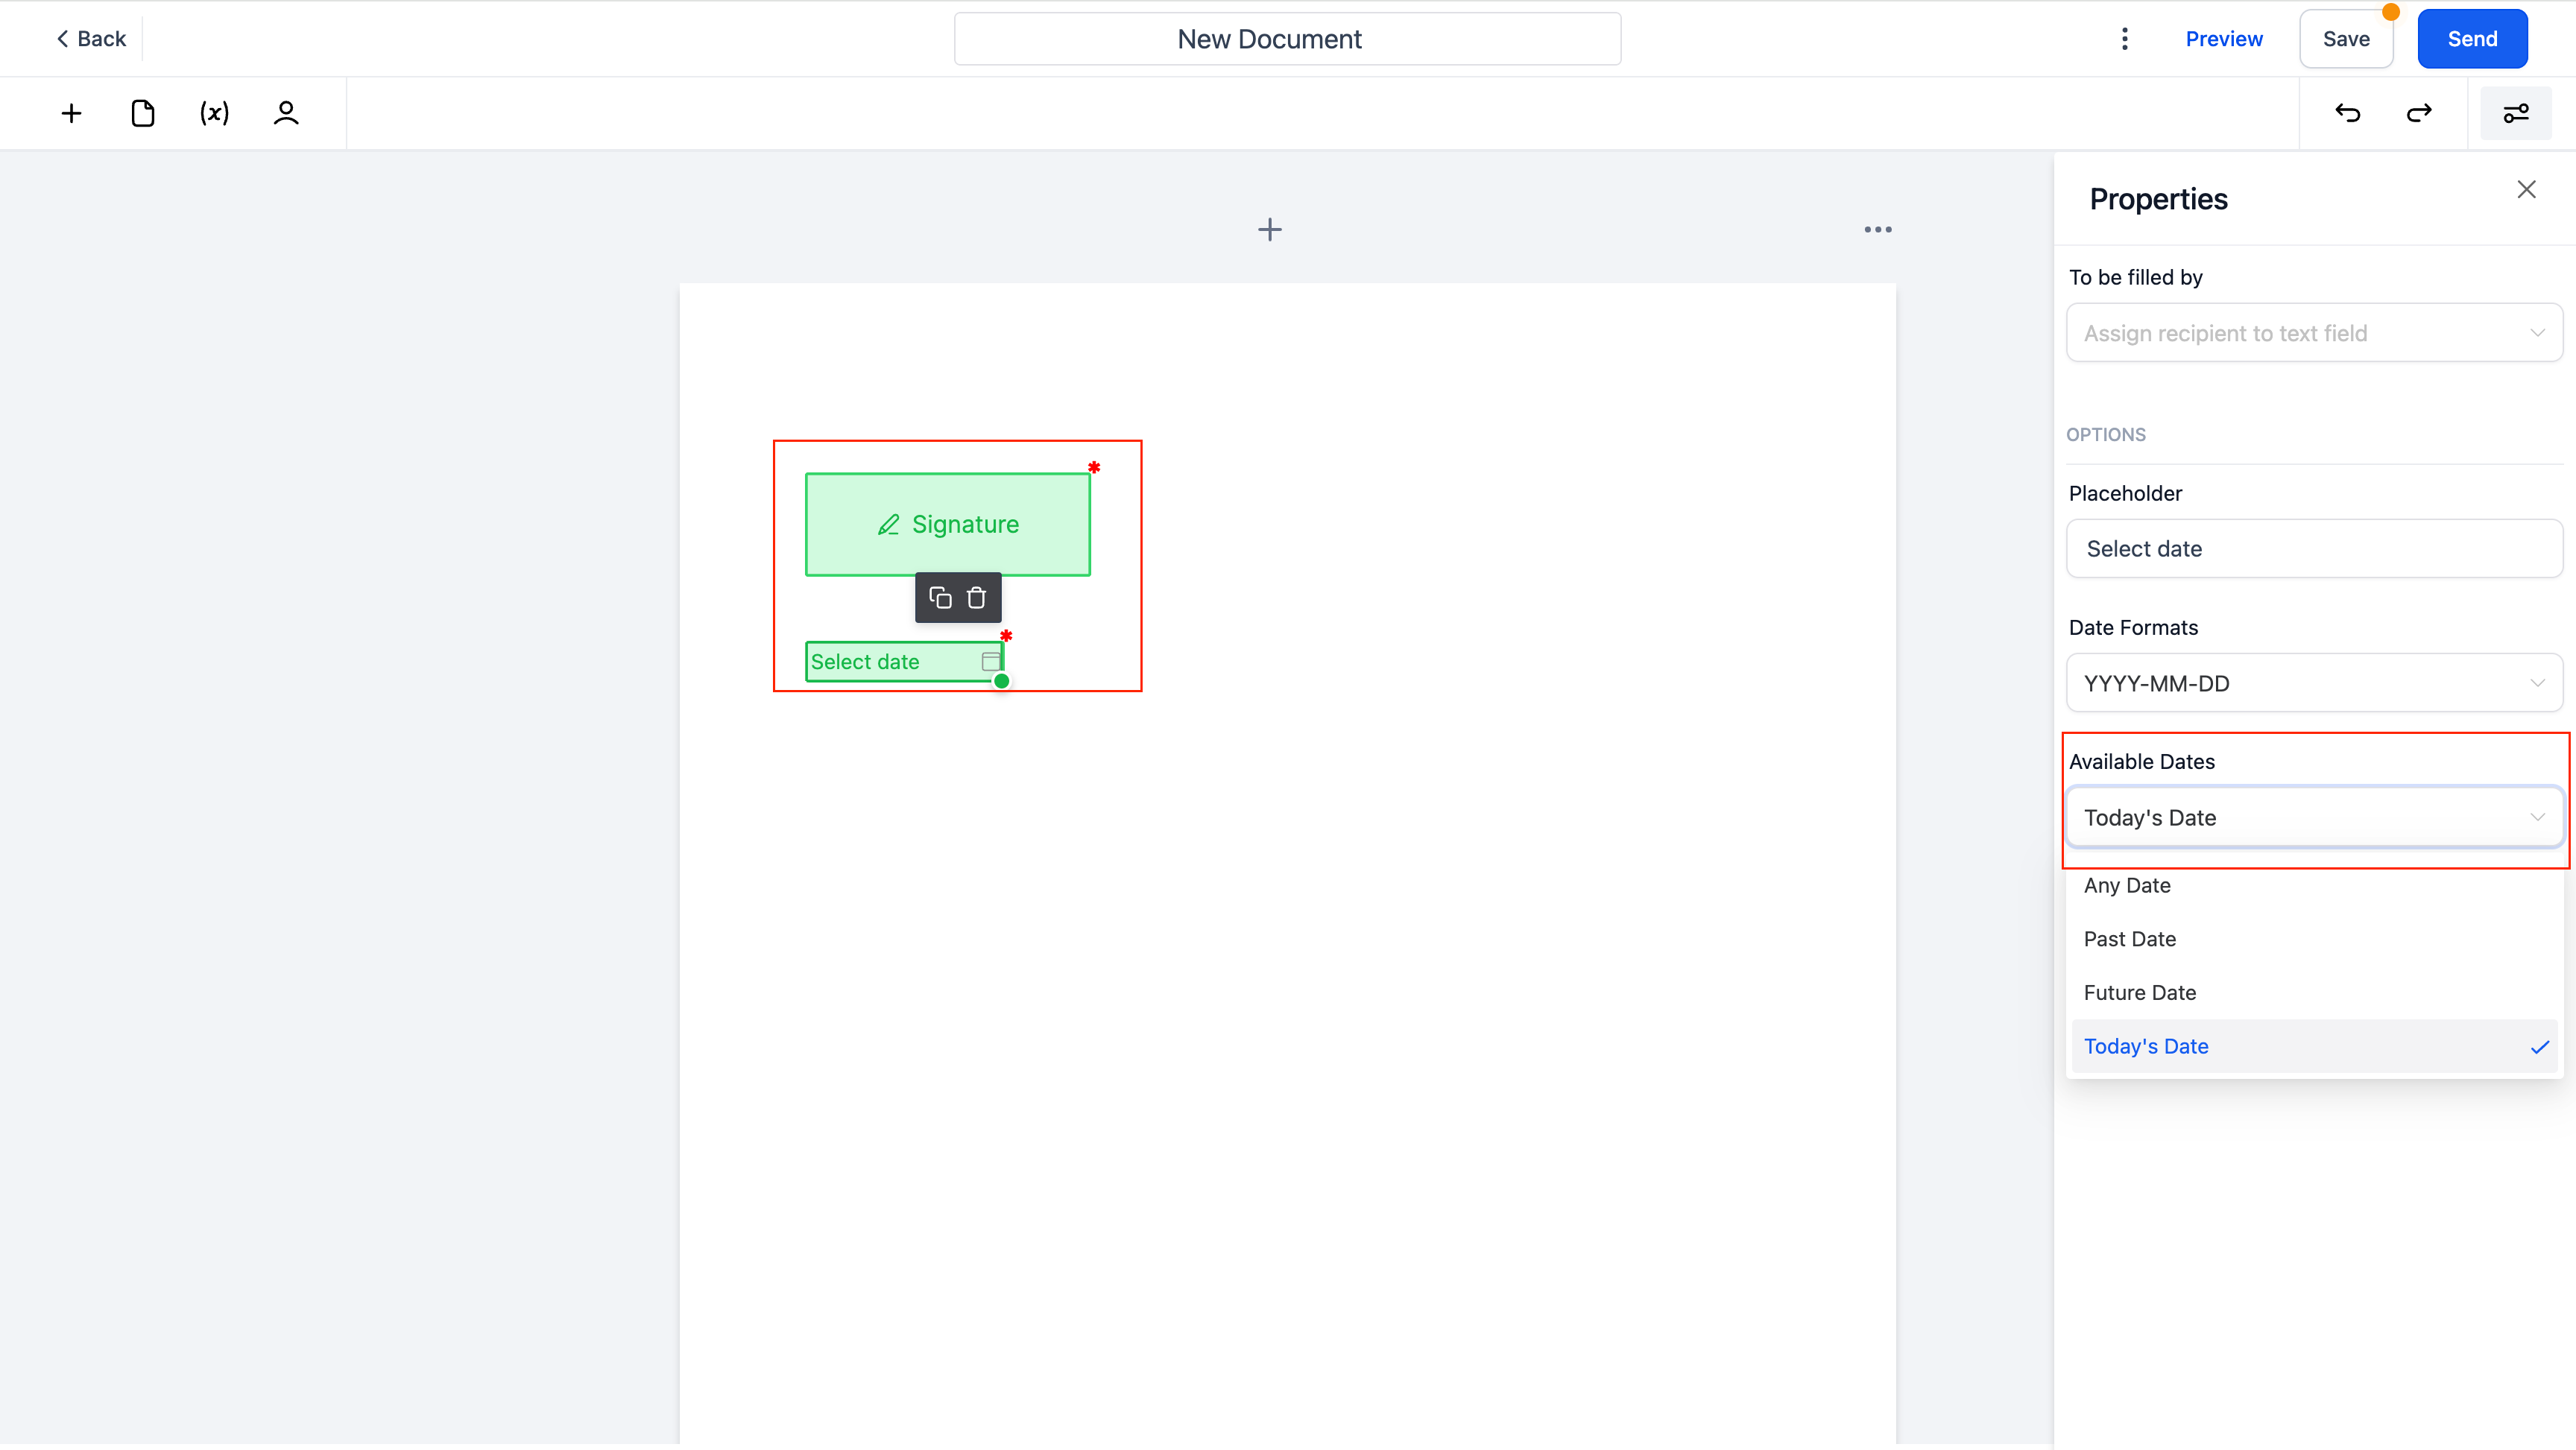
- Add today's date to the date field element which limits the selection of date range for the signer to the day when they are signing the document
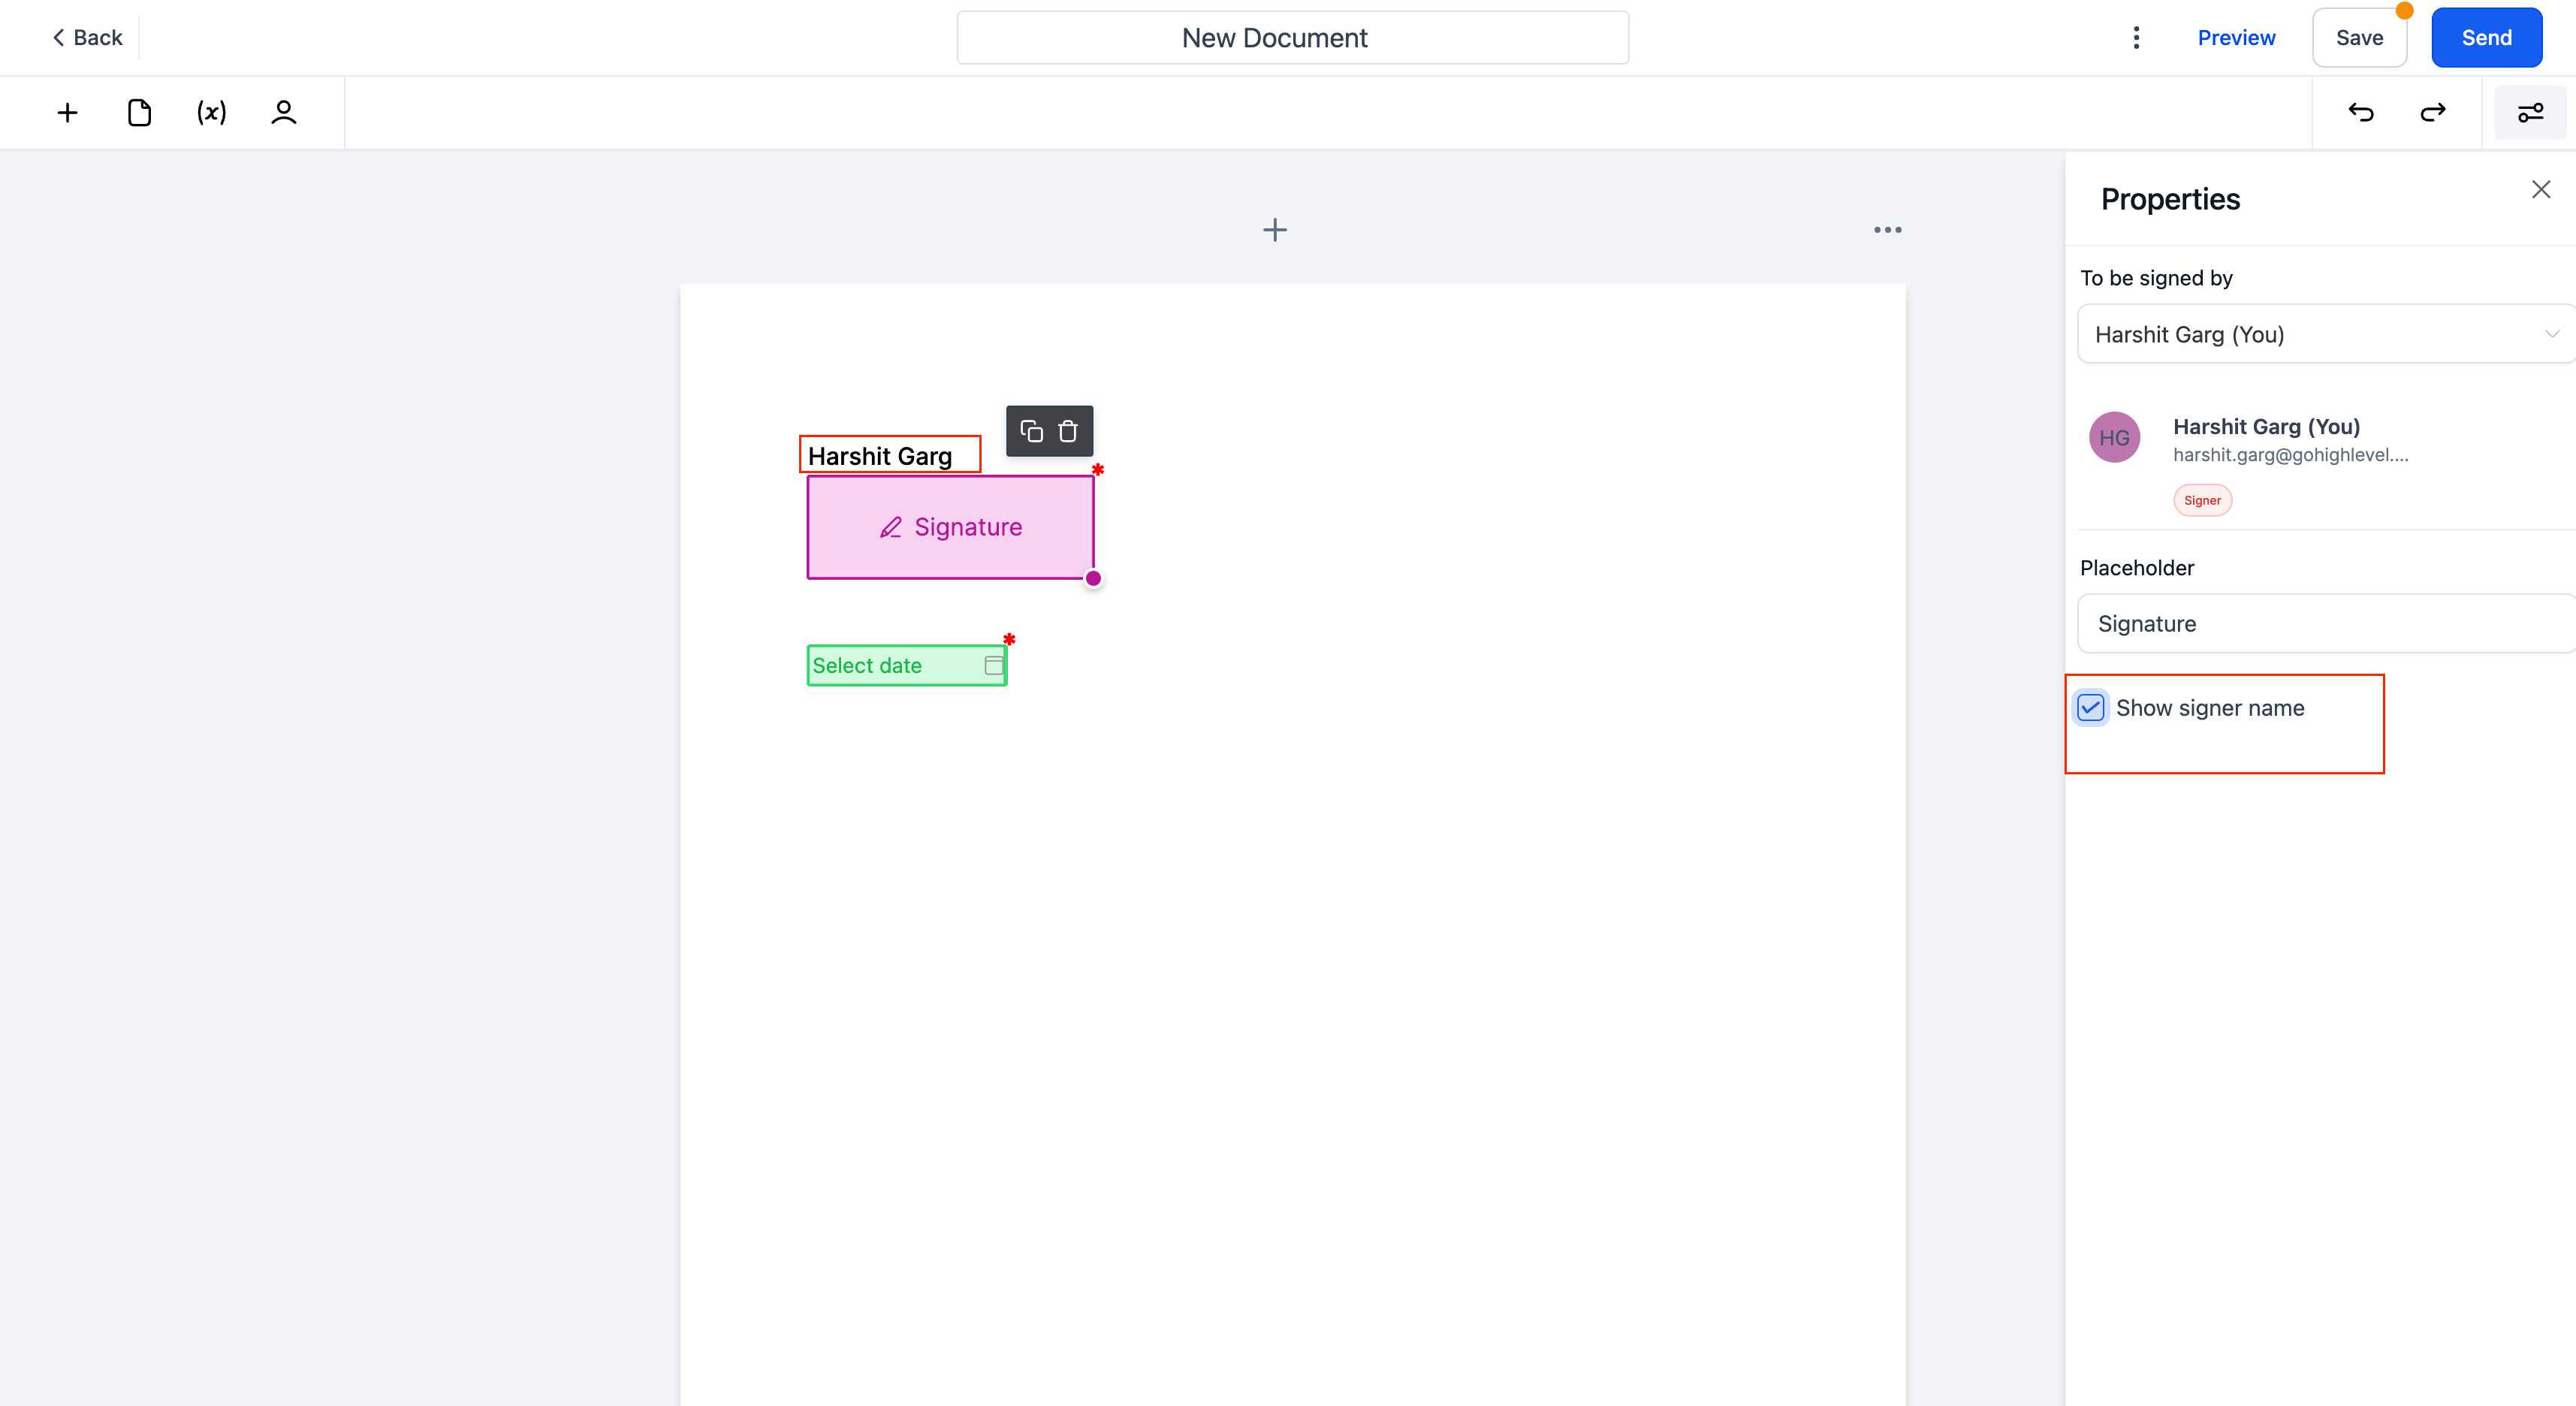
- Earlier, the signer's name was shown by default on top of the signature element in the generated PDF. Now you can control to show the signer name or not
How to use?
- Add a date field element. Go to available dates. Select Today's date as the option
- Add a Signature field. Assign a signer. Enable/disable the checkbox in properties to show the name or not
improved
Dashboard
Sub Account Dashboards: Elements Enhancements
👀 What’s Improved?
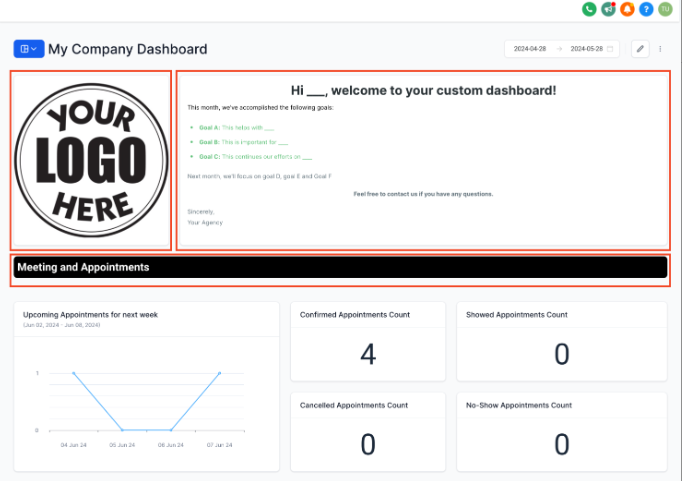
- Title Element:Title elements now have a white background by default instead of a transparent background.
- Image Fit:The default image fit setting is "Contain".
- Image Title:The image title is set to "Hide Title" by default.
👷 How It Works:
- Enter Edit mode on your Dashboard.
- Click on Add widget.
- Switch to the Elements tab.
- Choose from Titles, Textboxes, or Images.
- Configure the elements to suit your needs.
- Save your changes.
improved
Affiliate Manager
Sub Account Affiliate Manager: Fixed Coupon Support
We are thrilled to introduce support for Fixed Coupon Codes for Affiliates!
👀 What’s New?
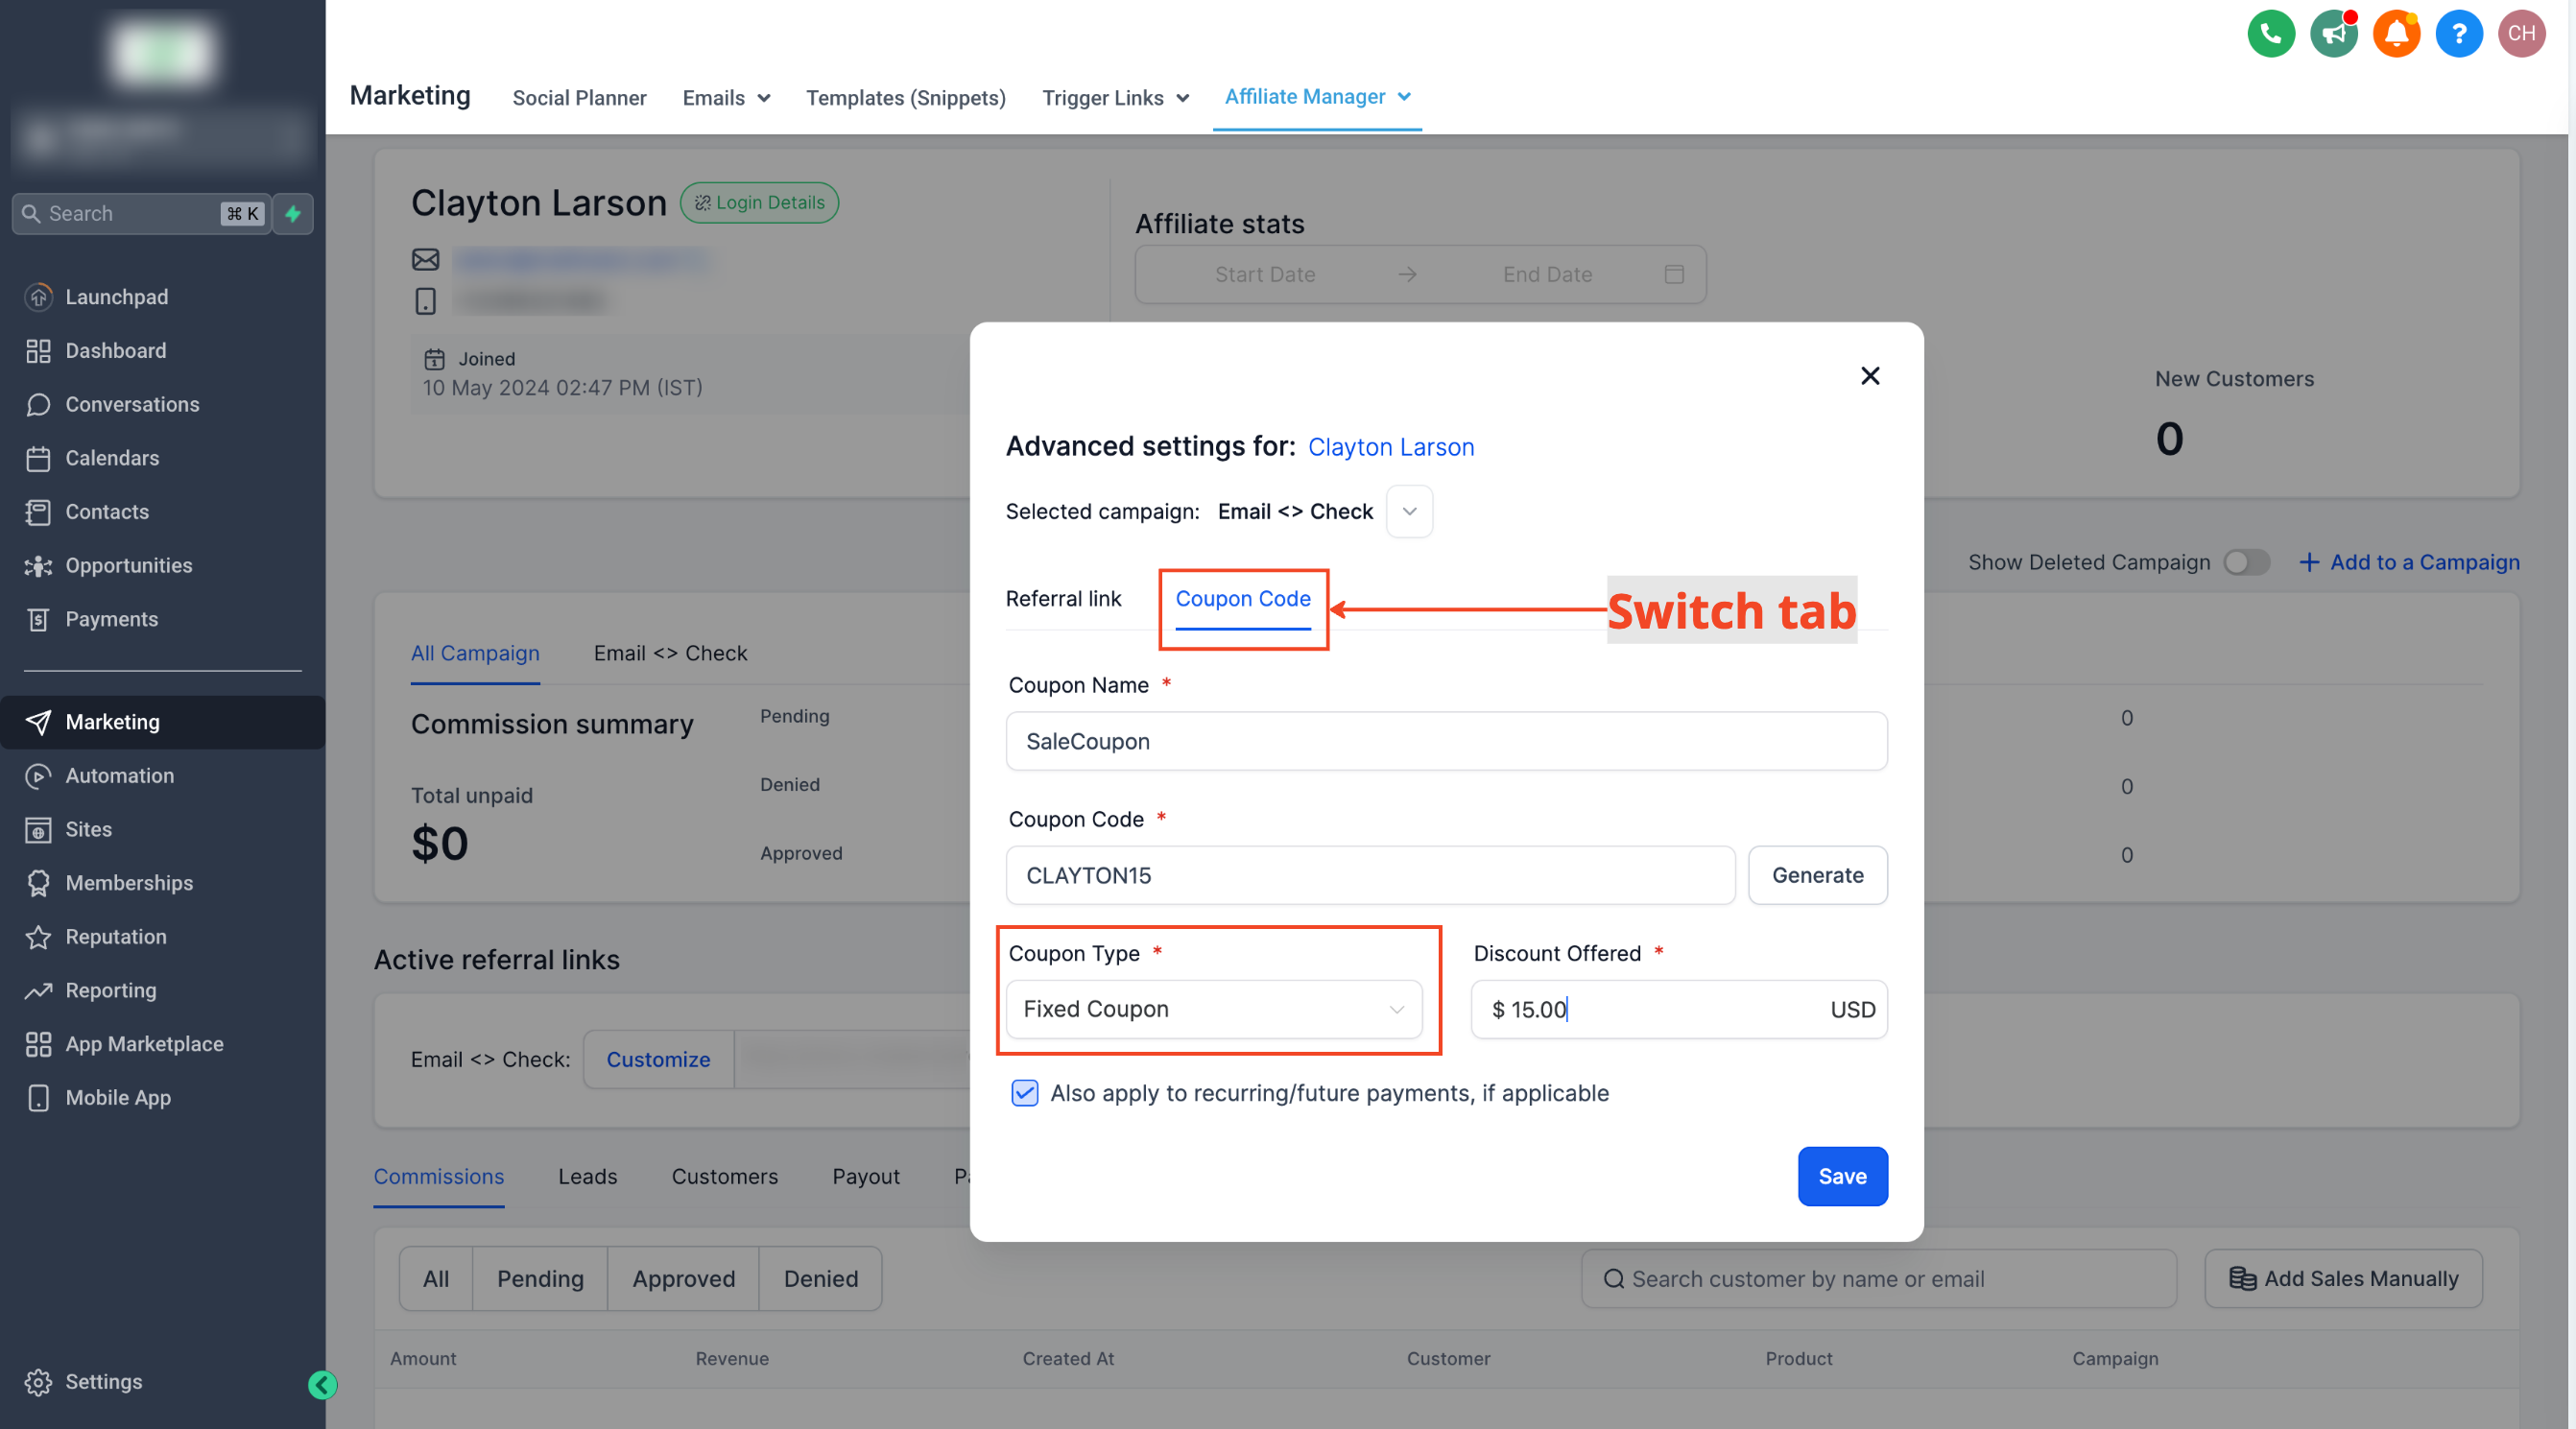
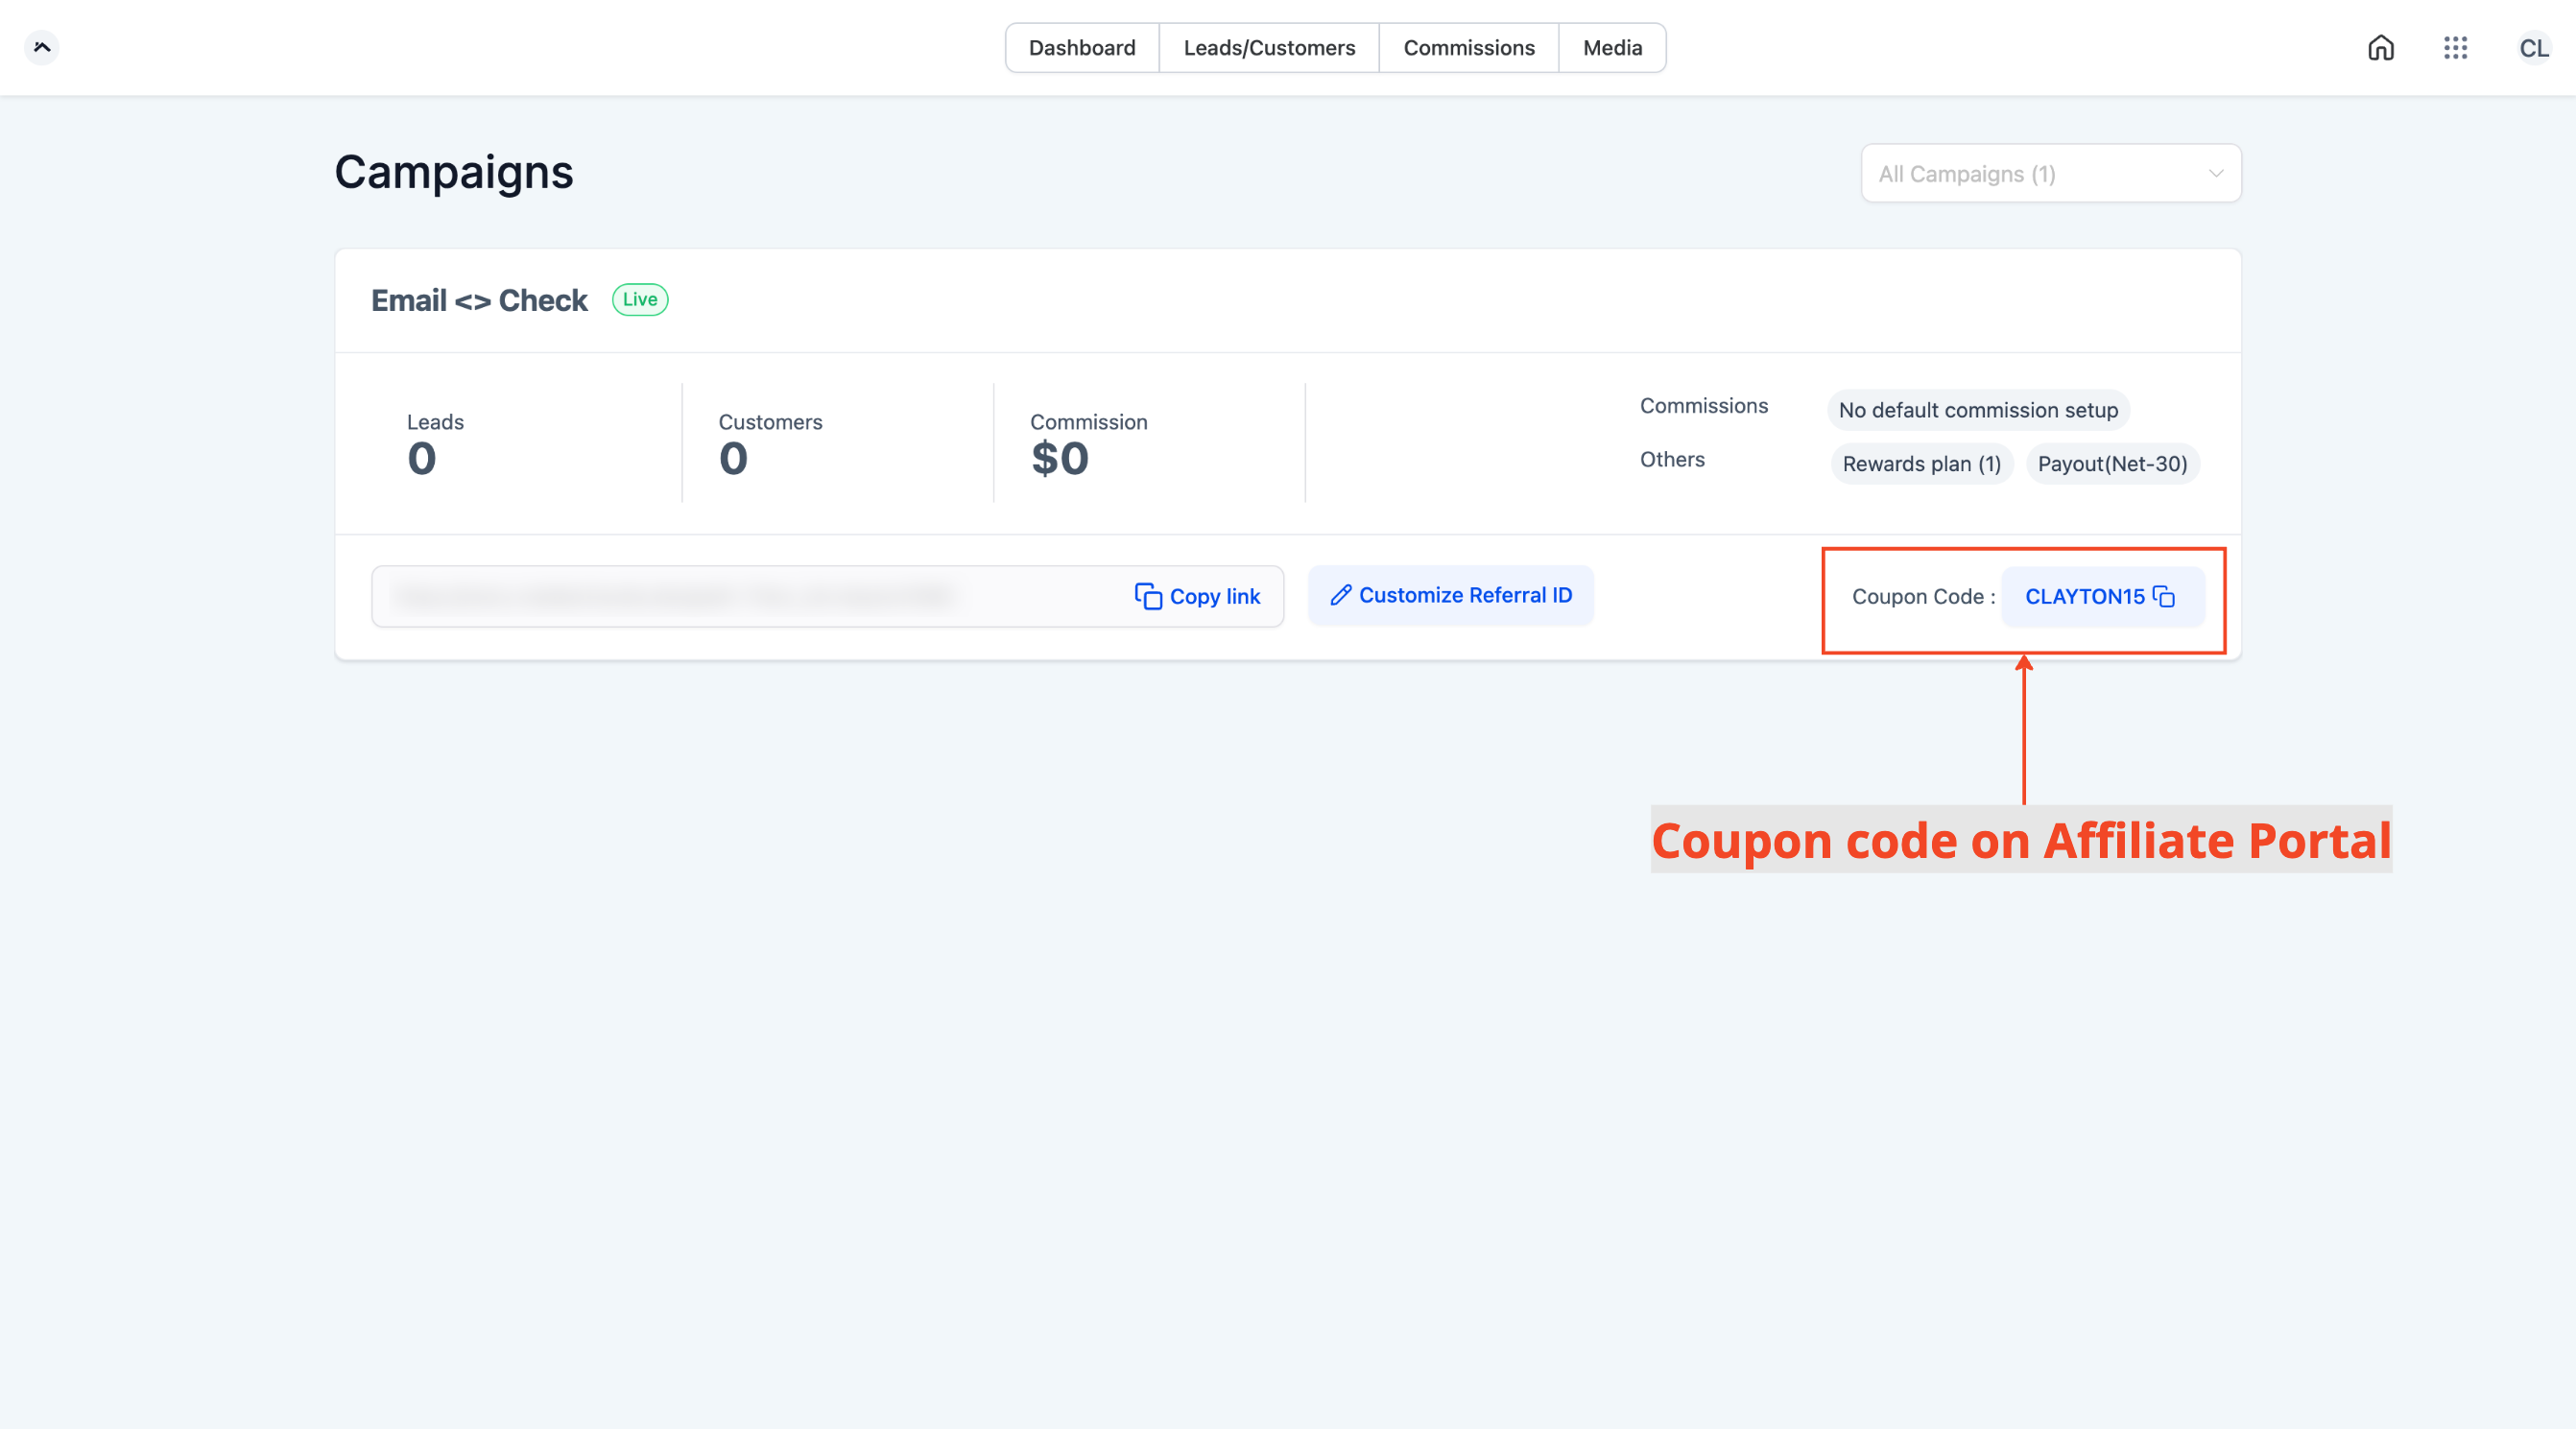
Users can now create coupon codes for affiliates, choosing between Percentage-based or the newly added Fixed coupon codes. Generate or create your own coupons for affiliates, with the option to apply the coupon for future/recurring payments if required.
👷 How It Works:
- Open Sub Account Affiliate Manager.
- Go to the Affiliate Page.
- Find and select the affiliate for whom you want to add the coupon code.
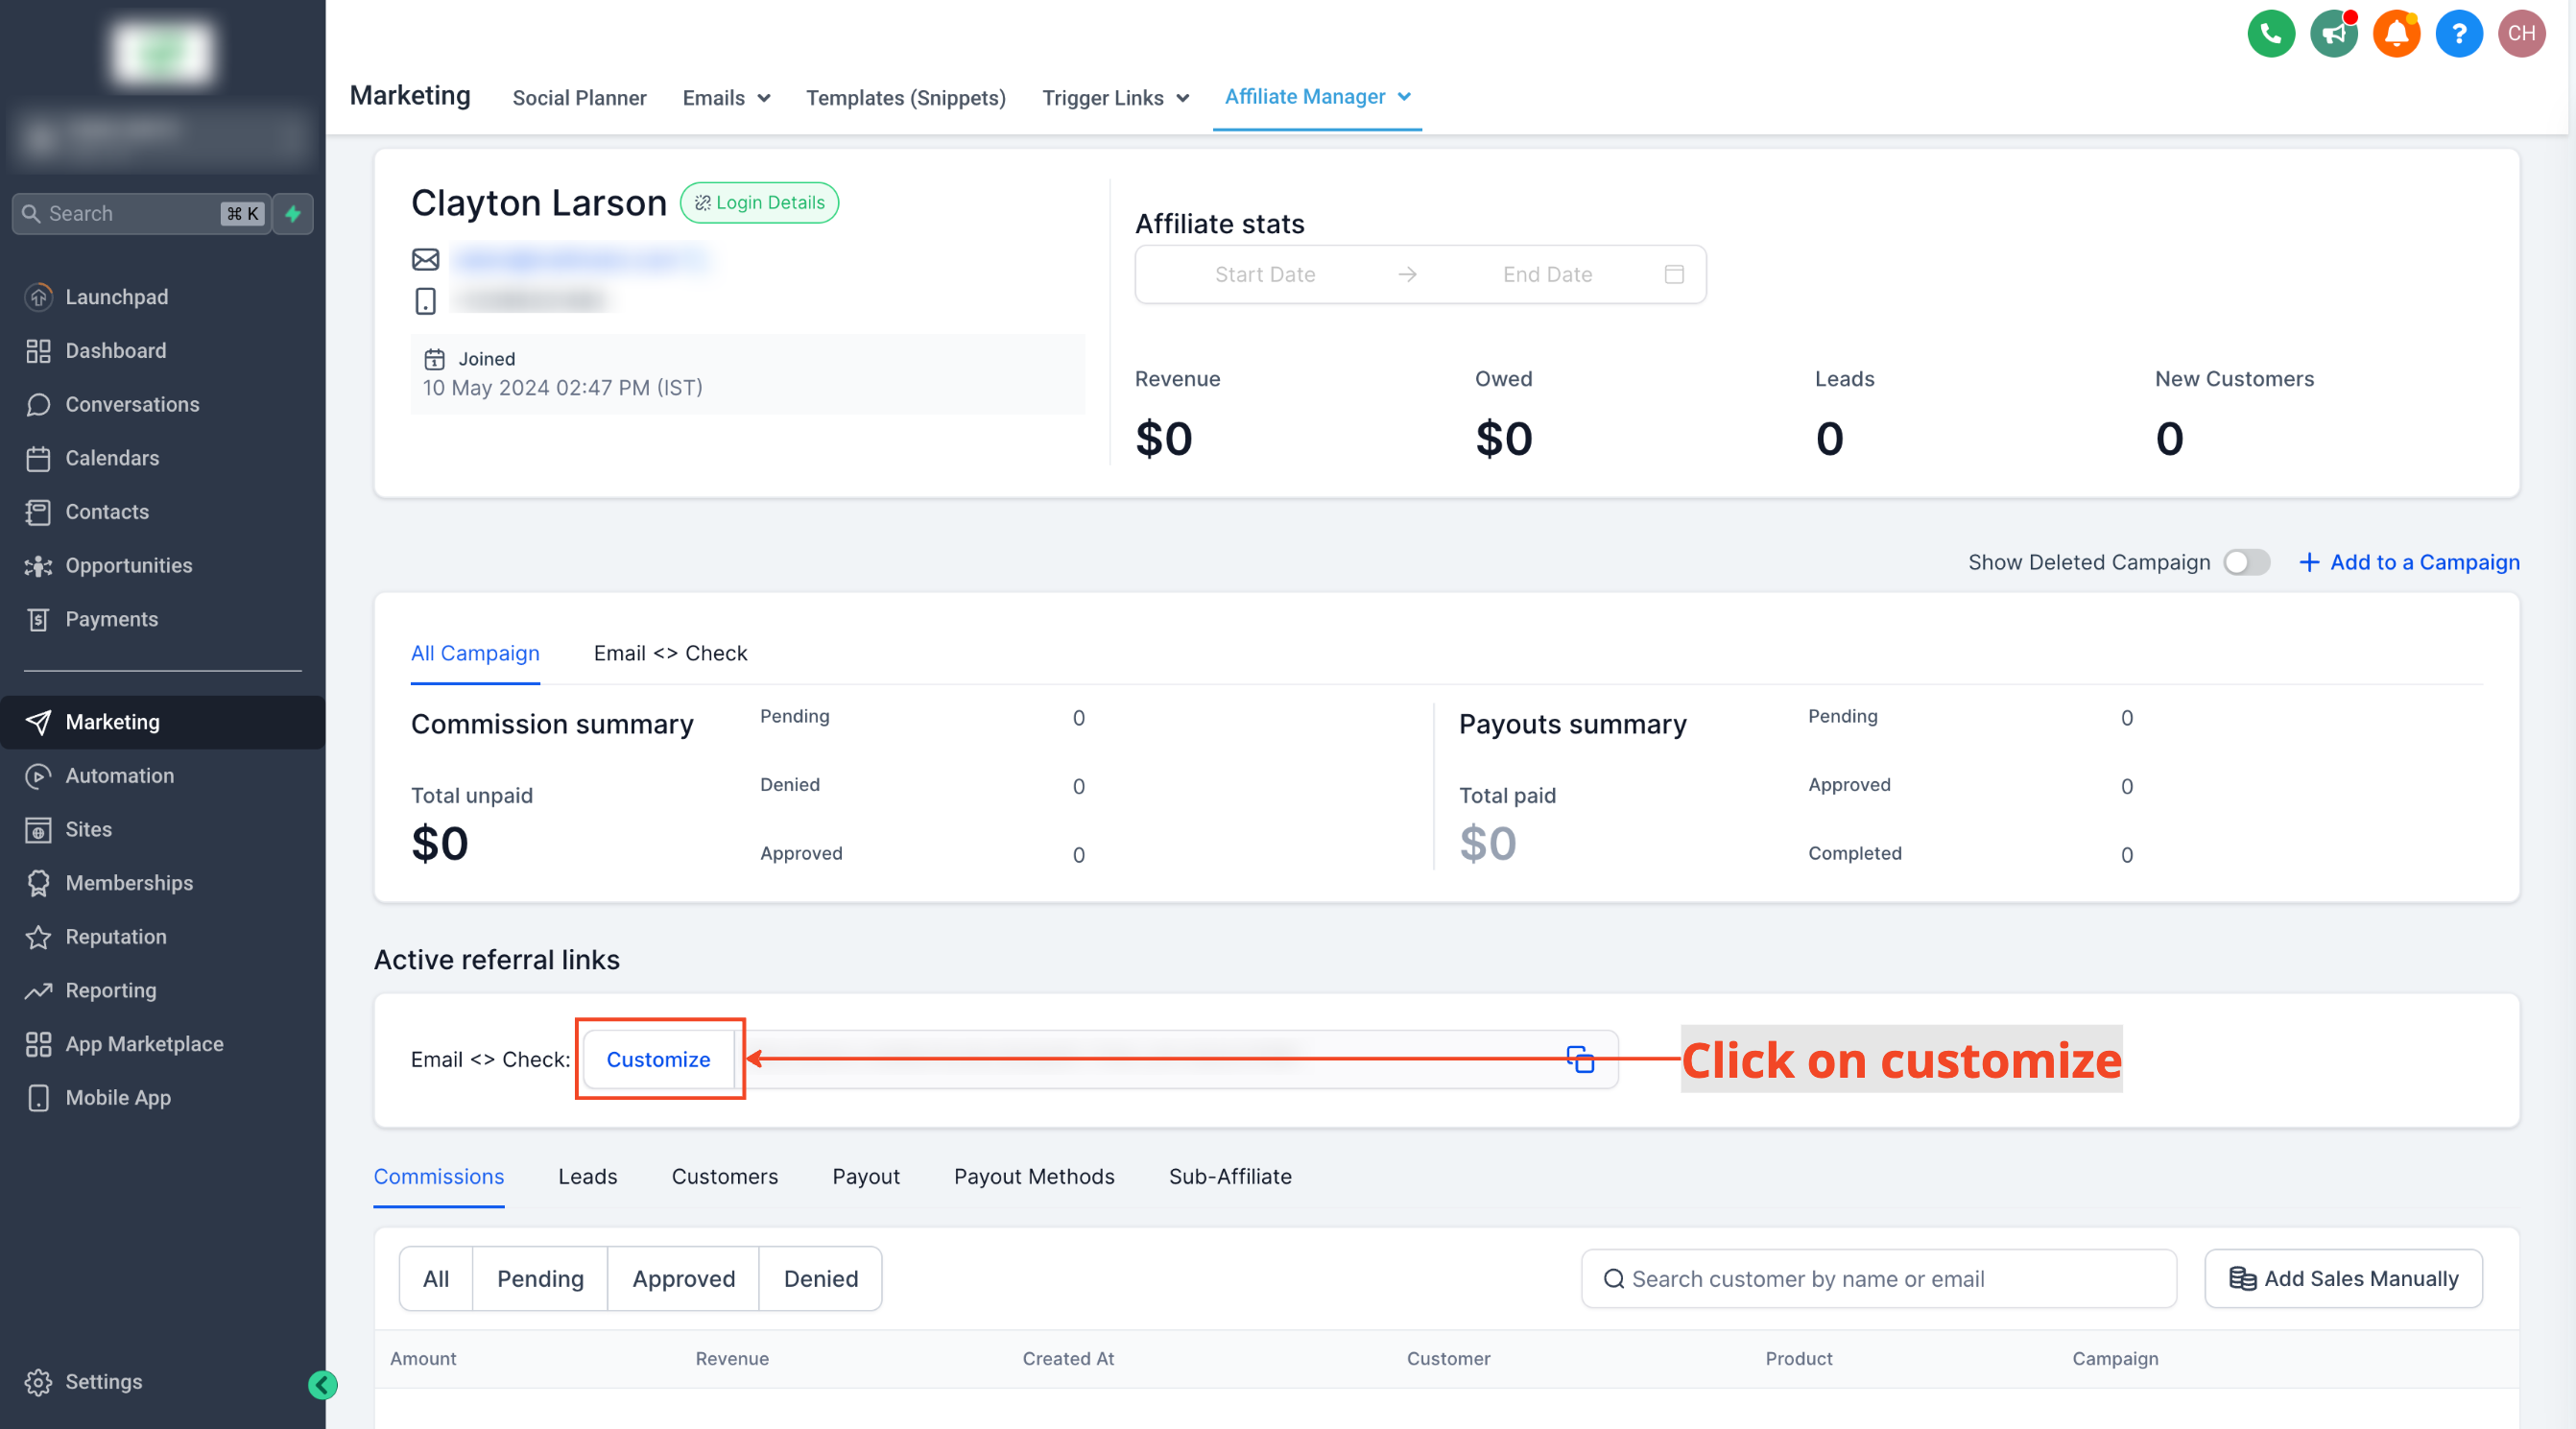
- On the Affiliate Profile page, scroll down to the Active Referral Links tab.
- Click on Customize for the campaign in which you want to create the coupon code.
- In the pop-up window, switch to the Coupon tab.
- Choose the coupon code type - Percentage or Fixed.
- Add the rest of the details.
- Save.
⭐ Why it Matters:
Fixed coupon codes provide a powerful tool for affiliates, offering an additional incentive for customers to make a purchase. By sharing their affiliate URL and a coupon code, affiliates can boost their campaign effectiveness and drive more sales.
📌 Important Note:
- For fixed coupon codes, if the coupon value exceeds the product value, the commission will be 0.
- Coupons created in the Payments tab will continue to function as they currently do.
new
E-Commerce Stores
Shipping & Delivery rates based on States/Province in Ecommerce stores
About
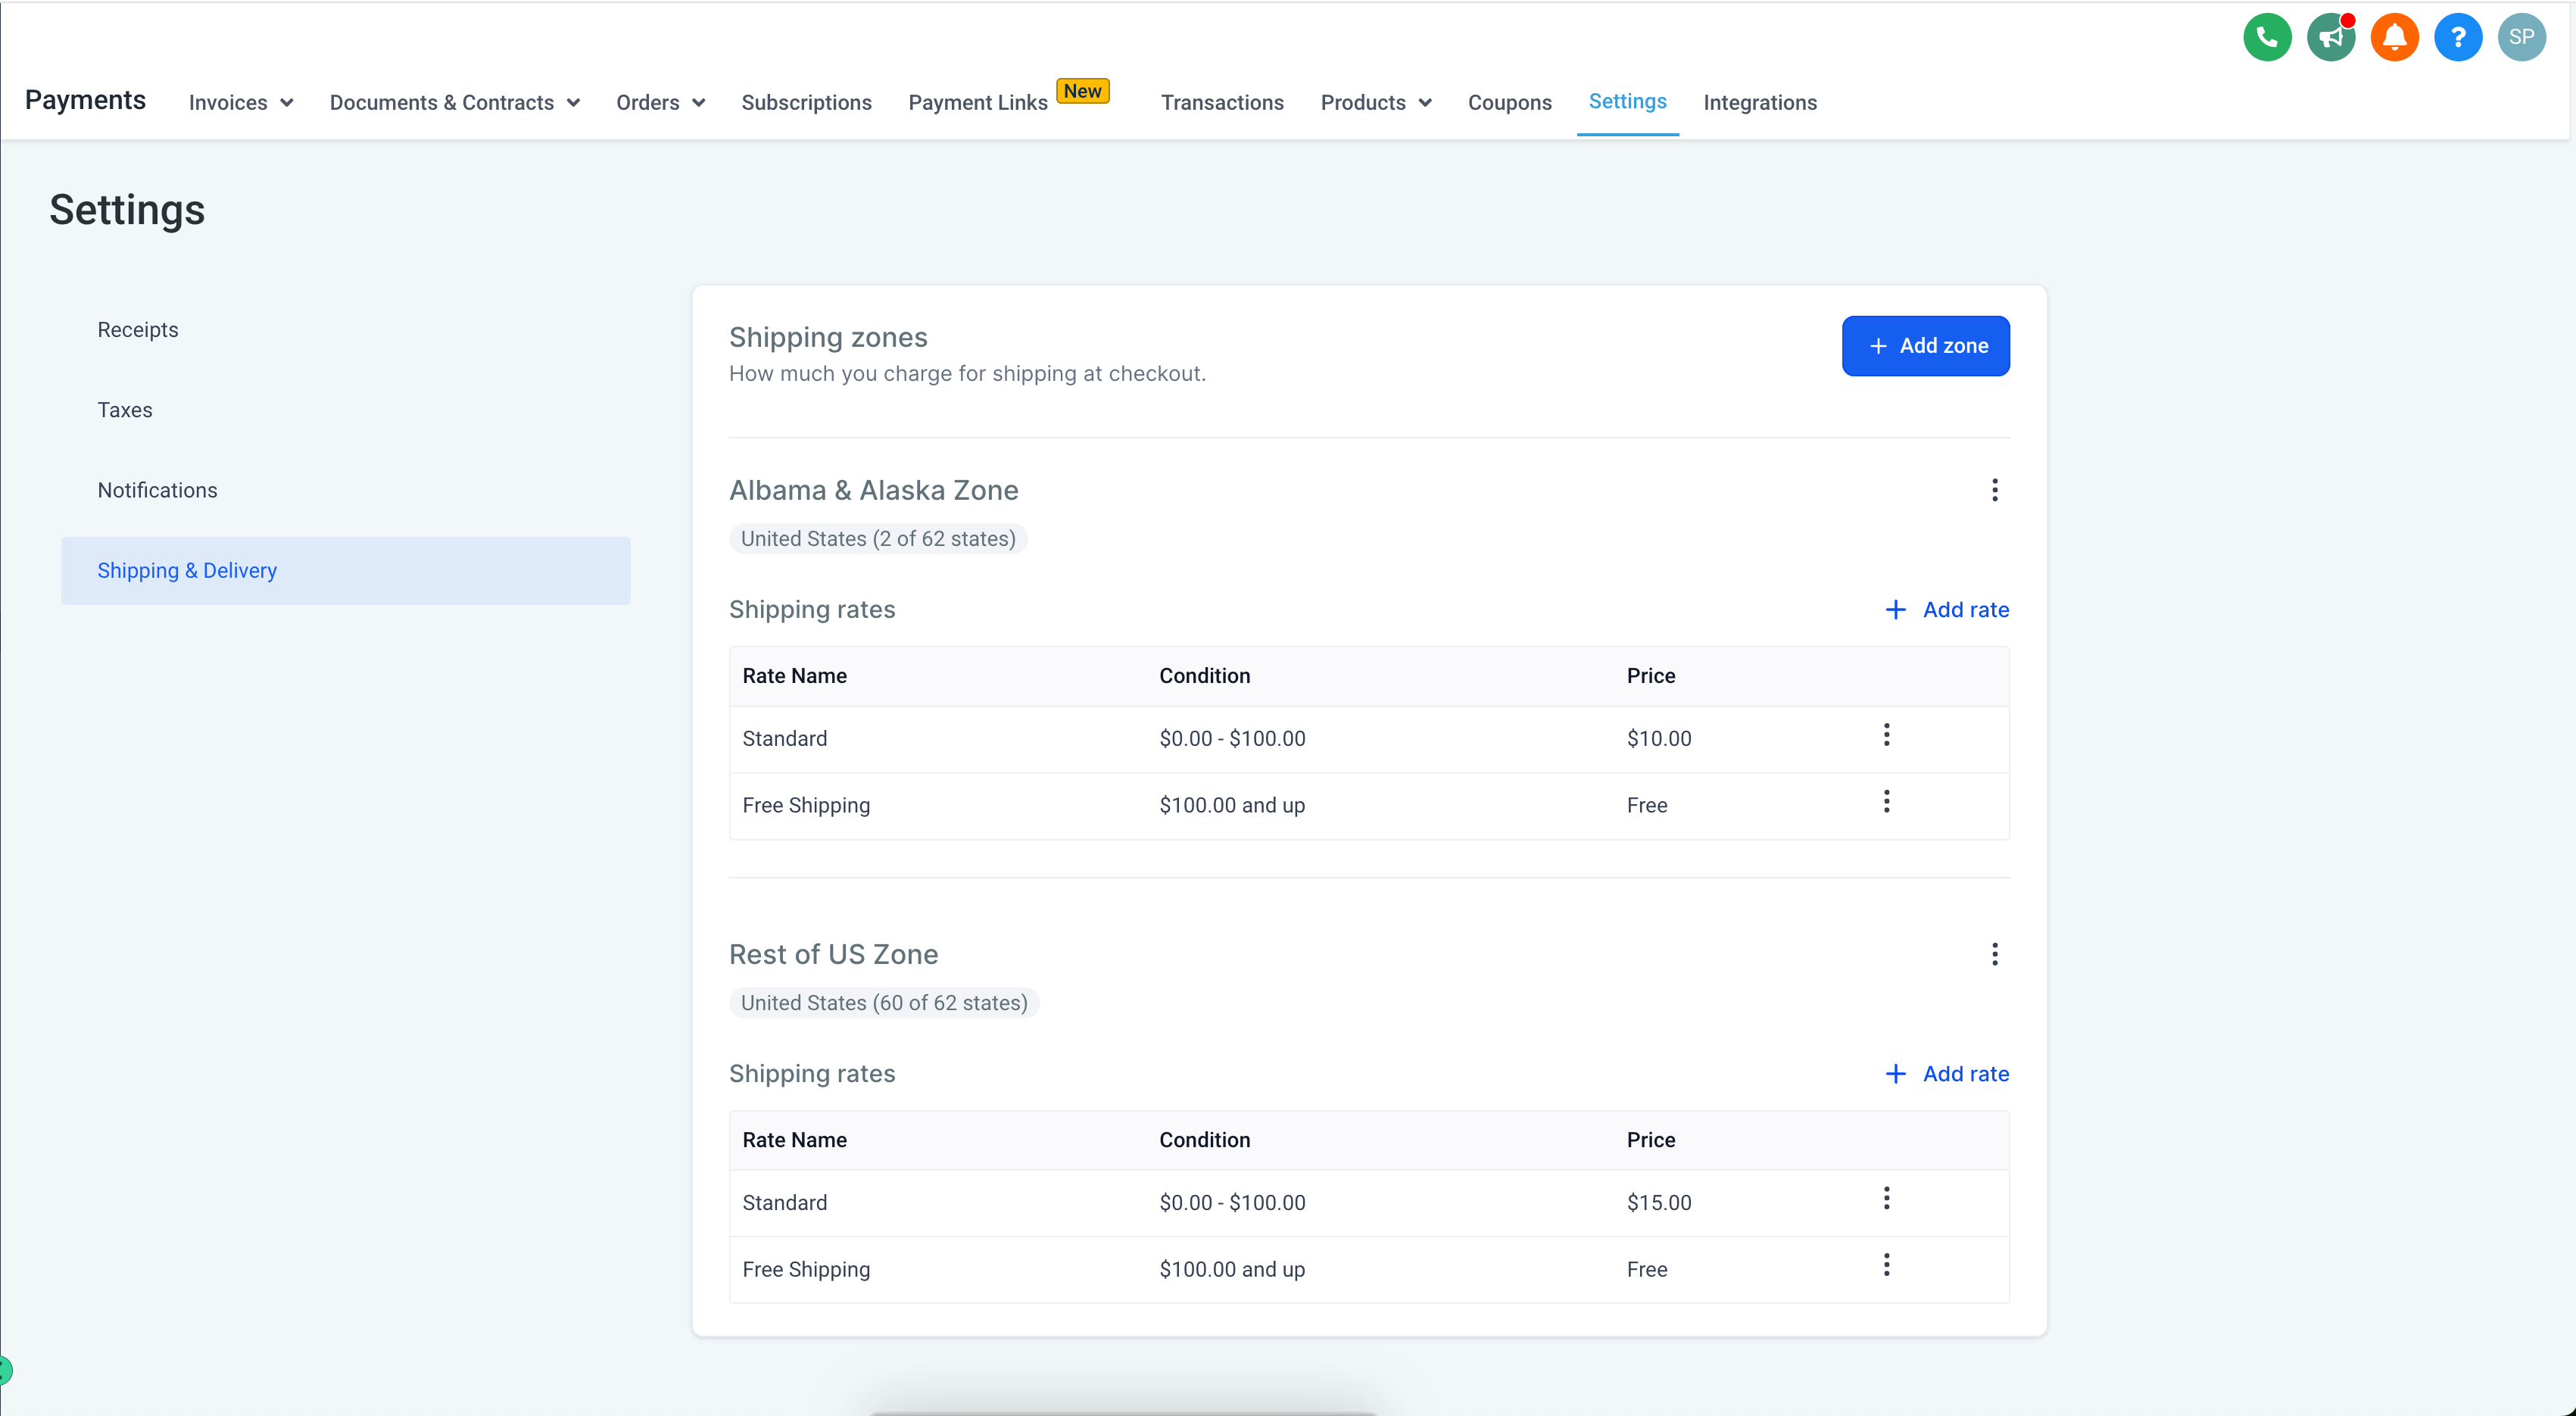
:Store owners who were selling products in a specific states/ provinces only within a country, due to which there was a challenge in setting up Shipping & Delivery charges. With this feature, store owners can now define shipping & delivery charges for selected states/ province within a country.
How to use:
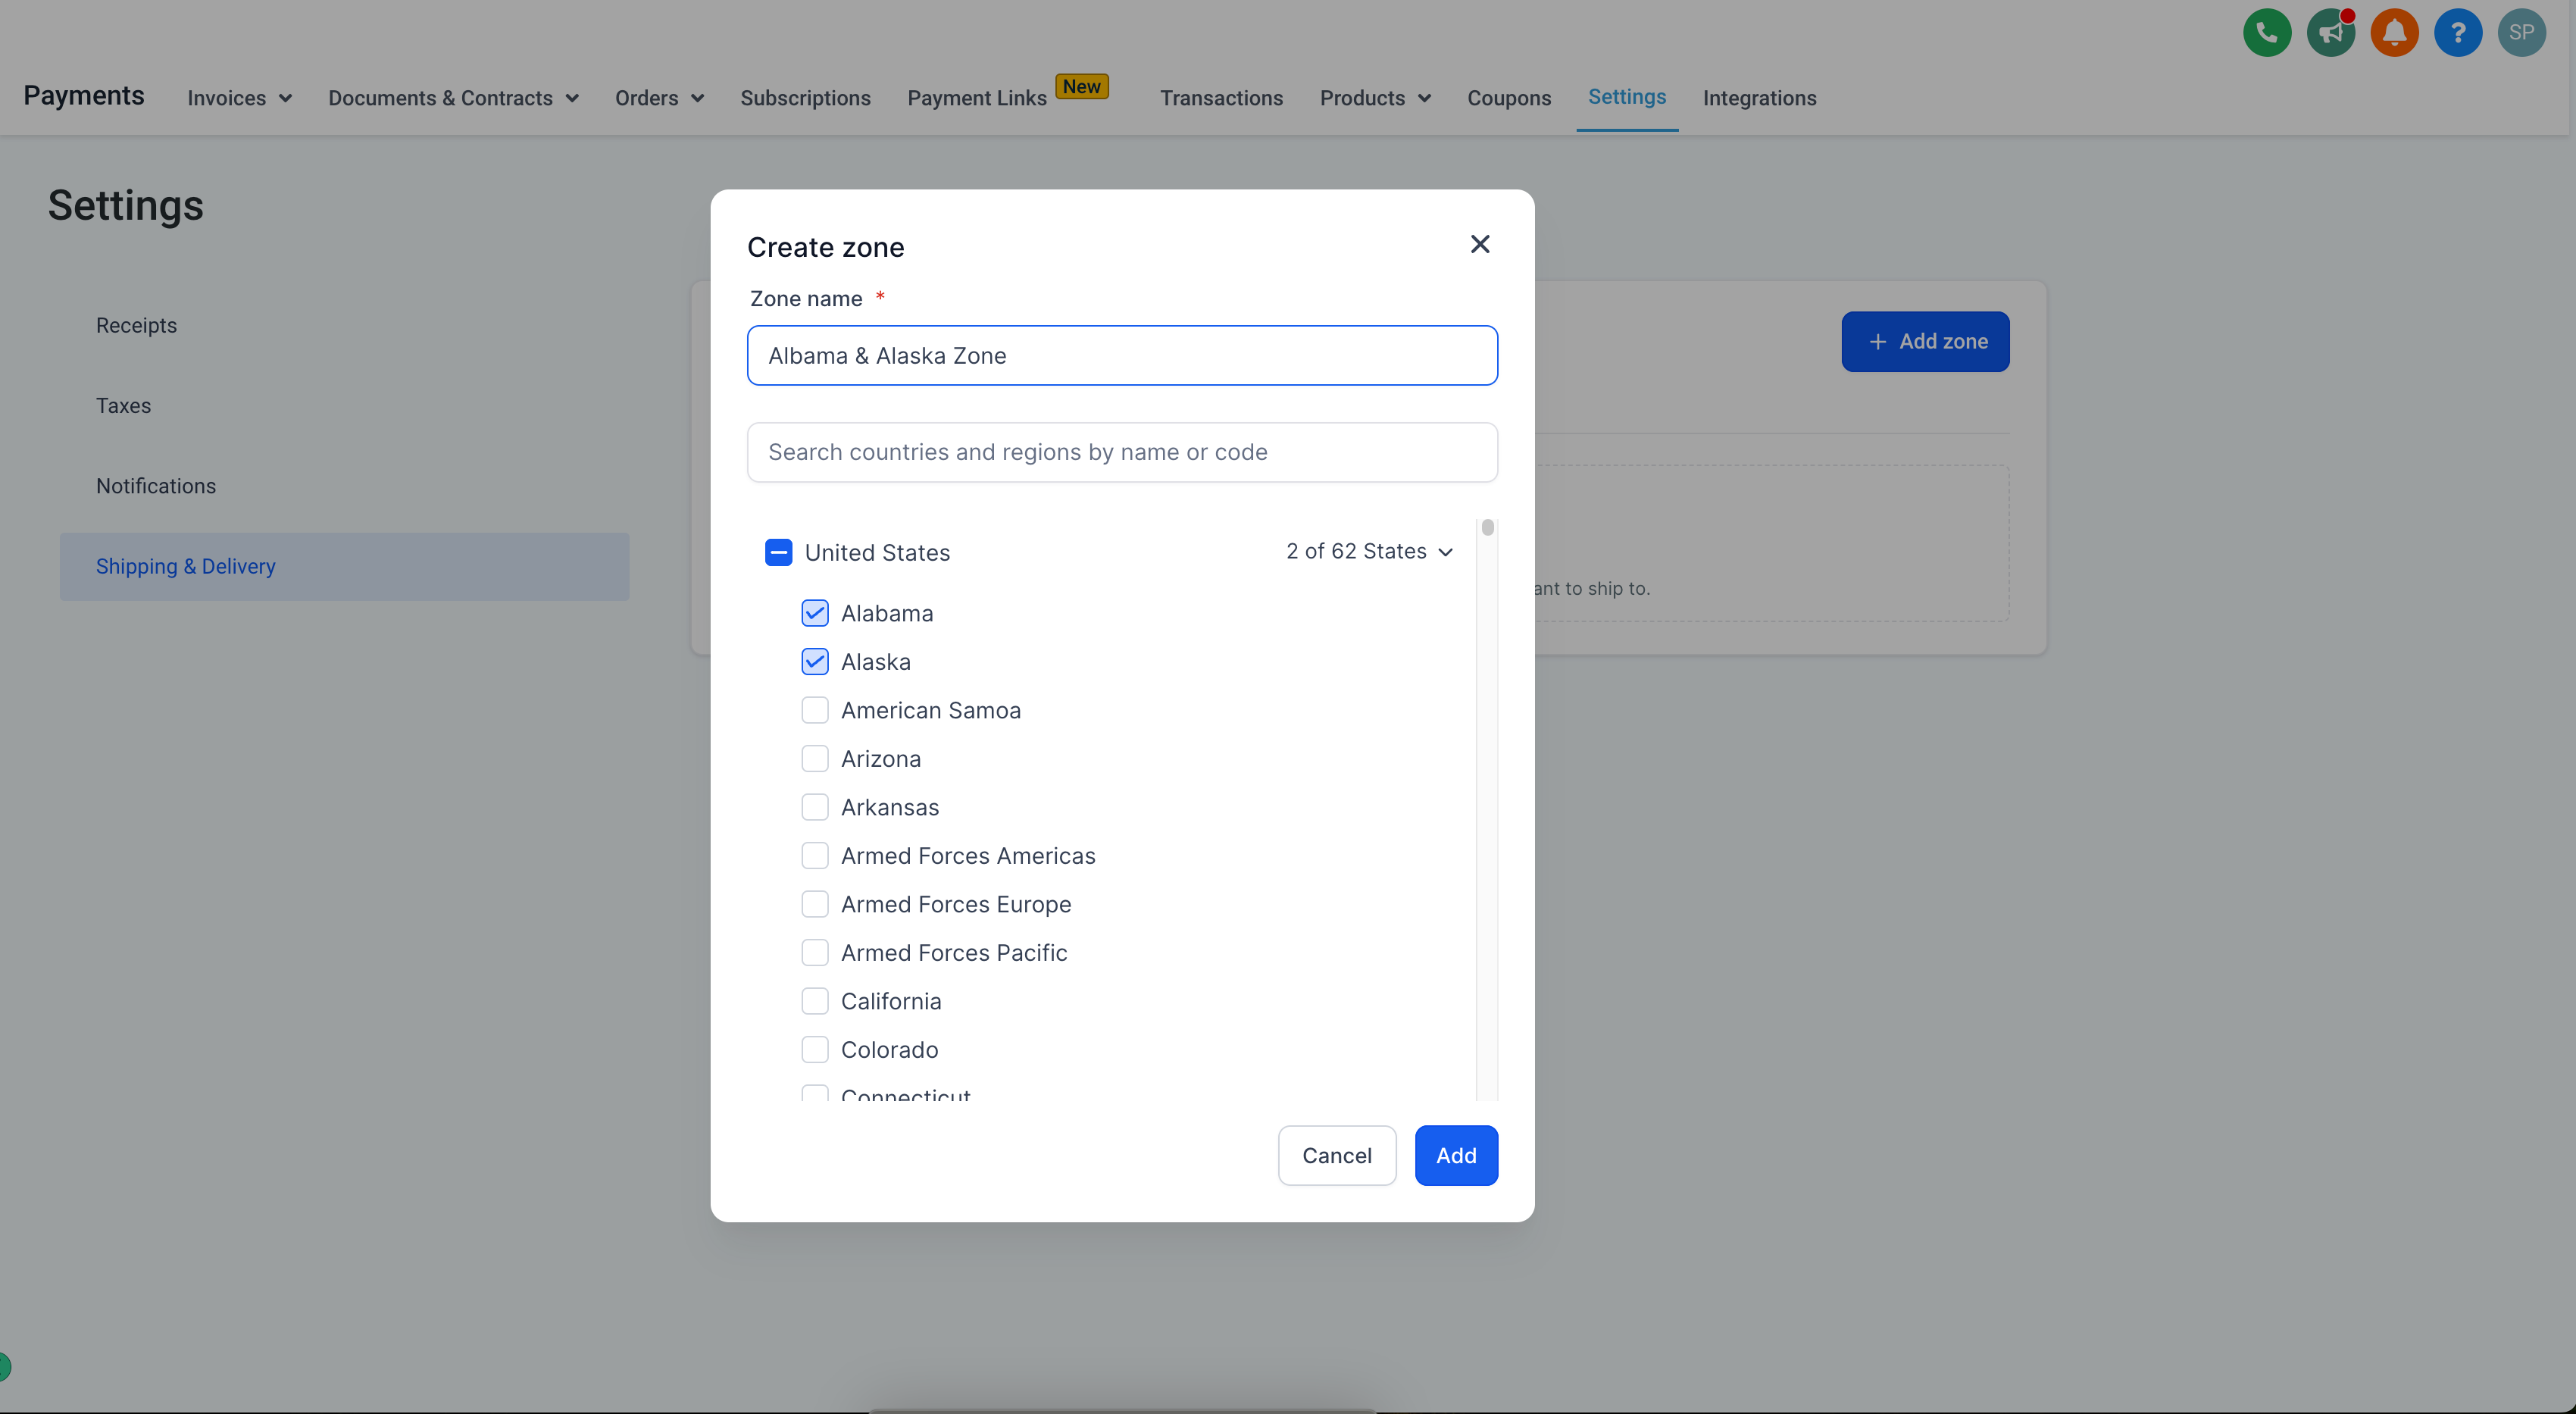
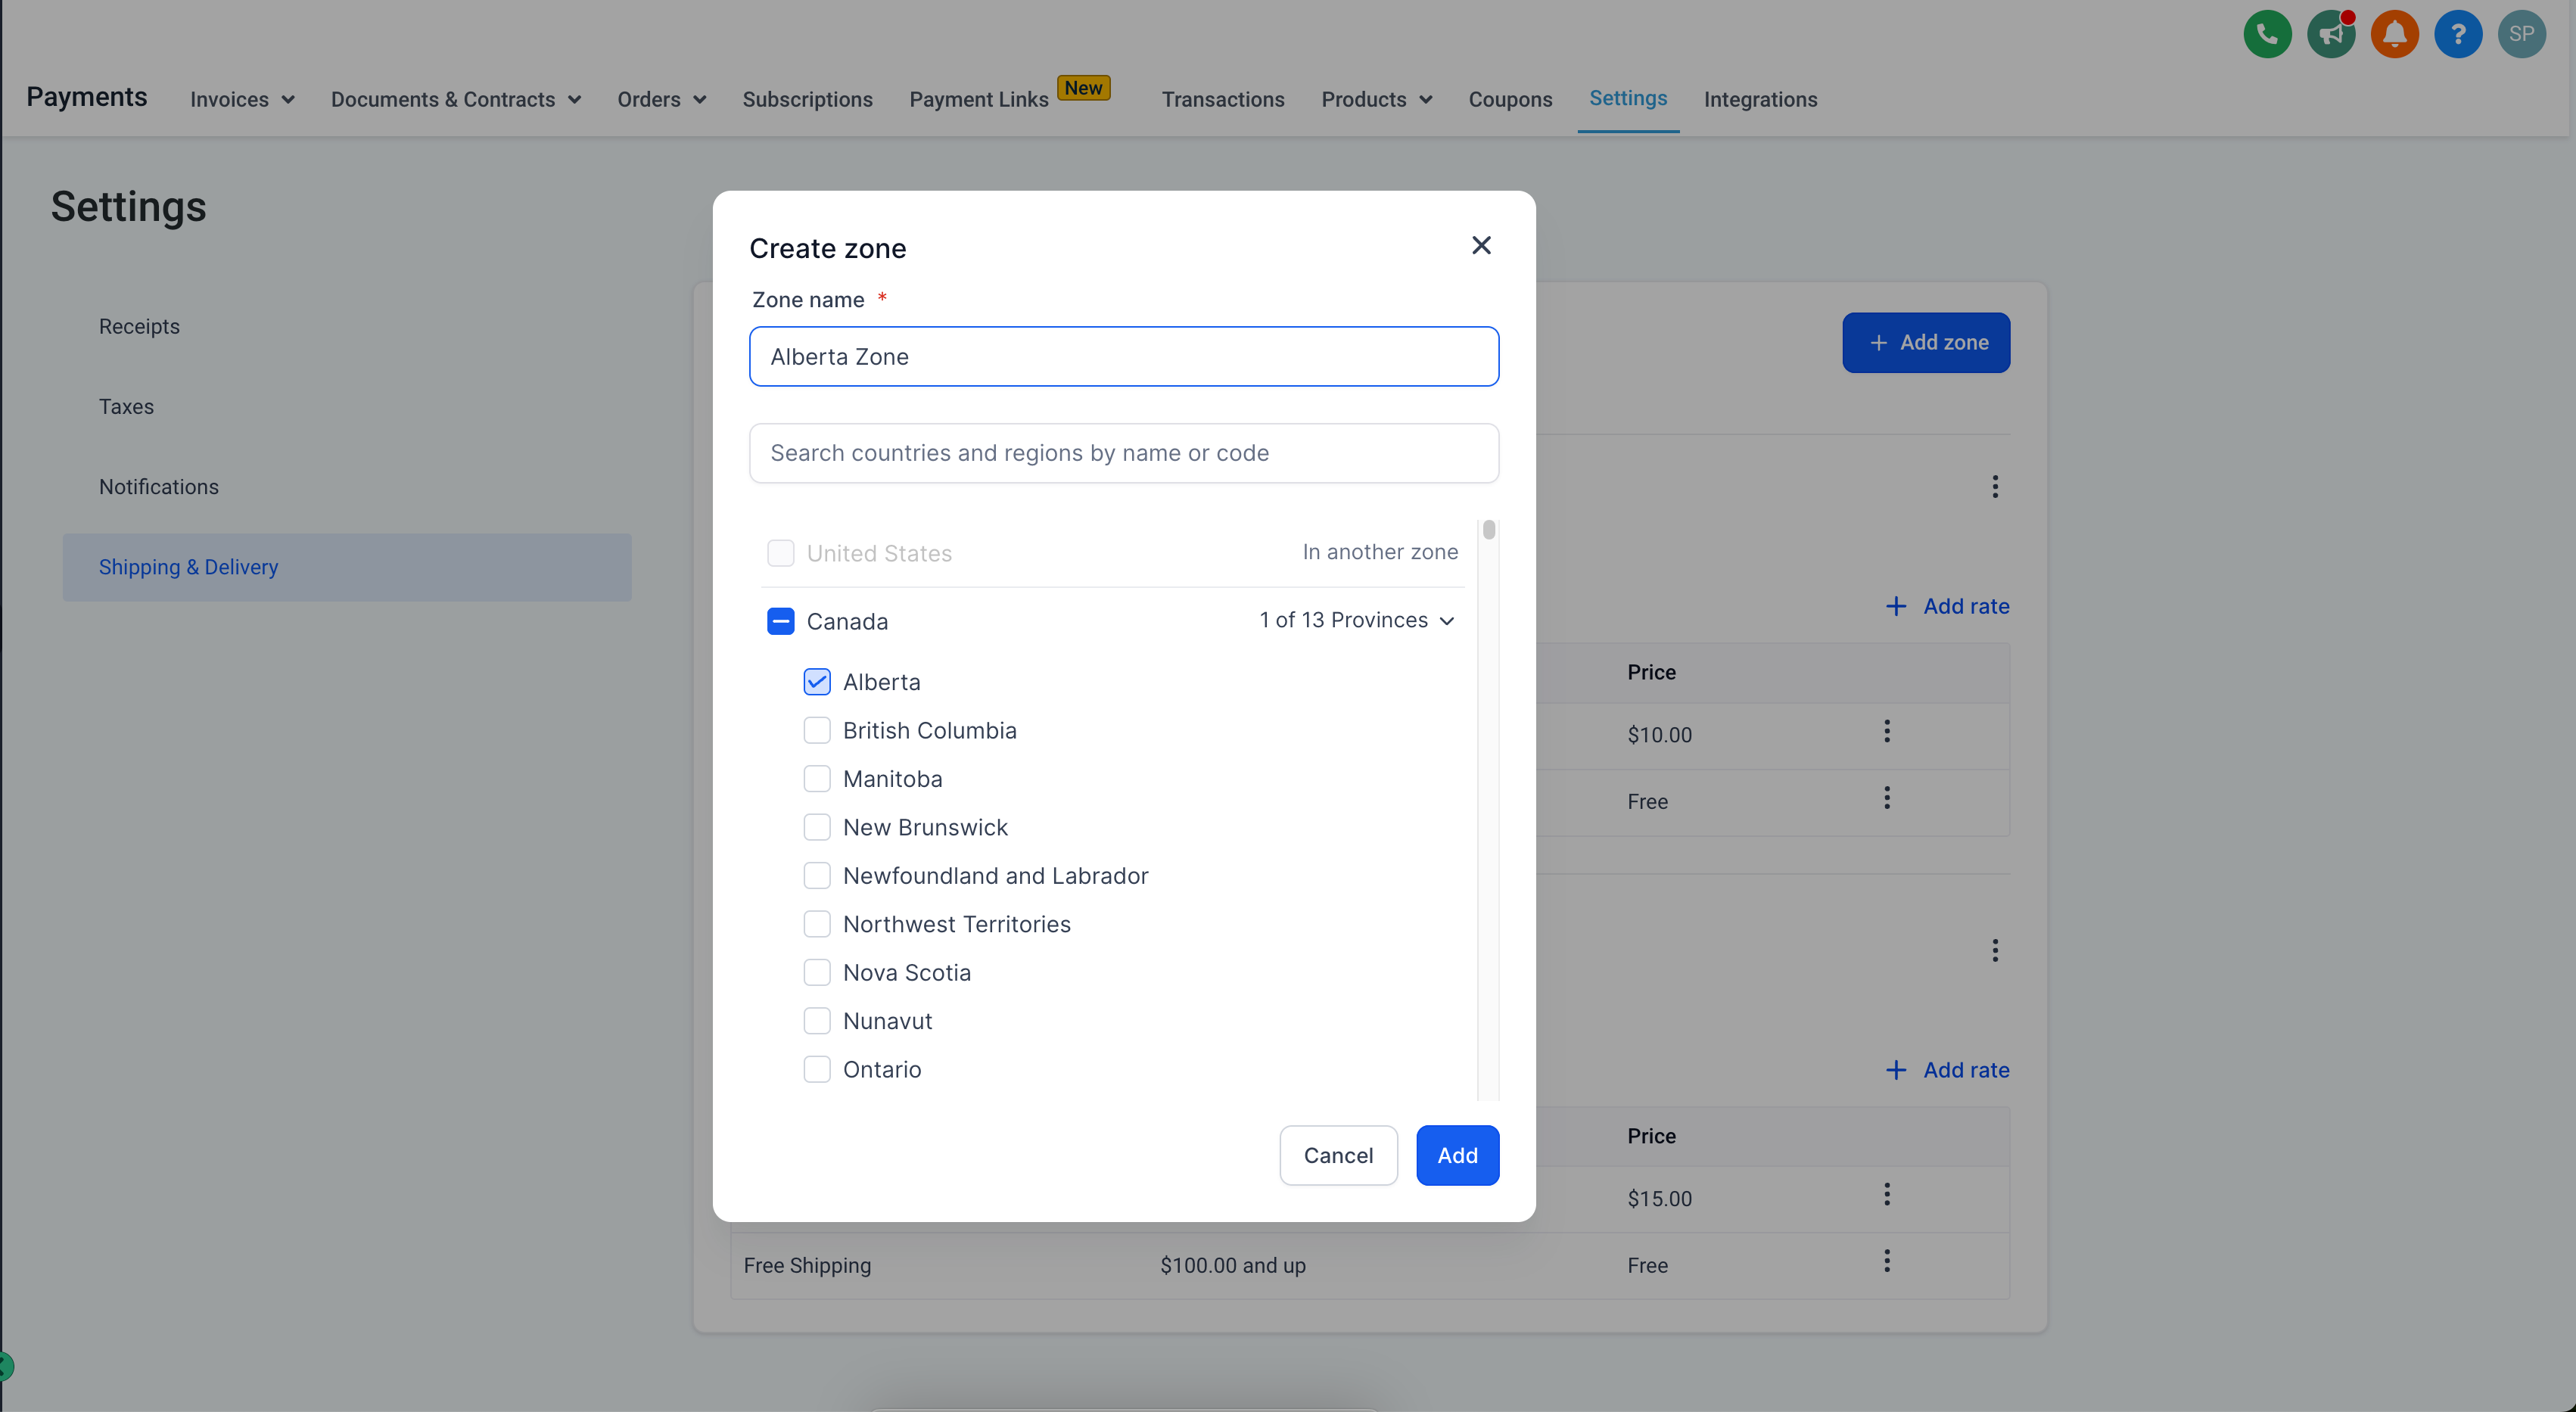
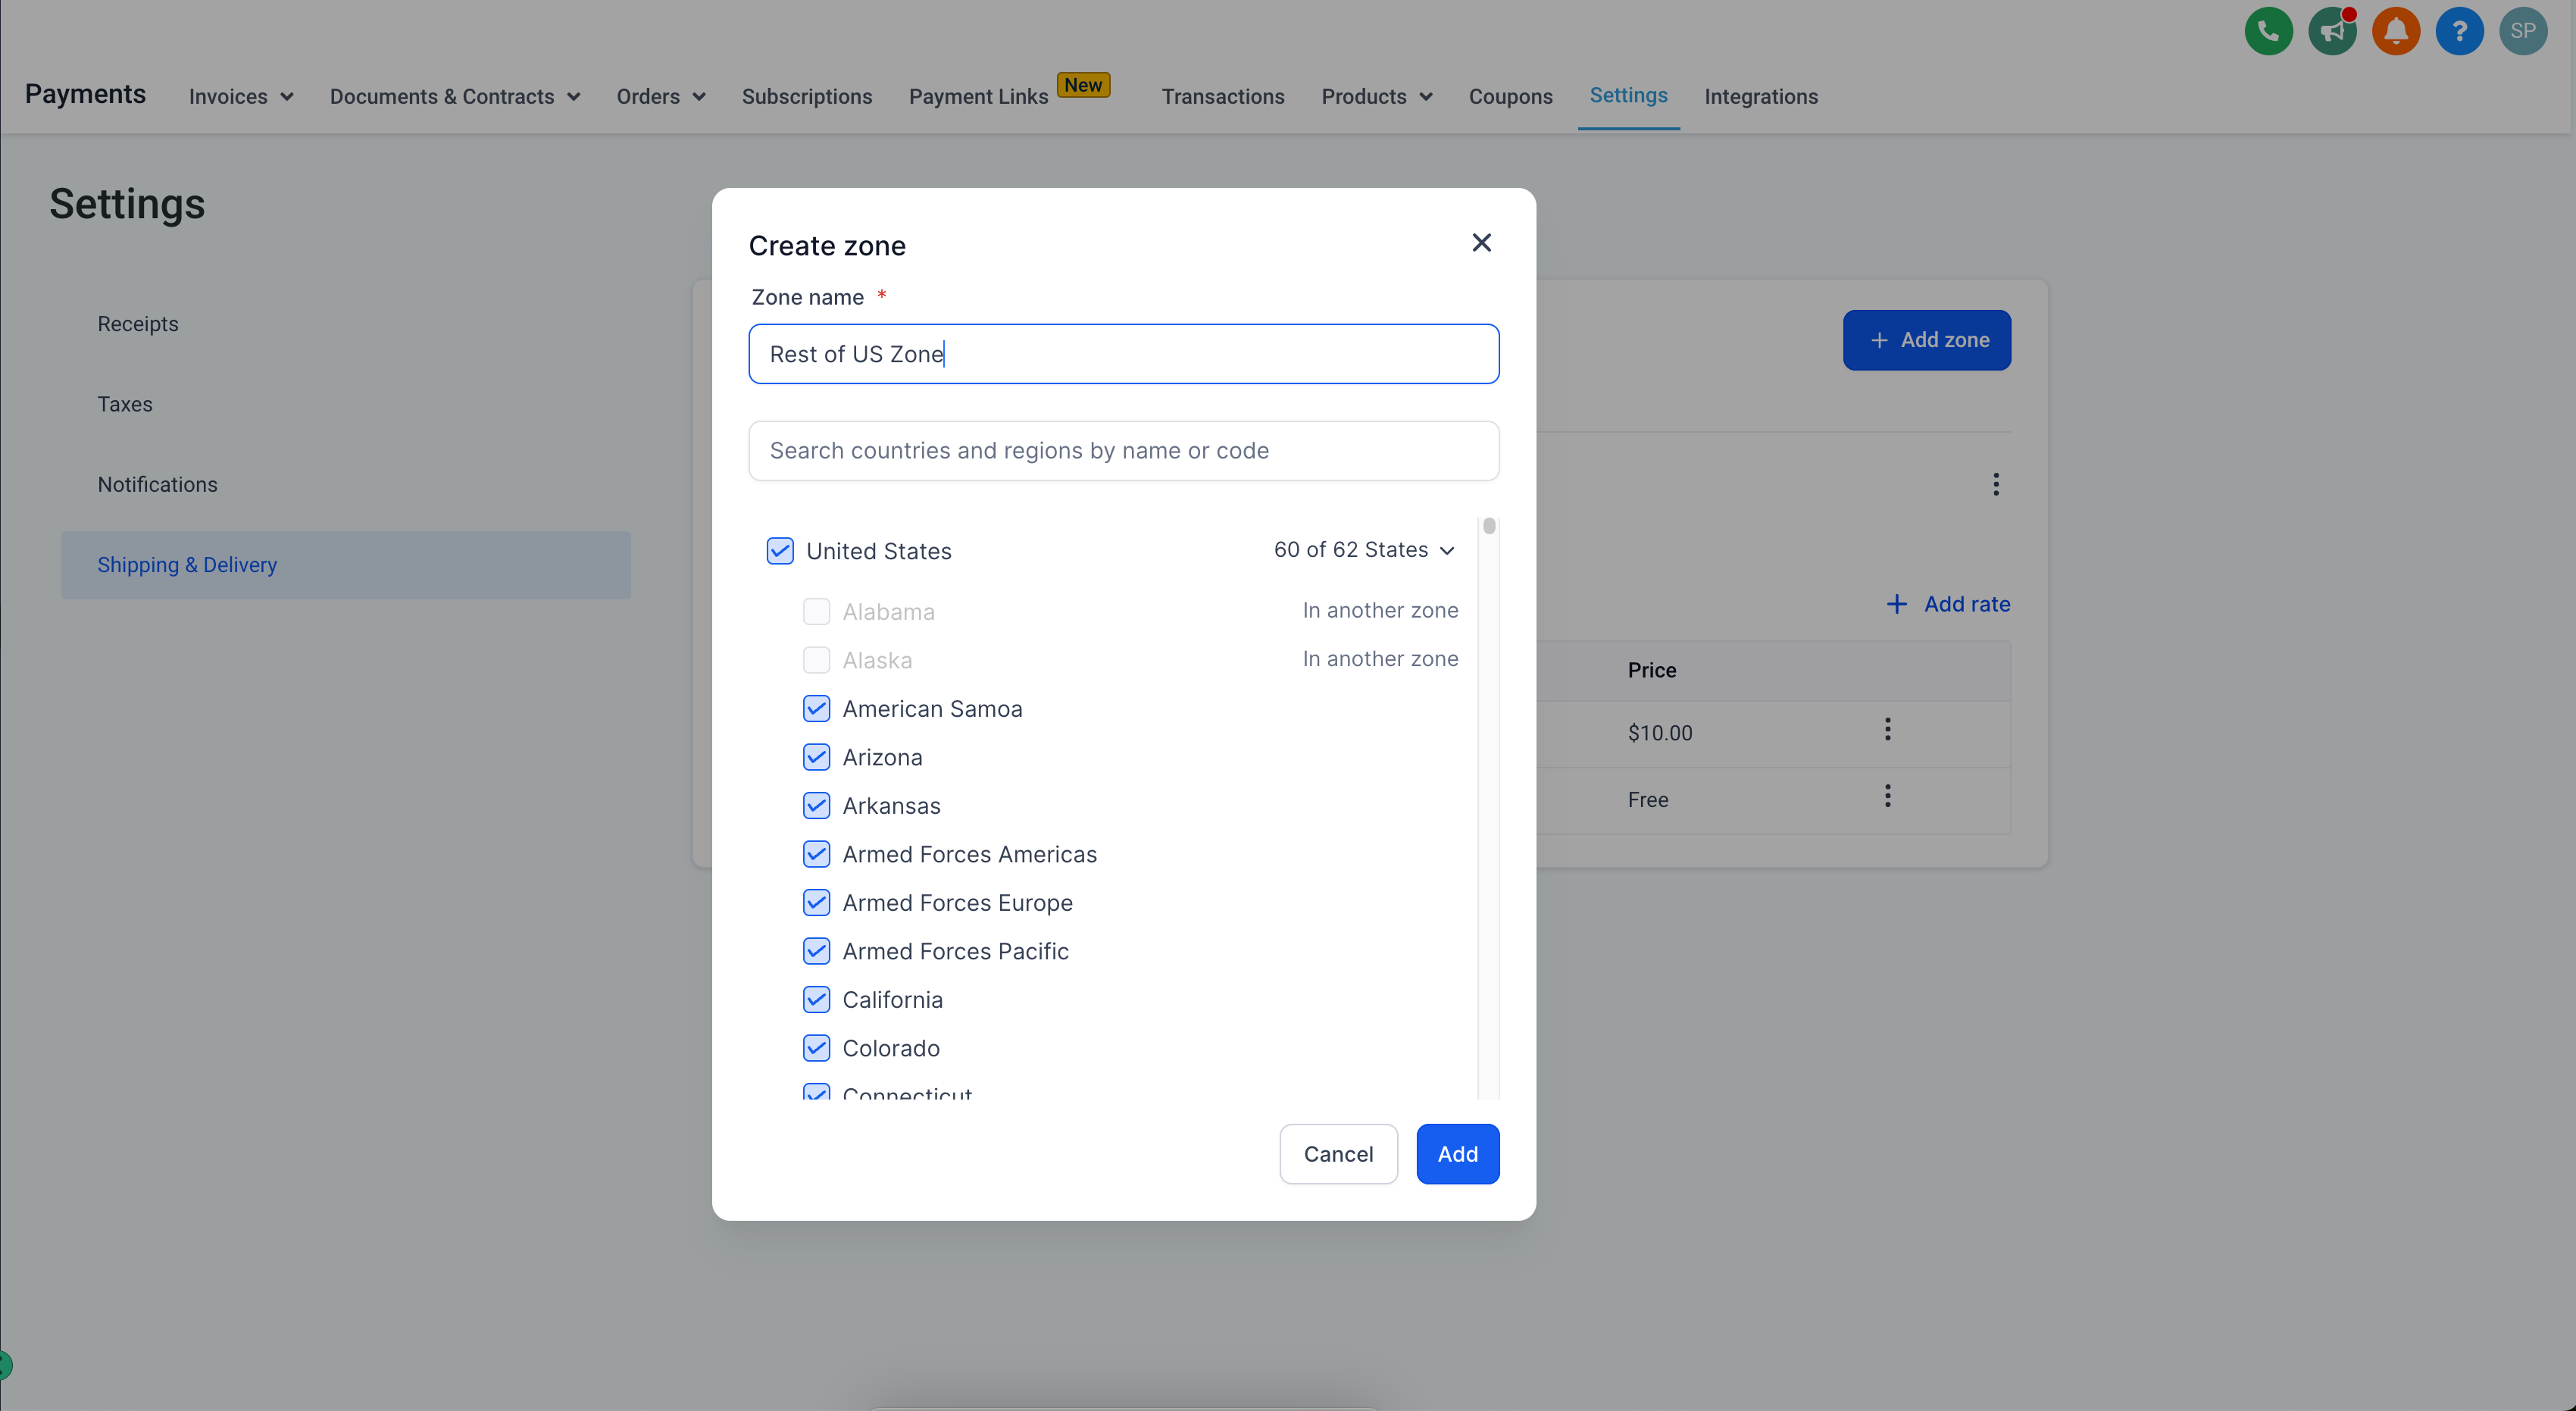
Store owners can setup Shipping & Delivery charges for their Ecommerce stores at: Payment > Settings > Shipping & Delivery > Add Zones. While choosing zones, user can choose specific states/ province in a country. Store owners can also set a conditional pricing based on amount for the specific zones.
Notes:
Store owners can create differential pricing for multiple shipping zones based on states/ province.
Once a states/ province is added in a zone, it can't be added to another zone.
While defining rates, delivery rates can be defined for specific zones according to the total amount in the cart. For eg- Free Shipping, if the order amount is above $500 or else, charge $10 if it's below $500.
Images
:
new
Funnels And Websites
Domains - migration of custom hostnames to CloudFlare
🎉 We are thrilled to announce the migration of custom hostnames for domains to CloudFlare. Get ready for a faster, safer, and more streamlined domain experience. 🎉
🤩 Key features & benefits
- Enhanced Security: Enjoy robust protection against DDoS attacks and other online threats. 🛡️
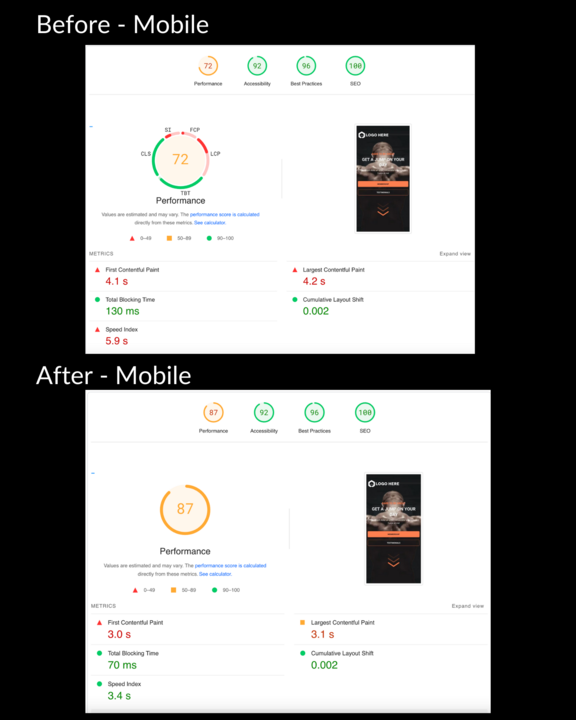
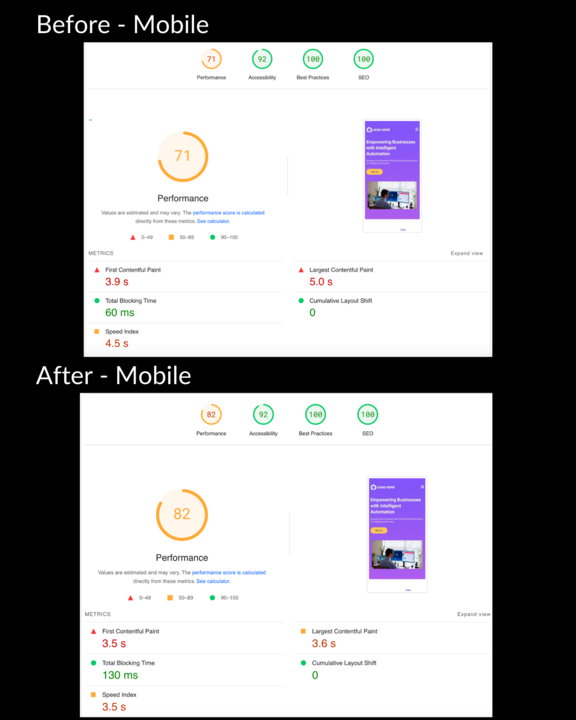
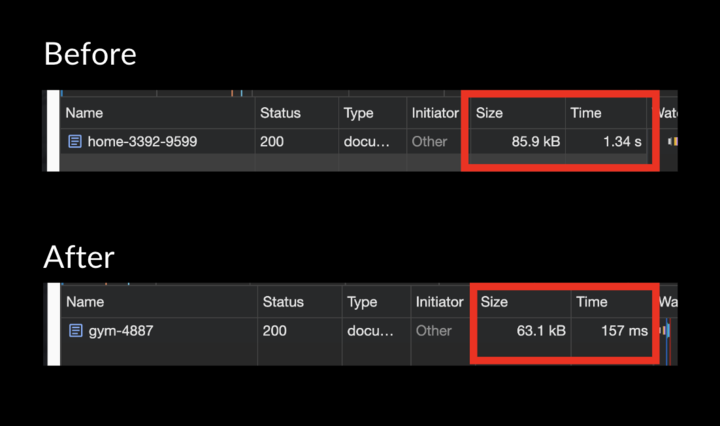
- Turbocharged Performance: Websites and funnels will load up to 15% faster 🚀
- Optimized Caching: Intelligent caching means quicker load times for your visitors. ⚡️
- Effortless SSL: Easy generation of SSL certificates and auto renewal from CloudFlare ✅
🤔 How to switch?
- New domains: automatically added during the domain connect process.
Existing domains:
- Navigate to settings -> Domains
- Select the domain which is already connected to flash funnels/level0 and click "Remove"
- Reconnect the same domain using the domain connect flow
Important note: Moving forward there won't be level0 or flash funnels to ensure a better experience.
new
Forms
Surveys
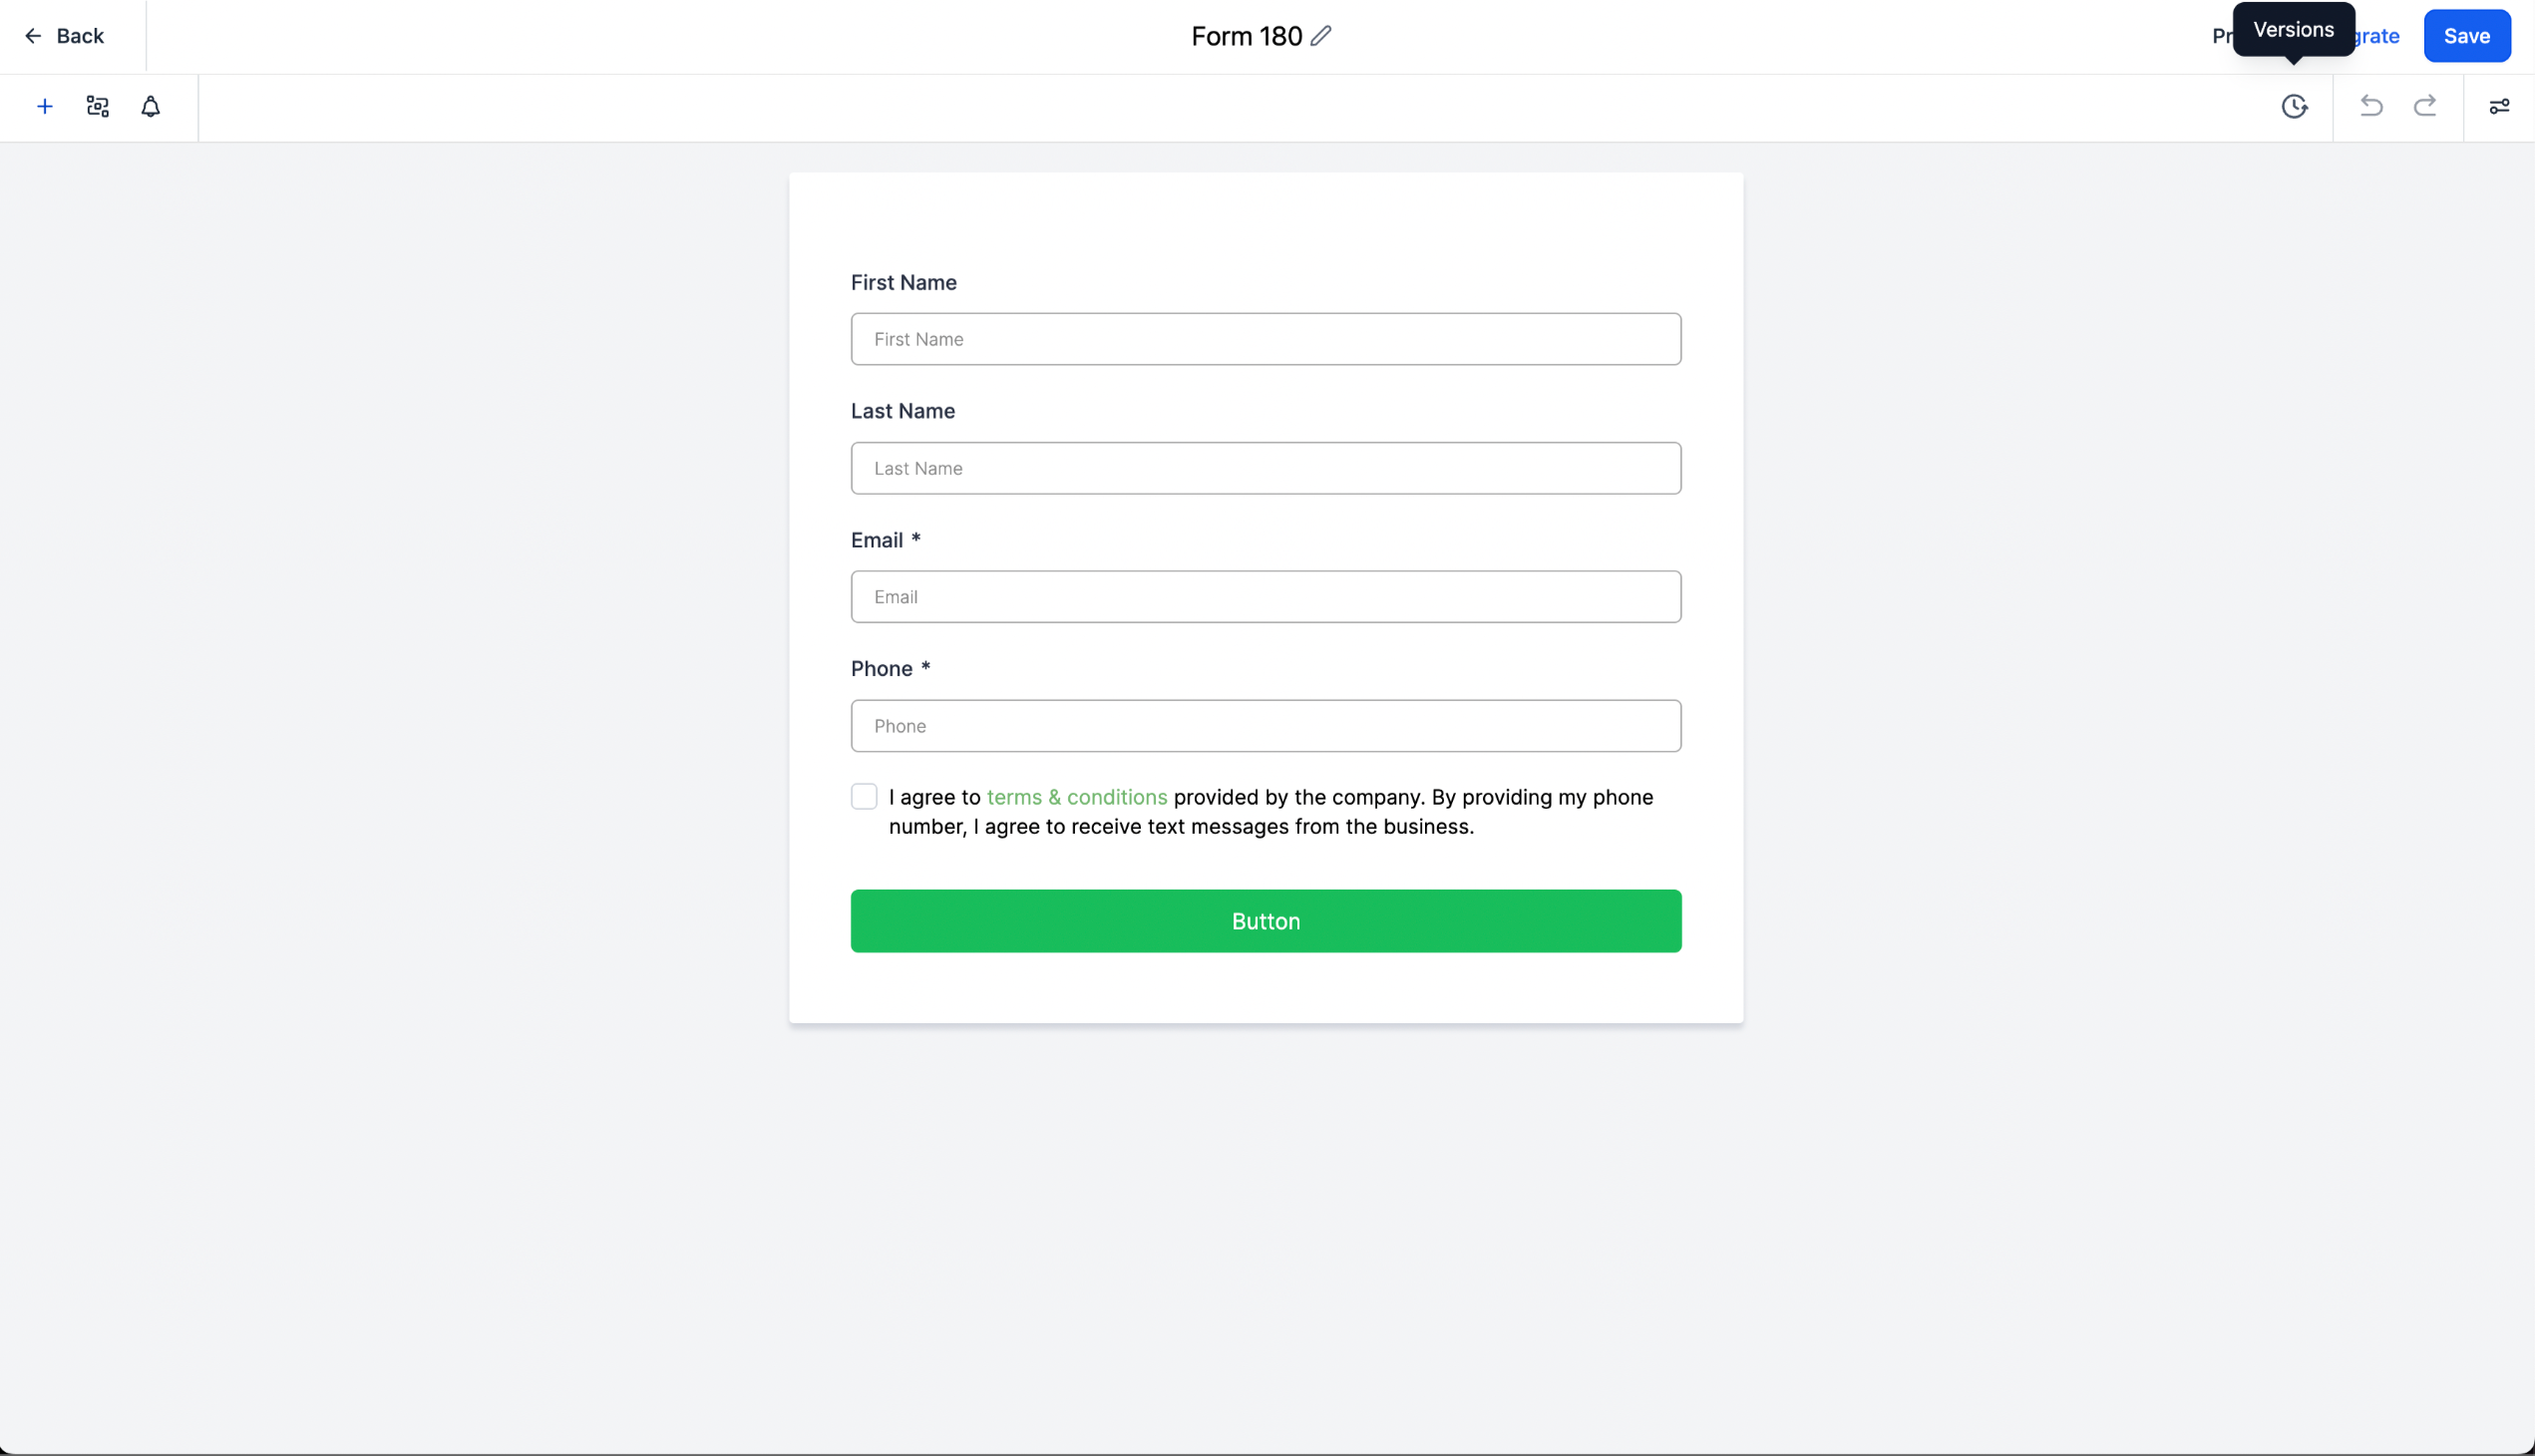
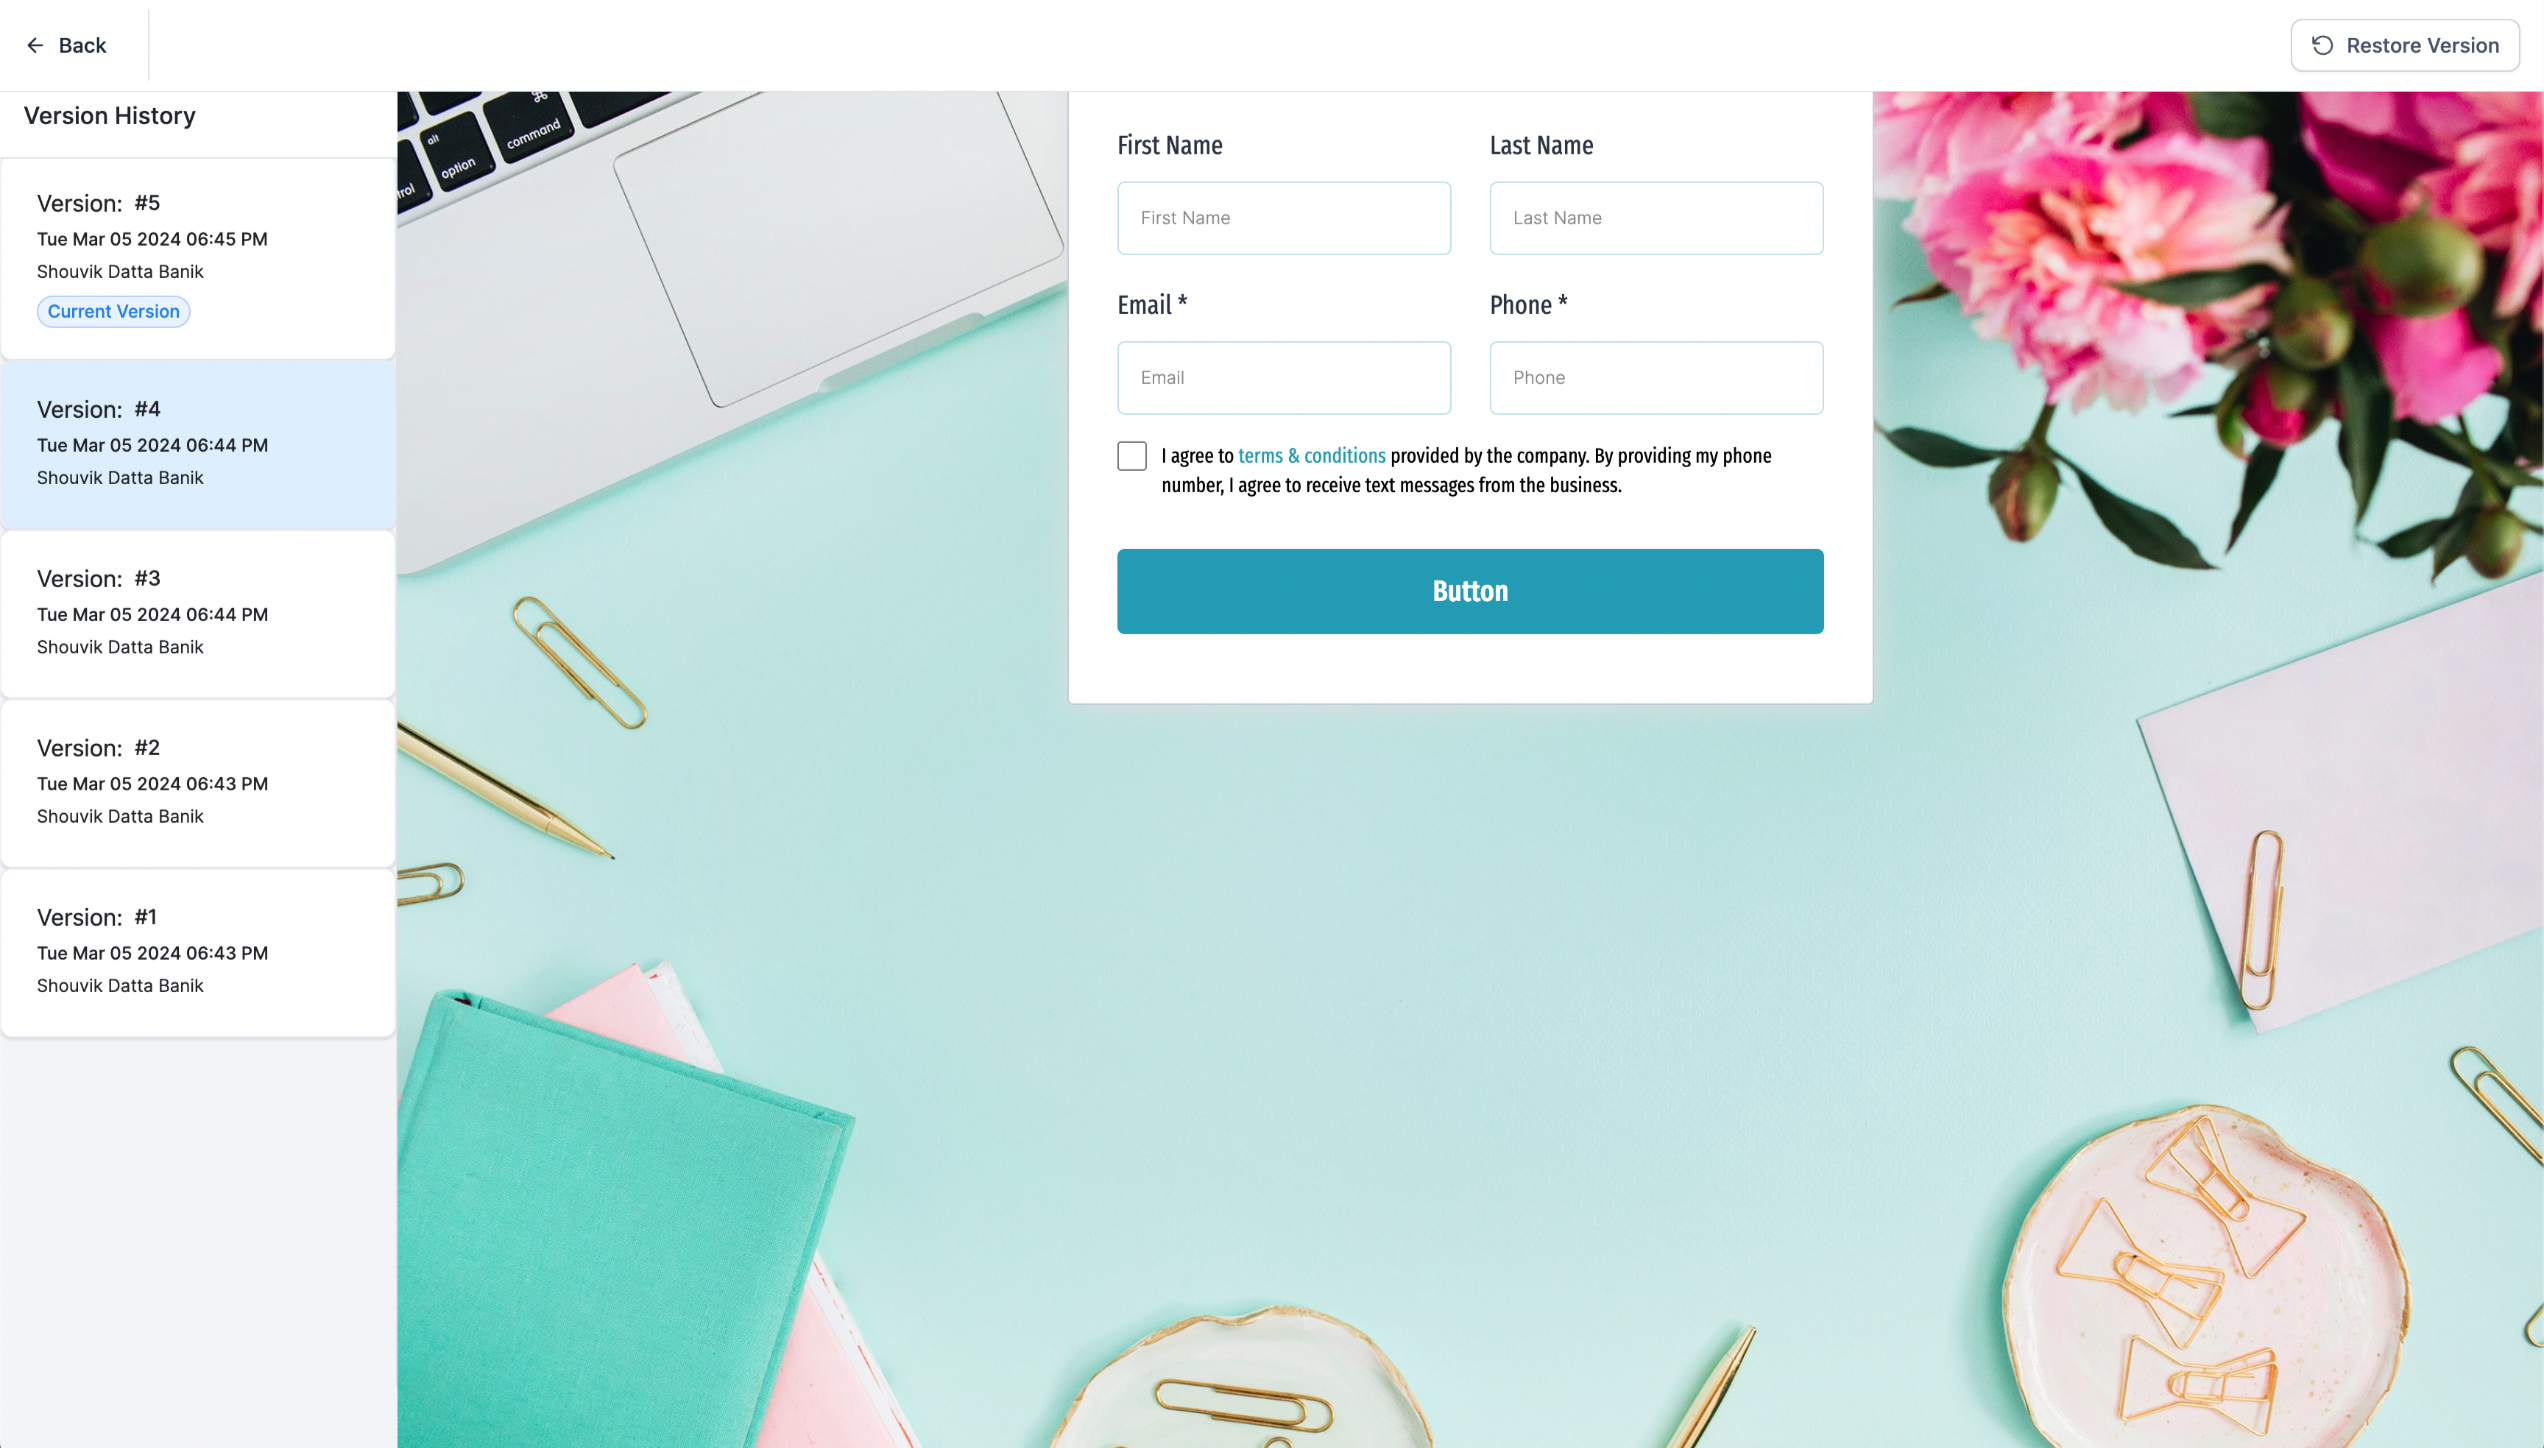
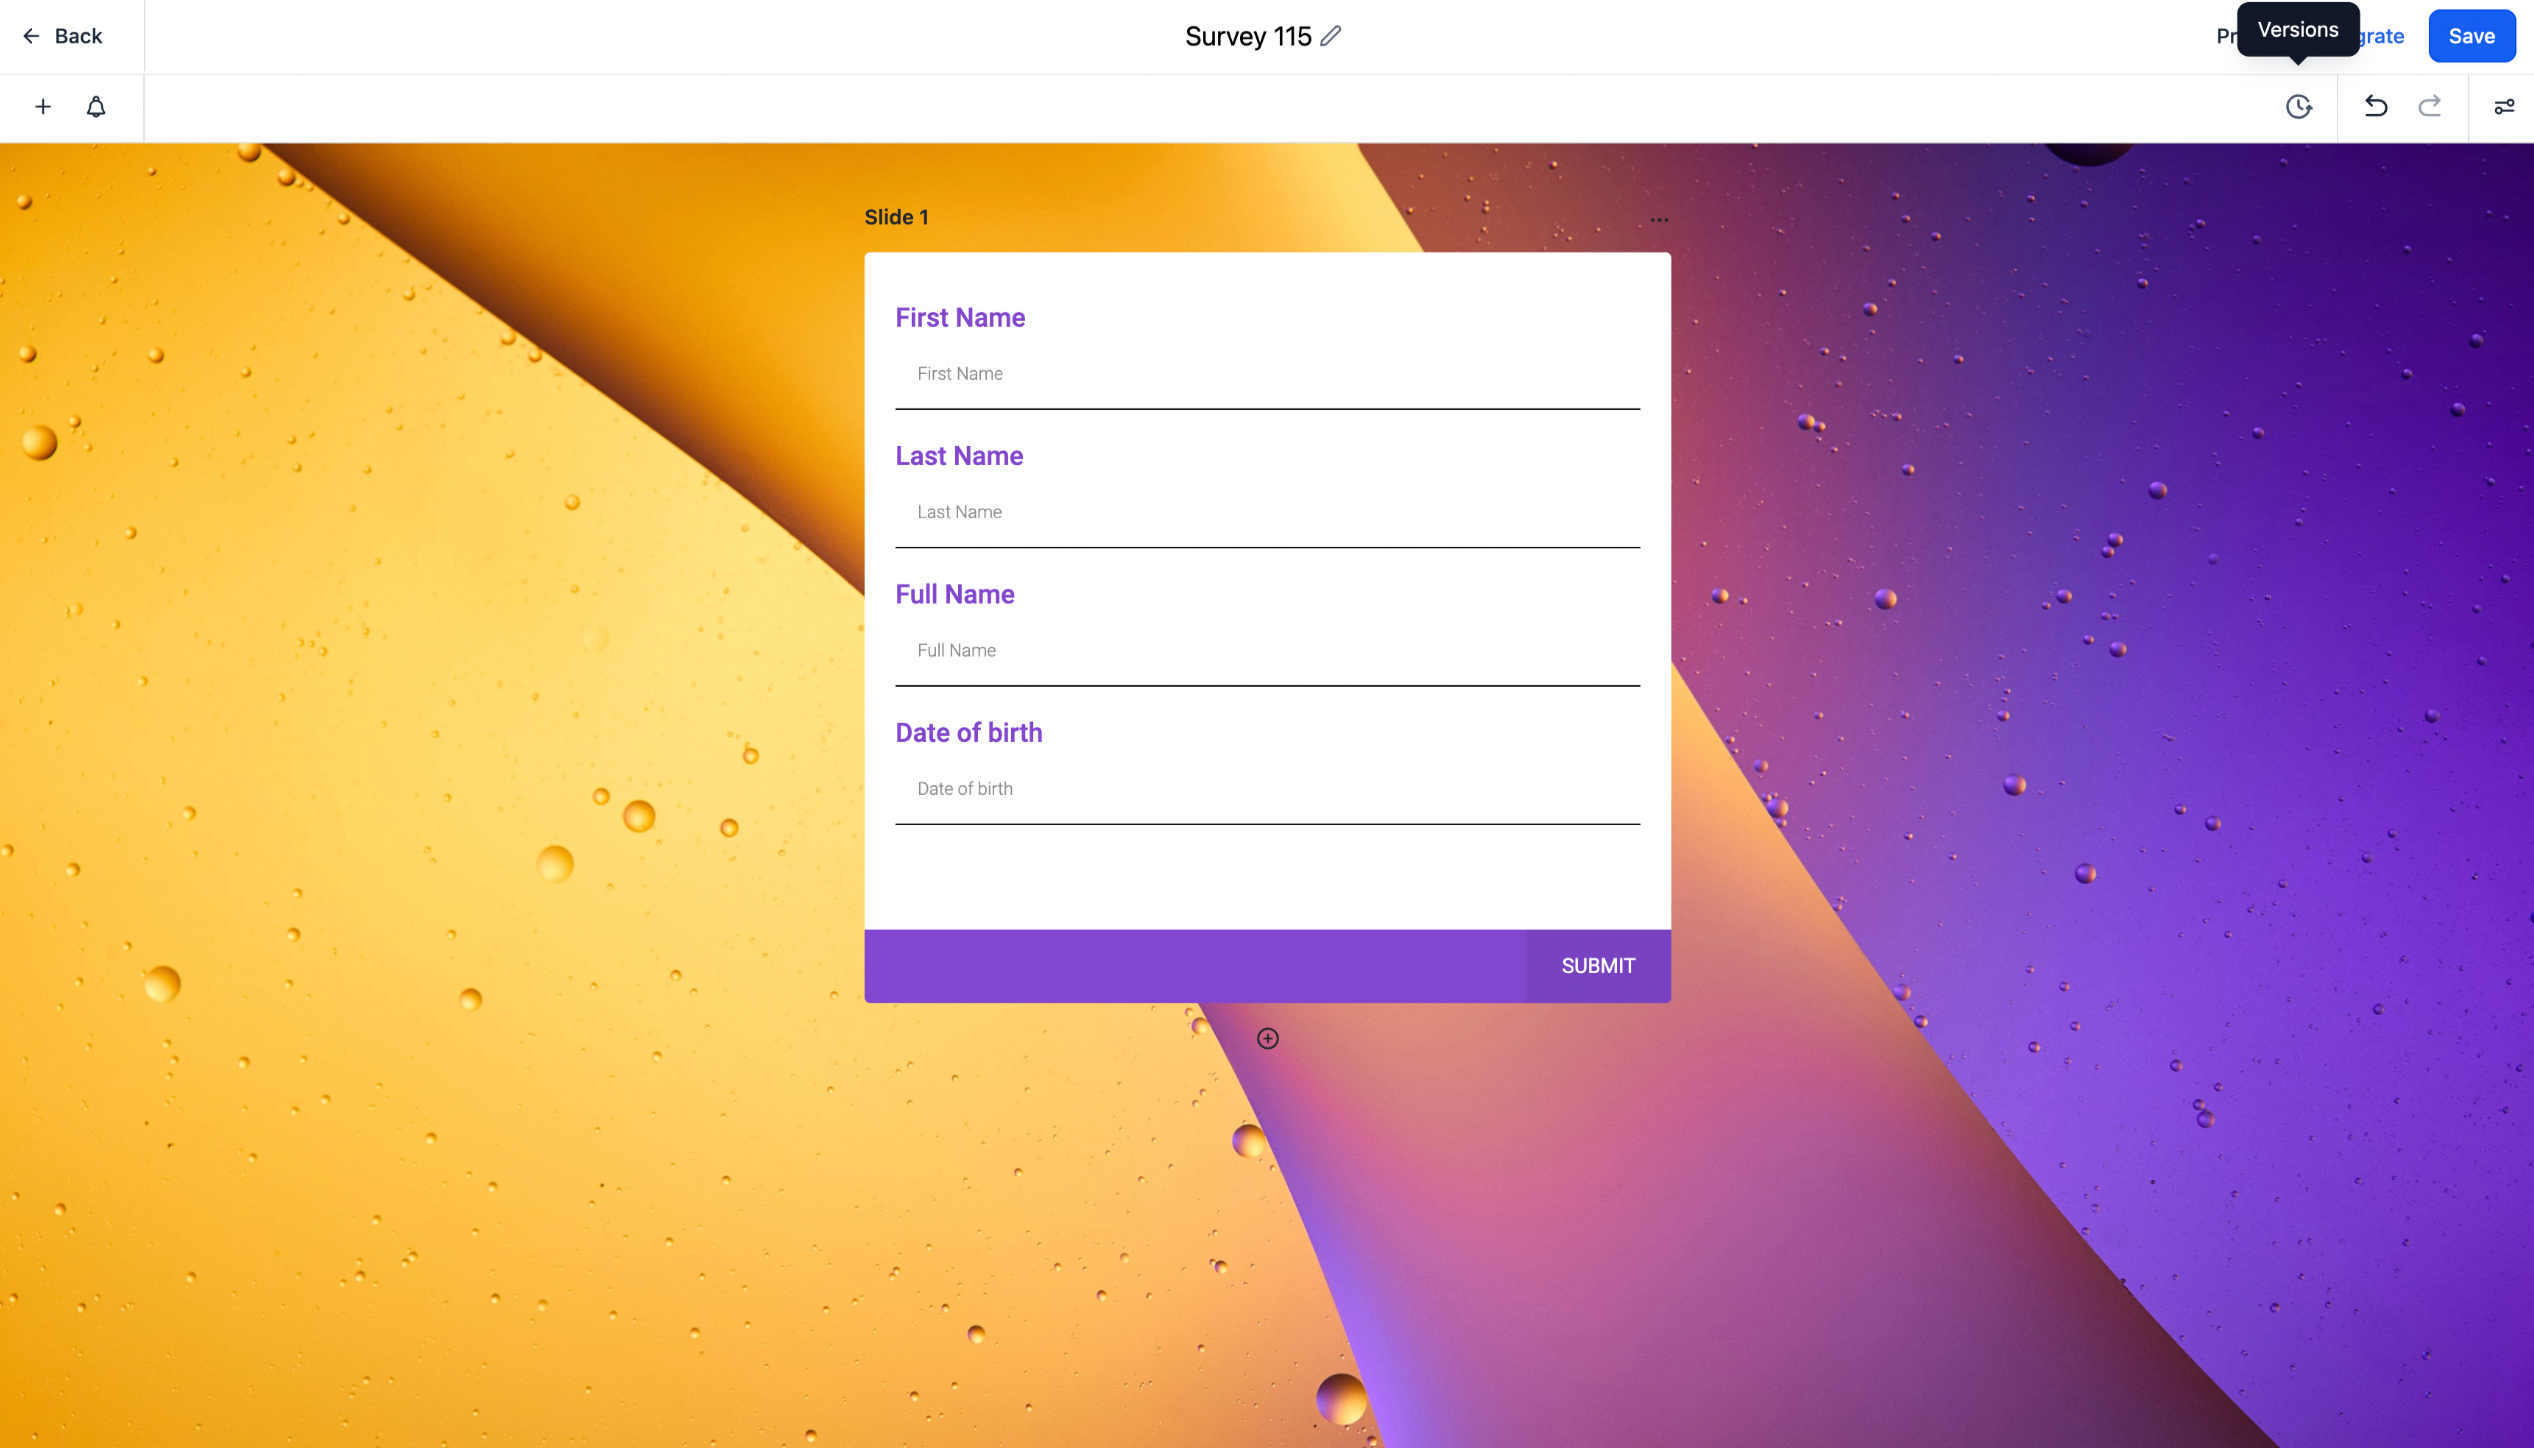
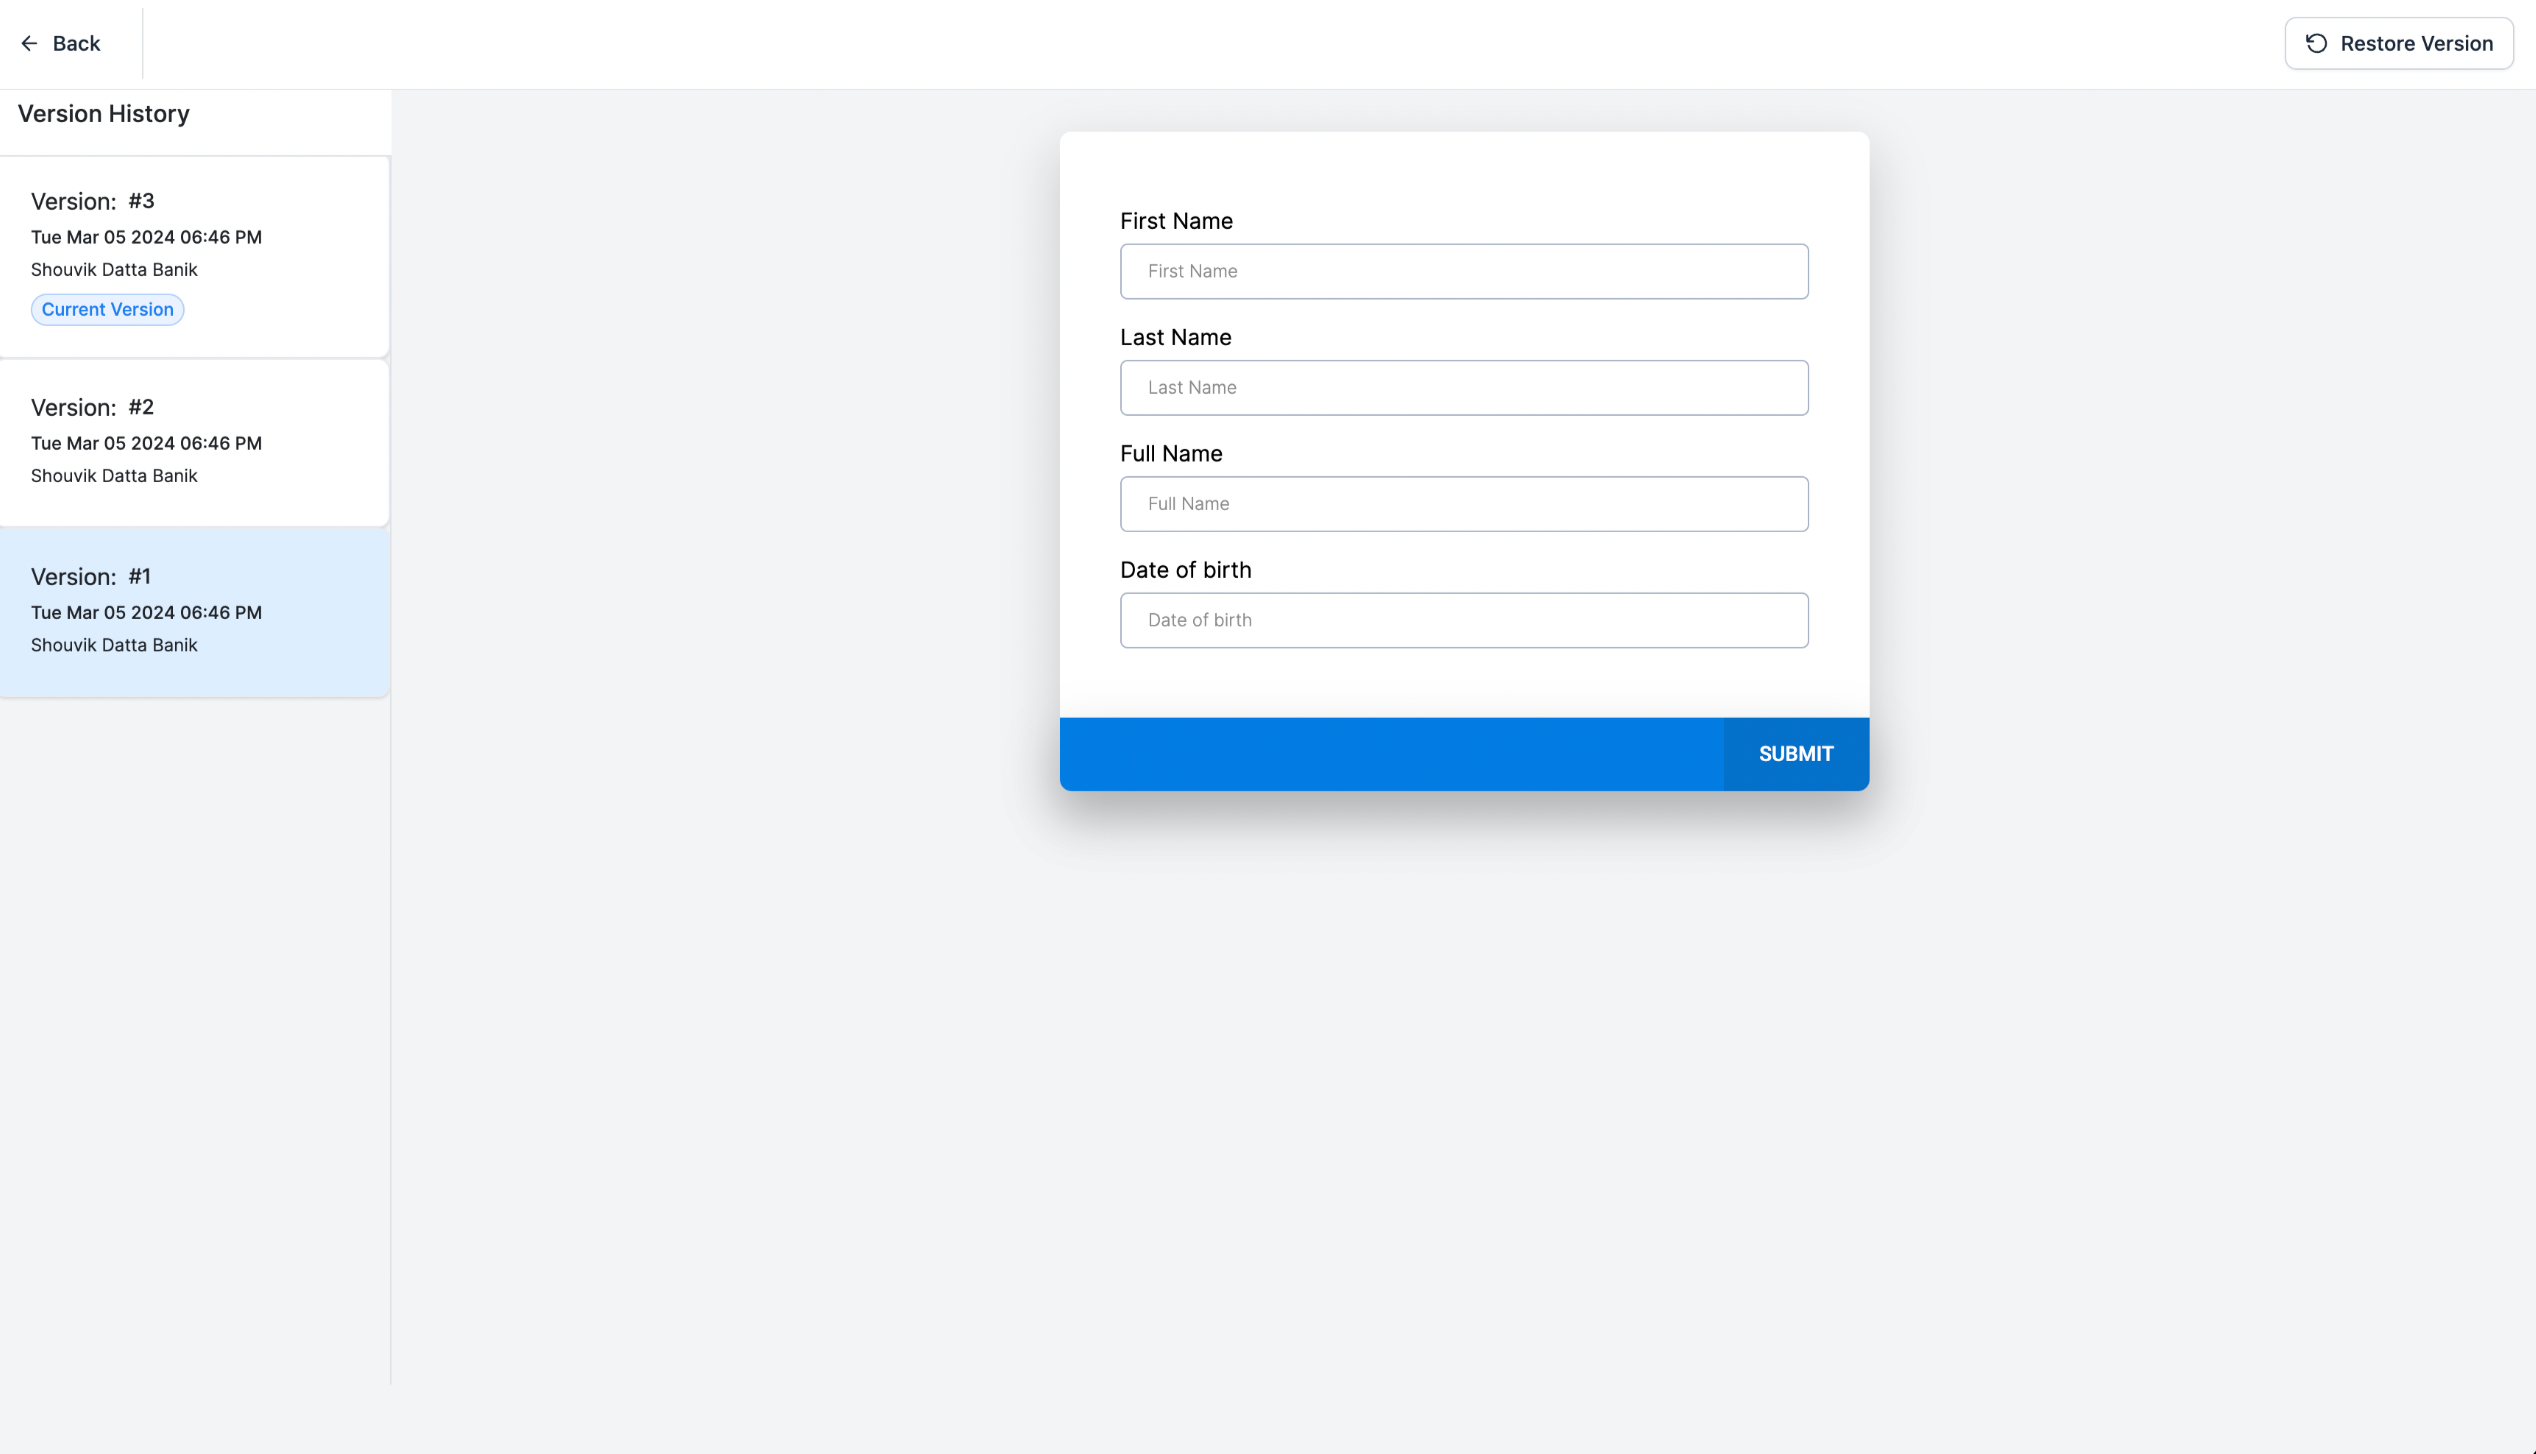
Version History for Forms and Surveys 📝📊
🎉 We're thrilled to introduce Version History to Forms and Surveys! 🎉
This update gives you the tools to track changes to your forms and surveys, allowing more robust management of form and survey versions
👀 What's New?
💾
Automatic Version Creation:
Every time you save changes in form or survey, a new version is automatically created✅
Edit Tracking Simplified:
Every edit is captured as a distinct version, allowing for detailed version tracking.Never worry about losing track of your edits!⏳
Version Preview:
Take a peek back in time! Preview any previous version of your form or survey directly within the builder. Click on the versions icon to see a list of all available versions, complete with timestamps and version numbers↩️
Restore Previous Versions:
Made a change you regret? Easily restore your form or survey to any previous version in a snap!🕹️
Enhanced Version Management:
Our improved interface makes navigating and comparing different versions a breeze, so you can choose the most appropriate version for your current needs.Get ready for streamlined form and survey management! This feature gives you the power to confidently track your changes and always have the option to revert if needed.
Load More
→